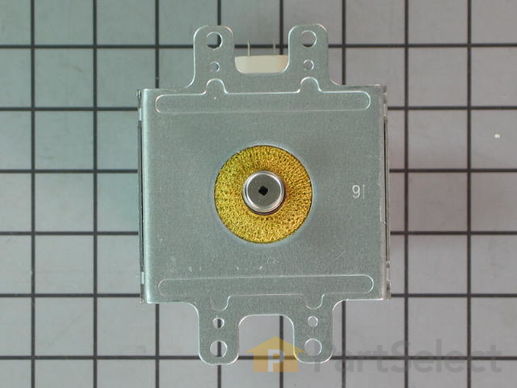
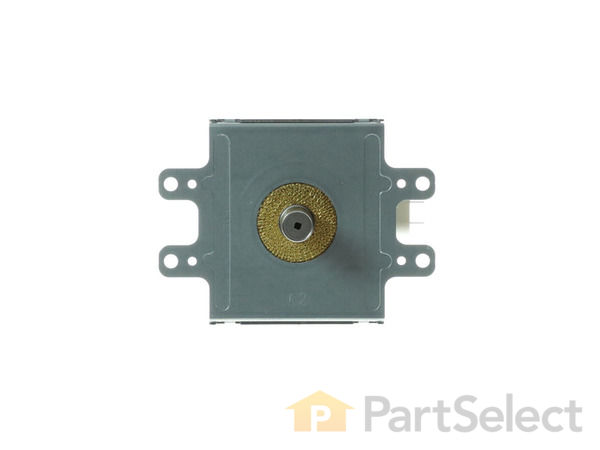
Part Location Diagram of W10245183 Whirlpool Magnetron
See part 7 in the diagram
( Grid squares measure 1x1 inch )
Customer Service Representative

Get in touch, we're here to help!

Daily 8am - 9pm EST

customerservice@partselect.com

Magnetron W10245183

 Fits your GH8155XMB0!
★★★★★
★★★★★
2 Reviews

Rated by 3 customers 

A Bit Difficult 

1- 2 hours 

Ratings submitted by customers like you who bought this part.

$ 202.78
  In Stock
Get FREE EconoShip on orders over $100! T&C apply

Get this part fast! Average delivery time for in-stock parts via standard shipping: 1.8 days.

 Fits your GH8155XMB0!
PartSelect Number PS2352604
Manufacturer Part Number W10245183
Manufactured by Whirlpool
Product Description

Magnetron Specifications

This part is used to generate microwave energy/heat.
How Buying OEM Parts Can Save You Time and Money

How Buying OEM Parts Can Save You Time and Money

Troubleshooting
This part fixes the following symptoms:
No heat | Noisy
This part works with the following products:
Microwave, Microwave Oven Combo.
This part works with the following products:
Whirlpool, KitchenAid, Kenmore, Maytag.
Part# W10245183 replaces these:
AP4412010, 1489083, W10245183, 423107844635, 4375072, 4393604, 8184306, 8186286, 8205650, 8205791
Back to Top
Customer Reviews
Average Rating:
★★★★★
★★★★★
2 Reviews
4.5
Filter By Rating:
  • 5 Stars
    1
  • 4 Stars
    1
  • 3 Stars
    0
  • 2 Stars
    0
  • 1 Star
    0
Sort by:
  • 1
Sorry, we couldn't find any existing reviews that matched. Try using some different or simpler keywords.
  • 1
Customer Repair Stories
 Average Repair Rating: 2.3 / 5.0, 3 reviews. What's this?
Sort by:
  • 1
Sorry, we couldn't find any existing installation instruction that matched.
Microwave worked perfectly but would no longer heat.
Looked up symptoms on parts select website. Ordered mag and diode. Very easy to take micro off the wall. Easily removed screws holding the skin on. Found diode. Really didn't need to replace it but since I had a new one (fairly cheap), just did so. Diode only installs one way. Can't botch it HOWEVER, MAKE SURE THE ONLY PART OF THE DIODE TO TOUCH THE GROUNDING POLE IS THE SCREW DOWN LEAD. IF THE OPPOSITE END LEAD, THAT WHICH IS THE PUSH ON TERMINAL, TOUCHES THE GROUNDING POLE, YOU'LL GET ARCHY SPARKY. The magnetron goes in very easy. Simply pay attention to how you removed it and reverse that process installing the new one. There are easy to use YouTube videos that show magnetron replacement. You can do this easily and save your microwave and $$ while doing so.
Other Parts Used:
DIODE Magnetron
  • Pat from Prior Lake, MN
  • Difficulty Level:
    Really Easy
  • Total Repair Time:
    30 - 60 mins
  • Tools:
    Screw drivers
1 person found this instruction helpful.
Was this instruction helpful to you?
Thank you for voting!
Loud buzzing noise and no heat.
PartSelect website indicated replacing the high voltage power supply diode is the solution for "no heat" 99% of the time, but the diode was OK. There is more info at the website concerning the case of "loud buzzing and no heat" indicating the magnetron needs to be replaced. As an electrical engineer with knowledge of microwave components, this was also my best guess. However, getting to the magnetron is not the easiest job, but it's not impossible. You also have to be careful to bleed off any charge stored on the high voltage power supply capacitor. Luckily, I found my KitchenAid service manual tucked away inside the unit since I couldn't find it online.
  • Charles R from Libertyville, IL
  • Difficulty Level:
    Difficult
  • Total Repair Time:
    More than 2 hours
  • Tools:
    Nutdriver, Pliers, Screw drivers, Socket set, Wrench (Adjustable), Wrench set
2 of 2 people found this instruction helpful.
Was this instruction helpful to you?
Thank you for voting!
My microwave began suddenly making a loud humming noise while cooking food.
My microwave began suddenly making a loud harsh humming noise while cooking food. I did not let it go on long enough to know if it cooked the food or not. I did some Internet research and learned that it was likely the Magnetron. The test for this was to run the microwave for at least a minute on the lowest power setting and see if the noise cycled on and off. It did, so I (actually, my wife) ordered the part from partselect.com using the model number. I was successful in replacing the part, and we are back to microwave popcorn and quick defrost for a price that was less than a service call, however, it was time consuming, required a large work area, and access to 5 out of 6 sides of the unit. So proceed at your own discretion

Caution:

The first thing in every set of repair instructions was to discharge (short-circuit) the capacitor, as it may store large (as in lethal) amounts of electricity even when it is not connected to a power source. I had never done this, but found these instructions:

“Discharging your microwave's capacitor is absolutely essential in preventing injury to your microwave, your tools, and yourself. A capacitor stores a large amount of electricity even when your microwave is unplugged, and it must be discharged before beginning any repair.
A capacitor is discharged by creating a short circuit between each of the two capacitor terminals, and between each terminal and the chassis. The chassis is the metal mounting (bare metal surface) of the capacitor. Read these directions thoroughly before you proceed.
With your microwave unit unplugged, touch the blade of a well insulated screwdriver to one terminal. Gently slide the screwdriver forward until it reaches the other terminal, holding it there for a few seconds. Be aware that this often results in a loud and startling 'POP'.
Repeat this procedure in order to create a short circuit between each capacitor terminal and the chassis (bare metal mounting plate surface). This same method can be applied to a capacitor having three, and not two, terminals.”
I had not run my microwave in over a week, and then while my part was shipping, left my microwave 'unplugged' for more than two days, and my capacitor apparently discharged itself, although I did go through the above procedure carefully and completely - just in case.
Step-By-Step:
1. You must remove your microwave from the cabinets - it is impossible to repair otherwise. This is best accomplished with 2 strong people - my wife and I made it work, but wished for another guy.
a. While supporting the microwave, remove the two screws coming down through the cabinet above.
b. Lift the rear of the microwave as much as possible, then tilt the front down - there is a clip high on the left side, as well as the hinge/clips on the bottom.
c. If you do not lift it off the wall all at once, you may have to lift the rear even farther to remove it from the hinge/clips on the bottom.
Important Note: Always beware of the microwave door, if it is bent or broken and cannot retain a seal, the microwave not function as a safety feature to keep from releasing microwaves.
2. Remove the vent cover on the top/front of the microwave - be careful, it's plastic.
3. Remove the vent cover and light panel on the bottom of the microwave - this is several screws and some simple wire clips.
4. Remove the "shell" (top and sides) of the microwave - this is several more screws on the back. Make sure to remove the plate that is holding the cord in place on the top.
5. Remove the interface panel by the screws on the top (which had been hidden by the vent cover) - the wires can remain attached, just slide it aside.
6. Remove the metal cover on the right side at the rear; this will expose the Magnetron and the Capacitor. Remember to immediately test and discharge the capacitor!

7. After you discharge the capacitor, remove the other cover plate and the support bracket - in case you haven't noticed, this is a time and space consuming operation.

8. You
  • Lindsay from Nampa, ID
  • Difficulty Level:
    A Bit Difficult
  • Total Repair Time:
    1- 2 hours
  • Tools:
    Nutdriver, Screw drivers
126 of 252 people found this instruction helpful.
Was this instruction helpful to you?
Thank you for voting!
  • 1
Questions and Answers

Ask our experts a question about this part and we'll get back to you as soon as possible!

6 questions answered by our experts.
Sort by:
  • 1
Sorry, we couldn't find any existing answers that matched.Try using some different or simpler keywords, or submit your new question by using the "Ask a Question" button above!
Debra
August 9, 2017
My combination microwave/convection oven is not heating sufficiently while on convection. I see that the element is getting red and heat come on, however, i noticed that the fan is not working and not moving the heat around sufficiently. Any suggestions on what may be needed to fix this?
For model number KMHC1857WSS0
PartSelect logo
Hi Debra, Thank you for your inquiry. It sounds like you will need to replace your fan motor. I hope that helps!

1 person found this helpful.

Was this helpful?
Thank you for voting!
Vernon
November 7, 2017
When heating an item, the microwave heats properly for about 2m15 sec. The noise of the magnetron then stops but everything else is working - turntable, timer, light, etc. If i stop the microwave and wait several minutes, i can then set the timer and the magnetron can be heard to be working/heating. After about 45 sec it stops heating again and everything else is working properly. Does this sound like the magnetron or the electric control?
For model number KBMS1454SSS3
PartSelect logo
Hi Vernon, Thank you for your question. I would actually suggest you check your diode and your fuse to see if they are both working correctly first. Be very careful when doing any repairs on your microwave. There is a capacitor inside of your microwave that will need to be safely disarmed before you start any repairs or else it could electrocute you. Good luck with your repair.

1 person found this helpful.

Was this helpful?
Thank you for voting!
Vernon
November 28, 2017
My previous question was answered but it did not solve the issue. The diode, fuse, capacitor, and magnetron are good so it is something else. Maybe the fan is not working and causing overheating? How to check?
For model number KBMS1454SSS3
PartSelect logo
Hi Vernon, Thank you for your follow up. Unfortunately we do not have any information on how to test that fan motor. However I do not think that would be causing your issue. I believe that if all of your other parts are fine, it is likely that your electronic control board is the issue, as that part is the brain of your appliance. I could suggest double checking with the manufacturer if you wanted a second opinion. I hope that helps. Good luck with your repair.

1 person found this helpful.

Was this helpful?
Thank you for voting!
NINOSKA
February 5, 2018
Hi, what is the price for change the magnetron? What is the price for technical service? My microwave has no heat? Thanks
For model number WMH3205XVS2
PartSelect logo
Hello, Thank you for contacting us. I have researched the model you have provided and have found the part you’re looking for is Part Number: PS2352604. Please type the number into the website for current price and availability. We do not offer a technician sorry as we are website based company tat sell appliance parts.

1 person found this helpful.

Was this helpful?
Thank you for voting!
Armen
September 22, 2021
The combo built in oven making constant clinging noise, after a minute or so of turning on and continues making noise even if it's turned off until it's cooled down.( sounding like a loose fan banging the surrounding walls) Is it a malfunction in cooling fan? How difficult or costly is it to repair ?
For model number YKEMS307GB0
PartSelect logo
Hello Armen, Thank you for contacting us. If the clicking sounds is coming from the Cooling Fan area, it will need to be replaced. We have researched the model you have provided and have found the part you are looking for is PartSelect Number PS11747998. The price and availability are posted on the site. If you need help placing an order, customer service is open 7 days a week. Please feel free to give us a call. We look forward to hearing from you!

1 person found this helpful.

Was this helpful?
Thank you for voting!
Related Parts:
Alessandra
June 1, 2023
Hi the microwave is not heating. Everything else seems to be working. The oven works well and the microwave have light and the dish rotate but doesn’t heat. What part is the one that is not working ? Is the magnetron or an other? Is not making any strange noise.
For model number KEHC309JSS05
PartSelect logo
Hi Alessandra, thank you for contacting us. We have researched the model and would suggest checking the high-voltage diode, part number PS11757136. It provides power to the magnetron that creates microwaves to heat the food. A defective high-voltage diode may result in a microwave that runs but does not heat the food. We hope this information helps!

Was this helpful?
Thank you for voting!
Related Parts:
  • 1
You May Also Need ?
Model Cross Reference
This part works with the following models:
PartSelect Number: PS2352604
Manufacturer Part Number: W10245183
Brand
Model Number
Description
Kenmore
66560601000
Microwave
Kenmore
66560609000
Microwave
Kenmore
66560612000
Microwave
Kenmore
66560617000
Microwave
Kenmore
66560619000
Microwave
Kenmore
66560622000
Microwave
Kenmore
66560629000
Microwave
Kenmore
66560632000
Microwave
Kenmore
66560639000
Microwave
Kenmore
66560652000
Microwave
Kenmore
66560654000
Microwave
Kenmore
66560657000
Microwave
Kenmore
66560659000
Microwave
Kenmore
66560682000
Microwave
Kenmore
66560689000
Microwave
Kenmore
66561601100
Microwave
Kenmore
66561609100
Microwave
Kenmore
66561612100
Microwave
Kenmore
66561612101
Microwave
Kenmore
66561614100
Microwave
Kenmore
66561614101
Microwave
Kenmore
66561617100
Microwave
Kenmore
66561617101
Microwave
Kenmore
66561619100
Microwave
Kenmore
66561619101
Microwave
Kenmore
66561622100
Microwave
Kenmore
66561624100
Microwave
Kenmore
66561627100
Microwave
Kenmore
66561629100
Microwave
Kenmore
66561632100
Microwave
Customer Service Representative

Get in touch, we're here to help!

Daily 8am - 9pm EST

Contact Customer Service