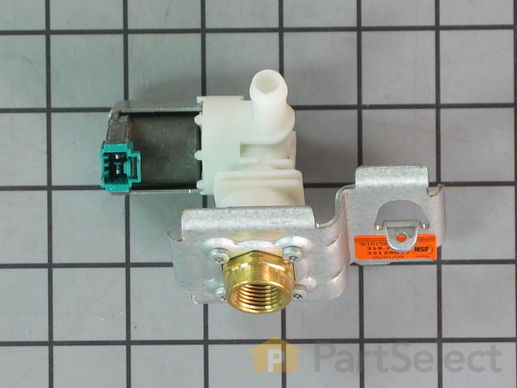
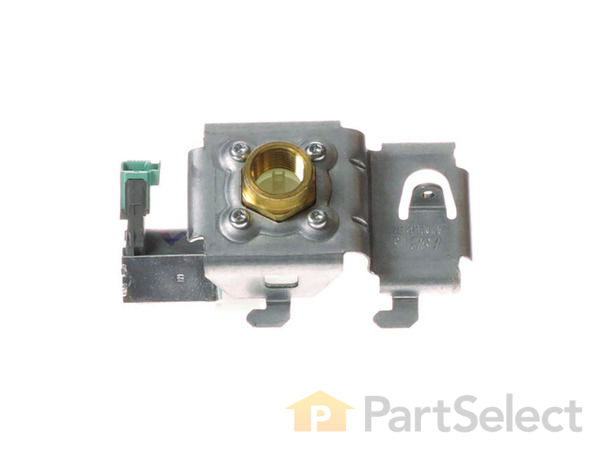
Part Location Diagram of WPW10158389 Whirlpool Water Inlet Valve
See part 7 in the diagram
Replacing your KitchenAid Dishwasher Water Inlet Valve
( Grid squares measure 1x1 inch )
Customer Service Representative

Get in touch, we're here to help!

Daily 8am - 9pm EST

customerservice@partselect.com

Water Inlet Valve WPW10158389

★★★★★
★★★★★
55 Reviews

Rated by 25 customers 

Easy 

30 - 60 mins 

Ratings submitted by customers like you who bought this part.

$ 59.50
  In Stock
Get FREE EconoShip on orders over $100! T&C apply

Get this part fast! Average delivery time for in-stock parts via standard shipping: 1.8 days.

PartSelect Number PS11749213
Manufacturer Part Number WPW10158389
Manufactured by Whirlpool
Product Description

Water Inlet Valve Specifications

This water inlet valve should be located behind the lower kickplate panel in either the right or left corner. The attaching solenoids on the valve open and close according to the desired amount of water needed.
How Buying OEM Parts Can Save You Time and Money

How Buying OEM Parts Can Save You Time and Money

Part Videos

Replacing your KitchenAid Dishwasher Water Inlet Valve

Replacing your KitchenAid Dishwasher Water Inlet Valve
Troubleshooting
This part fixes the following symptoms:
Leaking | Will not fill with water | Not cleaning dishes properly | Noisy
This part works with the following products:
Dishwasher.
This part works with the following products:
KitchenAid, Kenmore, Whirlpool, Jenn-Air.
Part# WPW10158389 replaces these:
AP6015932, 8558986, 8558987, 8558988, 8563405, 8563406, 8563407, W10158387, W10158389, WPW10158389VP
Back to Top
Customer Reviews
Average Rating:
★★★★★
★★★★★
55 Reviews
4.8
Filter By Rating:
  • 5 Stars
    48
  • 4 Stars
    5
  • 3 Stars
    1
  • 2 Stars
    1
  • 1 Star
    0
Sort by:
  • 1
  • 2
  • 3
Sorry, we couldn't find any existing reviews that matched. Try using some different or simpler keywords.
  • 1
  • 2
  • 3
Customer Repair Stories
 Average Repair Rating: 3.4 / 5.0, 25 reviews. What's this?
Sort by:
  • 1
  • 2
  • 3
Sorry, we couldn't find any existing installation instruction that matched.
No water to dishwasher
After watching the video, shutting off the water and electric, I began my repair. First problem....the video shows the unit in the middle of the floor and set on its side.....very easy. Mine was hard wired electrically and I had a copper tube connected to the garbage disposal (not so easy). I pulled the DW out as far as possible, removed the lower plate to expose the water valve. From that point the video was helpful, although laying on the floor at 76 wasn't that easy, I did manage the repair and get the DW back in service.
  • Anthony from AIKEN, SC
  • Difficulty Level:
    A Bit Difficult
  • Total Repair Time:
    1- 2 hours
  • Tools:
    Nutdriver, Pliers, Wrench (Adjustable), Wrench set
1 person found this instruction helpful.
Was this instruction helpful to you?
Thank you for voting!
Water would not pump in, thus sprayer was not working to wash dishes.
The water inlet valve was replaced and the unit completely cleaned. Perhaps the cleaning was the most important part. The mesh screen and food chopper were slightly plugged as was the top screen below the sprayer.
  • Kelly from Afton, WY
  • Difficulty Level:
    Really Easy
  • Total Repair Time:
    30 - 60 mins
  • Tools:
    Socket set
1 person found this instruction helpful.
Was this instruction helpful to you?
Thank you for voting!
Water leaking from inlet valve.
Removed bottom panel to find the leak. Shut off water and removed the inlet valve. Ordered and installed the new one. Turned on water and checked for leaks. Replaced bottom panel and was back in business. Have done 5 loads with no problems.
  • Robert from BOYNTON BEACH, FL
  • Difficulty Level:
    Really Easy
  • Total Repair Time:
    30 - 60 mins
  • Tools:
    Pliers, Screw drivers, Wrench (Adjustable)
2 of 2 people found this instruction helpful.
Was this instruction helpful to you?
Thank you for voting!
Water leaking from Inlet Valve
The repair was easy enough, but getting the brass pipe thread fitting tight enough not to leak was a challenge due to the part being difficult to hold. I needed to use three layers of Teflon tape and a vise. I had to do the job twice to get the fitting tight enough.
  • Steve from BOULDER, CO
  • Difficulty Level:
    Easy
  • Total Repair Time:
    1- 2 hours
  • Tools:
    Nutdriver, Pliers, Screw drivers, Wrench (Adjustable), Wrench set
1 person found this instruction helpful.
Was this instruction helpful to you?
Thank you for voting!
Door pops open when first starting.
Replaced the water inlet valve:

Turn off the water.

If your washed is hard wired, turn off the breaker. If plugged into an outlet, unplug it. When the water line is disconnected there will be a little water from the hose. Not good to get eater in any connectors.

Remove the door covering using the star drive. The only way to get to the valve. To remove the door covering: Open the door and remove the side screws and the two at the top on either side of the door latch. You will need to set the door on something so that it is not in the way of access to under the washer. Be careful that you don't pull the wire tape and break the connector.

Remove the the base plate and other plate with the insulation using a 1/4 inch socket or nut driver.

I removed the valve from the mounting. Remove the mounting screw ( 1/4 nut driver or socket ). You can position the valve to make it easier to disconnect the supply line and pull the discharge hose off of the fitting and remove the wire connector.

In my case, the water line was soft copper screwed into a brass fitting, and over the last 17 years the nut had seized to the 90 degree fitting. Made me say bad things trying to break it loose while trying to fit my hands and wrenches under the washer.

This is important!! Make sure to note the angle of the 90 degree fitting that the water line fits into. If your water line is plastic tubing you will be able to move it around to align it to the fitting but if your water line is copper, the 90 degree fitting must be perfectly aligned or the nut will not start and you will say bad things trying to get it to work.

Slide the hose clamp up the discharge hose a couple of inches, using the plyers to squeeze the end of the clamp to open it. Remove the hose by twisting it back and forth until it moves then pull it off of the fitting.

Remove the valve and remove the 90 degree fitting positioning it in the new valve exactly as it was in the old valve. I have a bench mounted vice that made it easier tighten the Teflon tape coated threads to the right position.

Install the discharge hose and make sure the clamp is near the bottom of the hose to provide a good seal below the bulge in the fitting. Connect the the wire plug and water line, install the valve into the mounting slots and install the mounting screw.

Turn the water on and check for leaks.

Install the base plates and secure with the two 1/4" screws.

Install the door by cocking the bottom in and the top out to let the bottom fit into the bracket. Hold the door square with the washer and install the screws to keep the door square.

Run the machine and keep your fingers crossed.
  • Charles from GREEN VALLEY, AZ
  • Difficulty Level:
    A Bit Difficult
  • Total Repair Time:
    More than 2 hours
  • Tools:
    Nutdriver, Pliers, Socket set, Wrench set
1 person found this instruction helpful.
Was this instruction helpful to you?
Thank you for voting!
Dishwasher was making an unusual noise when trying to fill with water (it was not filling). The dishes were not clean. I was able to pinpoint the inlet valve because I manually filled it with water and it ran fine.
Turn off water. Turn off power. (I did not turn electricity off for this repair but you should to be 100% safe)Remove baseplate. Unscrew Cooper water pipe from the part you are replacing (Have towels under to catch water). Unscrew anchor screw (need nut driver for this). Slide part to right to release the metal latches holding the part to the dishwasher. Remove electrical plug by squeezing little plastic tab and pulling wires gently to pull plug out of the part. Release clamp holding drain hose to the part and slide it down the hose. Remove hose. Now put the new part on in reverse of these instructions.
  • Ellen from WELLS RIVER, VT
  • Difficulty Level:
    Easy
  • Total Repair Time:
    30 - 60 mins
  • Tools:
    Nutdriver, Pliers, Screw drivers, Wrench (Adjustable)
1 person found this instruction helpful.
Was this instruction helpful to you?
Thank you for voting!
Water would not shut off.
Replaced inlet valve. The video explained how to do the replacement, but the demo dishwasher was out of the cabinet and on its side. In actuality, the valve can be replaced with the appliance in place by removing the panel at the bottom, but the space is very limited. The connection of the water line is the only hard part, and should be done before the valve is mounted in place. There is not enough space to turn an adjustable wrench with the valve mounted, and no open-end wrench in my metric or US sets would work on the copper fitting. BTW, I am 88 yrs old.
  • Charles from CORP CHRISTI, TX
  • Difficulty Level:
    A Bit Difficult
  • Total Repair Time:
    30 - 60 mins
  • Tools:
    Nutdriver, Screw drivers, Wrench (Adjustable), Wrench set
1 person found this instruction helpful.
Was this instruction helpful to you?
Thank you for voting!
The water inlet valve was dripping water on my hardwood flooring.
Because I didn't discover the leak until the ruined my flooring it was necessary to pull the dishwasher and replace 5-6 pieces the flooring.

Once the flooring was replaced it was very easy to follow the u-tube directions from your website to replace the valve. It took the handtools you recommended and about 30 mins.
... Read more />Everything is working as it should. I feel I saved myself a couple of hundred of dollars by doing it myself. Thank you for your expert help.
  • Clarence from BREMERTON, WA
  • Difficulty Level:
    Easy
  • Total Repair Time:
    30 - 60 mins
  • Tools:
    Nutdriver, Pliers, Wrench (Adjustable)
1 person found this instruction helpful.
Was this instruction helpful to you?
Thank you for voting!
Leaking Dishwasher
Simple repair. Saved me hundreds
  • Alfred from Virginia Beach, VA
  • Difficulty Level:
    Easy
  • Total Repair Time:
    30 - 60 mins
  • Tools:
    Pliers, Socket set, Wrench (Adjustable)
1 person found this instruction helpful.
Was this instruction helpful to you?
Thank you for voting!
Water was not pumping into the dishwasher, it was running dry(which is dangerous)
Turned power and water off. Removed the washer from the kitchen cabinet cavity. Removed lower cover plate. Rocked the washer over on it's side and rested it at 45 degrees on a stool to allow better access to the bottom. Followed the video installation instructions from partselect.com which worked out perfectly. Put it upright again, hooked up water and power and ran a rinse cycle to test the fittings for leaks. All good, so put lower plate back on and pushed back into the cavity. Put the kettle on for a cup of tea!
  • David from TIBURON, CA
  • Difficulty Level:
    Easy
  • Total Repair Time:
    30 - 60 mins
  • Tools:
    Pliers, Screw drivers, Socket set, Wrench (Adjustable)
2 of 2 people found this instruction helpful.
Was this instruction helpful to you?
Thank you for voting!
  • 1
  • 2
  • 3
Questions and Answers

Ask our experts a question about this part and we'll get back to you as soon as possible!

17 questions answered by our experts.
Sort by:
  • 1
  • 2
Sorry, we couldn't find any existing answers that matched.Try using some different or simpler keywords, or submit your new question by using the "Ask a Question" button above!
David
October 6, 2017
Should i repair a 10 year old plus kitchen aid dishwasher. Will not pump water, heard the washer stop pumping while in use first started. Like water not getting to pump
For model number KUD1021RBT3
PartSelect logo
Hi David, Thank you for your inquiry. You can still repair a 10 year old dishwasher. There are some parts that you will need to check to see which one is causing the issue. You will need to check the drain pump, the sump pump check valve, the chopper assembly, the drain hose, the water inlet valve, the float switch and the bimetal fuse. I hope this helps. Thank you and have a great day!

13 people found this helpful.

Was this helpful?
Thank you for voting!
G
December 4, 2017
Water is leaking from the bottom front left side.
For model number KUDP02CRBS4
PartSelect logo
Hi G, Thank you for your question. If water is leaking from the dishwasher, there are some parts that you will need to check to see which one is causing the issue. You will need to check the water inlet valve, the door seal, the seal, the air inlet and the float switch. I hope this helps. Thank you and have a great day!

13 people found this helpful.

Was this helpful?
Thank you for voting!
Rachel
June 10, 2019
Our dishwasher is leaking. It is filling with clean water when it is not on. We disconnected the power supply and it is no longer filling with water. Which part(s) need(s) to be replaced?
For model number Kenmore 665.17032403
PartSelect logo
Hello Rachel, thank you for your question. It sounds like the water valve is sticking in the open position. We would recommend replacing the water valve first. I hope this helps!

12 people found this helpful.

Was this helpful?
Thank you for voting!
Robert
February 1, 2018
Our dishwasher is leaking into the tub. When it has finished a cycle and sits for a while, open the door and the bottom has clean water sitting in it. Is the water inlet valve letting a little water in when it isn’t running?
For model number GU2200XTSS3
PartSelect logo
Hello Robert, thank you for your questions. Yes, I would recommend replacing the water valve for that appliance. It sounds like water is slowly leaking into the unit, and the water to the unit is supplied by the water valve. I hope this helps!

7 people found this helpful.

Was this helpful?
Thank you for voting!
Gerry
July 11, 2019
On the fill drain and overfill parts diagram, what is part # 10? Does this component control the amount of water that is filled? If there is an insufficient amount of water in the tub to operate the middle and upper spray bars, could this component be the issue or is it the inlet valve? I am also seeing a water leak from component 10
For model number 665.13853K602
PartSelect logo
Hello Gerry, Thank you for the question. #10 is the Float Switch Kit, PartSelect Number PS557009. Water that fills your dishwasher lifts the float, and when it reaches a certain level, the float acts as a trigger for the float switch. The float triggers the switch to shut off, thereby shutting off the flow of water into the dishwasher. I would suggest having this replaced if the appliance is not filling properly. Hope this helps!

6 people found this helpful.

Was this helpful?
Thank you for voting!
Related Parts:
Jose
March 22, 2018
My dishwasher is leaking. The water is coming from the bottom part of the door. I have already replaced the door gasket. I removed the wood panel and i see the water coming from both sides. The bolts holding the air inlet were with traces of water so i sealed them, as well as the air inlet in contact with the metal panel, but it's still leaking!!!. i can send pictures with the exact location of the leakage.thanks.
For model number KUDT03FTPA3
PartSelect logo
Hi Jose, Thank you for your question. We would suggest taking a look at your float switch and your water inlet valve next. It could be that there is too much water getting pushed up into your appliance and perhaps that is why it is leaking. I hope that helps. Good luck with your repair.

5 people found this helpful.

Was this helpful?
Thank you for voting!
Nadine
December 18, 2018
Can’t find a replacement “check valve” for hose when water being pumped out of dishwasher. Dishwasher started not draining, but you could click on the “cancel/drain” feature and empty tub. Now, nothing drains. Was told to view and replace this inline plastic “sensor” which was referred to as a “check valve”, but have been unable to find this part for my Kenmore elite dishwasher model:66513153k701. Thought it might be included in drain hose, but not certain from photos and Kenmore website does not show this part on schematics (at least that i could see); is it possible this is part of the “dishwasher water inlet valve” rather than an inline part in the drain hose? Thanks much
For model number 66513153K701
PartSelect logo
Hi Nadine, Thank you for your question. There is a check valve that is sold with the drain hose. The part number listed under your model number for the drain hose is PS11756139. I hope this helps. Thank you and have a great day!

5 people found this helpful.

Was this helpful?
Thank you for voting!
James
April 16, 2018
Thank you for the excellent video. My dishwasher had a bad inlet valve that is now replaced in full working order. Your help was invaluable. Jmk
PartSelect logo
Hi James, Thank you for you contacting us and letting us know how your repair went. We are happy to hear that your were able to use our resources to help you with the repair. If you need any assistance from us in the future, please let us know, we are always happy to assist you. Thank you and have a great day!

4 people found this helpful.

Was this helpful?
Thank you for voting!
Mark
November 1, 2017
I put my dishwasher in test mode and water starts to fill the tub at beginning of test cycle, when I take it out of test mode and go to wash a load in wash cycle the water does not dispense into the tub at all, green light then flashes and washer shuts down. This is a Kenmore elite high efficiency dishwasher, would this be a inlet valve problem? Any suggestions would be greatly appreciated thank you.
For model number 665.13152K701
PartSelect logo
Hi mark, Thank you for the question. It would be caused by the valve or the control board. I suggest checking the resistance in the water inlet valve with an Multi Meter.Hope this helps!

4 people found this helpful.

Was this helpful?
Thank you for voting!
Don
January 22, 2018
Fills with water and will not shut off completely. Washer over fills and i have water all over the floor. What parts should be replaced? Thank you.
For model number GU2700XTSB1
PartSelect logo
Hello Don, Thank you for your inquiry. We would recommend checking the following parts to fix your issue: water inlet valve, float or water level switch, and the control board. Hope this helps!

3 people found this helpful.

Was this helpful?
Thank you for voting!
  • 1
  • 2
Model Cross Reference
This part works with the following models:
PartSelect Number: PS11749213
Manufacturer Part Number: WPW10158389
Brand
Model Number
Description
Kenmore
66513112K700
Dishwasher
Kenmore
66513113K700
Dishwasher
Kenmore
66513114K700
Dishwasher
Kenmore
66513119K700
Dishwasher
Kenmore
66513122K700
Dishwasher
Kenmore
66513122K701
Dishwasher
Kenmore
66513123K700
Dishwasher
Kenmore
66513123K701
Dishwasher
Kenmore
66513124K700
Dishwasher
Kenmore
66513124K701
Dishwasher
Kenmore
66513129K700
Dishwasher
Kenmore
66513129K701
Dishwasher
Kenmore
66513132K700
Dishwasher
Kenmore
66513132K701
Dishwasher
Kenmore
66513133K700
Dishwasher
Kenmore
66513133K701
Dishwasher
Kenmore
66513139K700
Dishwasher
Kenmore
66513139K701
Dishwasher
Kenmore
66513152K700
Dishwasher
Kenmore
66513152K701
Dishwasher
Kenmore
66513153K700
Dishwasher
Kenmore
66513153K701
Dishwasher
Kenmore
66513154K700
Dishwasher
Kenmore
66513154K701
Dishwasher
Kenmore
66513159K700
Dishwasher
Kenmore
66513159K701
Dishwasher
Kenmore
66513163K700
Dishwasher
Kenmore
66513163K701
Dishwasher
Kenmore
66513169K700
Dishwasher
Kenmore
66513169K701
Dishwasher
Customer Service Representative

Get in touch, we're here to help!

Daily 8am - 9pm EST

Contact Customer Service