Compressor start relay kit is an original equipment manufacturer (OEM) part that fits some Kenmore, Frigidaire, Electrolux, Crosley, Gibson and White-Westinghouse refrigerators. It also fits some Kenmore, Frigidaire and Gibson upright freezers.
Compressor start relay kit includes the compressor start relay, run capacitor, wire harness adapter, 2 wire terminals, 2 wire connectors, 2 pieces of wire connection shrink tubing, the wire retaining clip and kit instructions sheet.
Clarification of instructions: Kit 5304491941 now uses a wire harness with white wires; attach the red compressor power wire to the wire harness adapter's white wire that plugs into the start device terminal at the outside edge of the start device.
Replaces original refrigerator and freezer compressor start relay part numbers 216649316, 218721119, 241524601, 241524605 and 5304468029.
Fits some refrigerators in the following series: Kenmore and Kenmore Elite 253; Frigidaire FRS, FRT, FRX, FSC, GLH, GLR, GS2, NGS, PHS, PLH and PLRS; Electrolux E23; Crosley CRSE; Gibson GRS and GRT; and White-Westinghouse WRS and WRT. Also fits some upright freezers in these series: Kenmore 253; Frigidaire FFU; and Gibson GFU.
How Buying OEM Parts Can Save You Time and Money
Part Videos
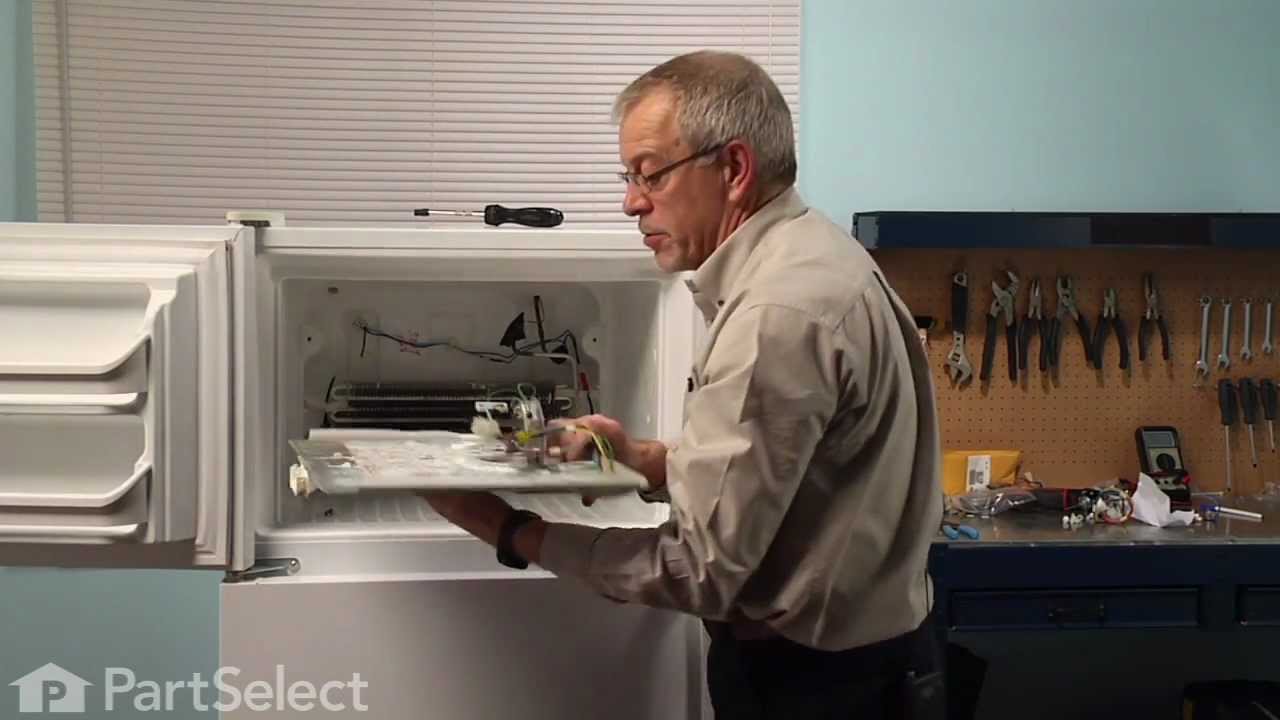
Replacing your Frigidaire Refrigerator Refrigerator Compressor Start Relay Kit
Troubleshooting
This part fixes the following symptoms:
Will Not Start | Freezer section too warm | Fridge too warm | Fridge and Freezer are too warm
Keep searches simple. Use keywords, e.g. "leaking", "pump", "broken" or "fit".
Sorry, we couldn't find any existing reviews that matched. Try using some different or simpler keywords.
★★★★★
★★★★★
Mike Q - January 2, 2019
Verified Purchase
Did what I hoped
It would have bin nice to know that this came as a kit with both starter & capacitor as I bought the capacitor first not knowing it comes as a kit. Witch was great but it should say so on the web site. Everything worked fine & good company to deal with, but try to fix the web site. Thank U Mike
< Prev
1
Next >
Customer Repair Stories
Average Repair Rating: 4.1 / 5.0, 7 reviews.
What's this?
Sort by:
< Prev
1
Next >
Search filter:
Clear Filter
Your search term must have 3 or more characters.
Keep searches simple. Use keywords, e.g. "leaking", "pump", "broken" or "fit".
Sorry, we couldn't find any existing installation instruction that matched.
Compressor would not start.
I watched You Tube on how to repair it the instructions that came were shit. I'm a stickler for wire colors being correct, could find that information in the instructions. Everything is on you tube I love you tube. The fix is is easy peasy. I'm not stupid eather there is nothing on that frig I could not repair if I can get parts ev
... Read moreen the compressor I can braze to. I know how it all works I never call repair people I will throw it all in the garbage if I can't get parts. That goes for TV's cars you name it. I have tools for all things.
Rear of upper shelf would freeze, while the rest of the freezer was dripping wet
We opened our freezer last week only to find the bottom 2/3 was barely cold, while only the rear of the upper shelf was cold. In fact, it was covered in frost, despite being a frost-free model. Our frozen veggies were slushy, not rock hard, and our frozen juices were all liquid. We defrosted the freezer, plugged it back in, but immediat
... Read moreely noticed that we didn't hear the 'whhoooooosh' that you typically hear when you close the freezer door. After 30 minutes, the rear upper shelf was frosty again, but the rest was still at room temp. We figured the freezer was a goner, so we started looking at new freezers. I headed online to see if I could fix it, and I eventually found this site. I had learned online that these symptoms can be caused by either a bad capacitor, or a bad controller (which the capacitor plugs in to). I guess you can't necessarily tell which of the two parts is defective, so I chose to order/replace both of them. I ordered the correct parts from partselect.com, and they alerted me that Frigidaire has a new replacement part for the capacitor. When the parts arrived (quickly, ftw!), I unplugged the freezer and snipped the two wires leading to the controller. Next I unplugged the controller from the compressor housing. I spliced the replacement controller's wires into the freezer's wires (using my own wire nuts...as none were included with my order :( ). I snapped the new controller onto the compressor mounting, and then plugged the capacitor in. I plugged the freezer back in, and it was time for the moment of truth. The interior light of the freezer came on, and I could hear the compressor 'humming'. I could hear it humming before the repair, so the big test was to see if it got cold. I was nervous because the freezer DIDN'T make the 'whoooshing' noise right away, but after just an hour, the 'test' mug of water was already turning into ice. It was fixed!!!! If you have these symptoms, you CAN do this!!! Unplug the freezer. Cut two wires. Unplug the controller. Splice two wires. Plug in the new controller. Snap in the new capacitor. DONE!!!
Pulled the fridge from encloser, removed rear cardboard cover and found compressor in rear. The compressor, being very accessable, was easy to find the bad starter/capacitor. I removed the spring retainer, pulled the capacitor off the starter, removed the starter by pulling outward and replaced with new. All went well when the unit star
... Read moreted and cooled as new. Some noise at times, but traced to icemaker. As time went by, that noise was gone.
The repair was not difficult because you just remove the old part and plug it in and connect two wires. But I wish there was a way to test if the compressor is working before I purchased the parts. The compressor would not start so I was not able to repair the refrigerator.
Tom from Valencia, CA
Difficulty Level:
Easy
Total Repair Time:
15 - 30 mins
Tools:
Nutdriver, Pliers, Screw drivers
7 of 15 peoplefound this instruction helpful.
Was this instruction helpful to you?
Thank you for voting!
starter smoking when first coming on
The retaining wire keeping the starter in place was first removed then the starter was easily removed. Pulling the old wire off was a little difficult because I had to pull harder than I expected. Getting the wire back on was probably the hardest part. I had to compress one part of the plug so I could get it to fit back on then it was
... Read moresimply a matter of placing the starter back in position and replacing the wire that holds it snugly in place. 20 minutes or so start to finish and new starter works well.
Read less
Michael from Ayden, NC
Difficulty Level:
Easy
Total Repair Time:
15 - 30 mins
Tools:
Pliers, Screw drivers
14 of 21 peoplefound this instruction helpful.
Was this instruction helpful to you?
Thank you for voting!
freezer and fridge stopped cooling. Could hear compressor clicking on, smelled electronics overheating, starter melted.
remove the rear cover, and simply pull off harness and replace starter.
ron from hawthorne, CA
Difficulty Level:
Easy
Total Repair Time:
15 - 30 mins
Tools:
Nutdriver
30 of 46 peoplefound this instruction helpful.
Was this instruction helpful to you?
Thank you for voting!
< Prev
1
Next >
Questions and Answers
Ask our experts a question about this part and we'll get back to you as soon as possible!
8 questions answered by our experts.
Sort by:
< Prev
1
Next >
Search filter:
Clear Filter
Your search term must have 3 or more characters.
Keep searches simple. Use keywords, e.g. "leaking", "pump", "broken" or "fit".
Sorry, we couldn't find any existing answers that matched.Try using some different or simpler keywords, or submit your new question by using the "Ask a Question" button above!
Dean
August 1, 2018
Do i need a new starter relay? Compressor will not kick on. I have temps set as low as the fridge allows and freezer won’t go blelow 40° and the fridge 50°. The condenser is clean.
For model number PLHS67EGSB2
Hello Dean, thank you for your question. The start relay briefly kick starts the compressor, and then shuts off as soon as the motor gets up to speed. If the compressor is not kicking on you will want to replace the start device part number PS8689661. You may also want to test/replace the run capacitor part number PS2333670 as well, as these parts sometimes fail together. The run capacitor helps the compressor kick on and off while maintaining a constant temperature in your fridge and freezer. I hope this helps!
13 people found this helpful.
Was this helpful?
Thank you for voting!
Nam
December 10, 2019
Hello technian of partsectcanada, i have a question for you that is my frigiaire too warm, the compressor has not kicked on but the fan is working. I order parts from your company and i have changed run capacitor
Part number: Ps817298 and defrost thermostat kit
Part number: Ps469522 after that i plug power on and run it for 1 and 1/5 hour but it has not changed at all, the problem is still there. Test compressor 3 terminals to ground was good. Please help me, thanks. Nam
For model number GLRS234ZAW5
Hello Nam, thank you for your question. If the compressor is not kicking on, we would recommend replacing the start relay PartSelect Number: PS8689661. I hope this helps.
3 people found this helpful.
Was this helpful?
Thank you for voting!
Doug
October 31, 2017
When unit starts to come on it will kick on and off up to 30 seconds be for the compressor kicks on and stays on.Then it runs fine . Both the freezer and main side are staying cold. It just happens when it kicks on. Thank you
For model number frs23r4cw3
Hi Doug, Thank you for the question. I suggest replacing the Run Capacitor,This part helps the compressor kick on and off while maintaining a constant temperature to keep things frozen in your freezer.Hope this helps!
2 people found this helpful.
Was this helpful?
Thank you for voting!
Kevin Chapman
August 29, 2017
The red and blue wire end connects do not look like they will fit into the slots on replacement relay switch
For model number 25351699100
Hello Kevin, thank you for contacting us. That is the correct start device for your model according to the manufacturer Kenmore. Good luck with the repair!
1 person found this helpful.
Was this helpful?
Thank you for voting!
Tom
November 30, 2021
Refrigerator and freezer became to warm. There was frost in the freezer so I took the panel off to expose the coils and melt the ice. Once done and the panel was replaced I started the refrigerator. The freezer seems to be at temperature but the refrigerator side is not cooling down to temp. It seems the motor on the freezer side keeps cycling. On and off sound but there is constant air flow. The ice maker is turned off for now. The fan for the condenser in the bottom back of the refrigerator is working. Any ideas?
For model number FRS23H5ASB
Hello Tom, Thank you for the question. This could indicate there is a issue with the Defrost Cycle. We suggest testing the Defrost Thermostat. The best way to do this is to remove the thermostat from the refrigerator so you can control the temperature of the sensor. You can let the sensor warm up to room temperature. With the sensor warmed up to room temperature the sensor should read approximately 6.2K Ohms at 68°F. With the thermistor submerged is a glass full of ice water, the sensor should be very close to 32°F which should read approximately 16.3K Ohms. If the values that you are getting are far off from these readings, then the sensor is bad and should be replaced. We hope this helps!
Have replaced defrost kit,run capacitor and evaporator fan with no help. Can figure it out . Will compressor make a noise when it is running. Want to give up. Wish i would of known run capacitor came with starter kit. Do you think it could be the starter kit still? Planning to return parts. Please let me know how to test starter is starting compressor.
For model number frs26h5bas4have
Hello Craig, thank you for your question. PartSelect Number: PS8689661 is the start relay for the compressor. The start relay briefly kick starts the compressor, and then shuts off as soon as the motor gets up to speed. If the compressor isn't starting and making a buzzing sound when its trying to start up, this would be the part to replace. I hope this helps.
1 person found this helpful.
Was this helpful?
Thank you for voting!
Katy
June 22, 2022
Fridge and Freezer are cool but warmer than ideal temperature. Fridge sits at around 44.6 F and freezer at 32 F. Both temperature knobs are set to the coolest setting but its still too warm. Already replaced temperature control thermostat and defrost thermostat. Evaporator coils are still freezing over. Would you recommend replacing the compressor start relay or run capacitor
For model number FRS26H5ASB3
Hello Katy, Thank you for the question. If the compressor is kicking on and off as normal, the start relay and run capacitor should be good. We suggest checking the Evaporator Fan Motor to make sure it is spinning at a normal speed to circulate the air over the coils. You can also test the Defrost Heater with a Multimeter. You should get an approximate reading of 10 to 150 ohms. If you need help placing an order, customer service is open 7 days a week. Please feel free to give us a call. We look forward to hearing from you!
Refrigerator does not cool and makes a buzzing sound for a few seconds and then is quiet for a minute or two and repeats the buzz/quiet. However, if i unplug it for a while, it will cool for hours and sometimes for two or three weeks. When it stops cooling, i unplug for a while.Sometimes i must unplug and replug within a few seconds.
For model number FRS6LF7FB5
Hello Marshall, thank you for inquiring. For this symptom you will want to replace either the Evaporator Fan Motor Kit part PS3419839, the Defrost Thermostat Kit part PS469522, or the Run Capacitor part PS2333670. We hope this helps.
Was this helpful?
Thank you for voting!
< Prev
1
Next >
✖
Ask a Question
Ask our experts a question on this part and we'll respond as soon as we can.