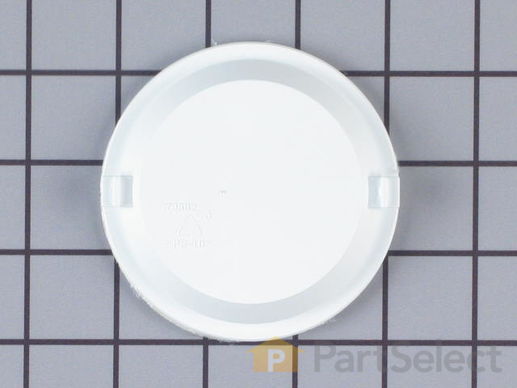
Part Location Diagram of WP61005883 Whirlpool Ice Door Assembly
See part 7 in the diagram
( Grid squares measure 1x1 inch )
Customer Service Representative

Get in touch, we're here to help!

Daily 8am - 9pm EST

customerservice@partselect.com

Ice Door Assembly WP61005883

★★★★★
★★★★★
8 Reviews

Rated by 44 customers 

Easy 

15 - 30 mins 

Ratings submitted by customers like you who bought this part.

$ 17.69
  In Stock
Get FREE EconoShip on orders over $100! T&C apply

Get this part fast! Average delivery time for in-stock parts via standard shipping: 1.8 days.

PartSelect Number PS11743244
Manufacturer Part Number WP61005883
Manufactured by Whirlpool
Product Description

Ice Door Assembly Specifications

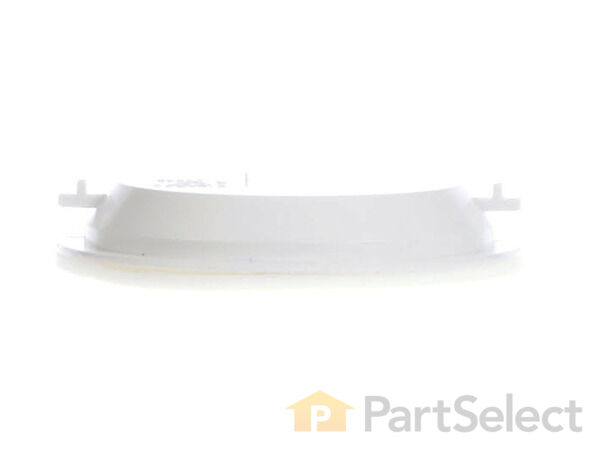
This ice door assembly is a little over three inches in diameter. It is all white in color and it is made entirely of plastic.
How Buying OEM Parts Can Save You Time and Money

How Buying OEM Parts Can Save You Time and Money

Troubleshooting
This part fixes the following symptoms:
Ice maker won’t dispense ice | Door won’t open or close | Leaking | Door Sweating
This part works with the following products:
Refrigerator.
This part works with the following products:
Maytag, Jenn-Air, Admiral.
Part# WP61005883 replaces these:
AP6010068, 61005883
Back to Top
Customer Reviews
Average Rating:
★★★★★
★★★★★
8 Reviews
5.0
Filter By Rating:
  • 5 Stars
    8
  • 4 Stars
    0
  • 3 Stars
    0
  • 2 Stars
    0
  • 1 Star
    0
Sort by:
  • 1
Sorry, we couldn't find any existing reviews that matched. Try using some different or simpler keywords.
  • 1
Customer Repair Stories
 Average Repair Rating: 3.9 / 5.0, 44 reviews. What's this?
Sort by:
  • 1
  • 2
  • 3
Sorry, we couldn't find any existing installation instruction that matched.
Ice door flopping around. Very loud clattering noice.
Taking everything apart and eyeballing what was wrong only took 15 minutes and one tool, the T15 torx driver ... a star screwdriver.

Disclaimer: I am 79 with arthritis. This should have taken about 15 minutes to put together. I made a couple of errors. I did not wind the ice door spring tight enough. It needs to be wound almost two turns ... so I had to do it over again. This is where I needed the long nose pliers to wind the spring.

The second mistake was I did not unplug the refrigerator. That is a basic safety precaution. I did not get shocked, but while I was working on it the ice was melting and refreezing, which created an ice jam at the ice door. All is working now. It is always satisfying to have fixed it myself.
Other Parts Used:
Ice Door Strike Ice Door Assembly
  • John from SUMMERVILLE, SC
  • Difficulty Level:
    A Bit Difficult
  • Total Repair Time:
    1- 2 hours
  • Tools:
    Pliers
1 person found this instruction helpful.
Was this instruction helpful to you?
Thank you for voting!
replace broke door on fountain
follow video
  • Dan from SEVIERVILLE, TN
  • Difficulty Level:
    Really Easy
  • Total Repair Time:
    Less than 15 mins
  • Tools:
    Screw drivers
1 person found this instruction helpful.
Was this instruction helpful to you?
Thank you for voting!
Ice Chute door return spring
Used your instructions . went very well about 10 min.
Other Parts Used:
Ice Door Strike Ice Door Assembly Ice Chute Door Return Spring
  • Samuel from Burke, VA
  • Difficulty Level:
    Really Easy
  • Total Repair Time:
    Less than 15 mins
  • Tools:
    Pliers, Screw drivers
0 of 5 people found this instruction helpful.
Was this instruction helpful to you?
Thank you for voting!
Ice flap broken
I followed the instructions from other users and everything went fine. I had one issue not covered. My refrigerator doors are covered by cabinet panels, and the top panel had to be removed in order to remove the panel for the ice/water dispenser. The part was perfect and fairly easy to install!
  • Anthony from Milford, OH
  • Difficulty Level:
    Easy
  • Total Repair Time:
    15 - 30 mins
  • Tools:
    Screw drivers
0 of 1 people found this instruction helpful.
Was this instruction helpful to you?
Thank you for voting!
Ice dispenser chute door had broken tabs.
Generally I followed the instructions left on the website by others who had accomplished the repair. (A couple of them are very good, and I don't see the need to repeat their instructions.) However, I had two problems in the process. First, without any clear drawings, I mistakenly installed the ice chute door backwards. The shape of the door back matches the shape of the chute, so I made a mistake. Once I realized the mistake and placed the rubberized side of the door to face the chute, the project moved quickly. Secondly, I faced the same problem that most others cited. The solenoid plunger is difficult to get in the right location on the chute door strike. You must lift the strike out of its cradle, where it is held only by the pressure of the return spring, in order to seat the strike into the plunger flange. Once I overcame those two problems, the job was easy and quick. Thanks for your quick delivery of the parts.
  • Don from Edwardsville, IL
  • Difficulty Level:
    Easy
  • Total Repair Time:
    1- 2 hours
  • Tools:
    Pliers, Screw drivers
0 of 1 people found this instruction helpful.
Was this instruction helpful to you?
Thank you for voting!
Had broken ice chute door
I first read the repair hints on your web site and proceeded to follow the instructions that were there. This was a very easy fix and did not take long to repair. I did get a bit of an electrical shock when I accidentally touched the electronic board with the back of my hand. But again, the instructions are very helpful and anything that I would add for instructions would just be repeating what others have said.
  • Rick from Des Moines, IA
  • Difficulty Level:
    Really Easy
  • Total Repair Time:
    15 - 30 mins
  • Tools:
    Screw drivers
0 of 1 people found this instruction helpful.
Was this instruction helpful to you?
Thank you for voting!
ice seal to ice maker broke
it went just fine. fowed instuctions from web page. 1,2,3,done
thank you
  • william from Palm Bay, FL
  • Difficulty Level:
    Really Easy
  • Total Repair Time:
    15 - 30 mins
  • Tools:
    Screw drivers
0 of 1 people found this instruction helpful.
Was this instruction helpful to you?
Thank you for voting!
Plastic part where the ice cubes fall out of broke
My son (who generally good at appliance repairs did look at it first. He told me what part to order. Unfortunately he had to go back home. I did watch what he did and when the part came in, I surprised myself and attempted to fix it. I had to take it apart one more time but then SUCCESS. Ice is flowing like a river....Thank, Hope this helps
Bette
The repair was to unscrew for screws and unplug some electric board (easily removed), put the new part in. Plugged the electric board back in screwed the screws and I was back in busness.
  • Elizabeth from Belchertown, MA
  • Difficulty Level:
    Easy
  • Total Repair Time:
    Less than 15 mins
  • Tools:
    Screw drivers
0 of 1 people found this instruction helpful.
Was this instruction helpful to you?
Thank you for voting!
Ice chute flap broke
removed the ice chute door, unhooked the computer board replaced the flap. The only problem was the spring loaded part of the ice chute door come up and the little plunger came loose. It only took a few minutes to replace the plunger back in the holder and replaced the ice chute door. The best part of the whole job was that I ordered the part on Monday afternoon and the part was at my door Wednesday. The Parts did an excellent job of getting the part to me quickly.
  • John from Crothersville, IN
  • Difficulty Level:
    Easy
  • Total Repair Time:
    15 - 30 mins
  • Tools:
    Screw drivers
8 of 9 people found this instruction helpful.
Was this instruction helpful to you?
Thank you for voting!
cover of ice maker chute broke off
Disassembled the control facade of the ice maker/water dispenser, then attempted to install the chute cover, only to discover that an arm connecting the chute was broken. Temporarily reassembled the chute with cover, so we can still secure water. Will need to order broken arm to finish the install.
  • La Donna from La Mirada, CA
  • Difficulty Level:
    A Bit Difficult
  • Total Repair Time:
    30 - 60 mins
0 of 1 people found this instruction helpful.
Was this instruction helpful to you?
Thank you for voting!
  • 1
  • 2
  • 3
Questions and Answers

Be the first to ask our experts a question about this part!

You May Also Need ?
Model Cross Reference
This part works with the following models:
PartSelect Number: PS11743244
Manufacturer Part Number: WP61005883
Brand
Model Number
Description
Maytag
AS2125CIHW
Refrigerator
Maytag
AS2125SIHW
Refrigerator
Maytag
AS2728GIHB
Refrigerator
Maytag
AS2728GIHW
Refrigerator
Maytag
AZ2727GIHB
Refrigerator
Maytag
AZ2727GIHW
Refrigerator
Maytag
GC2227CDFB
Refrigerator
Maytag
GC2227CDFW
Refrigerator
Admiral
GC2227EEDW
Refrigerator - Admiral Refrigerator Model GC2227EEDW Parts
Maytag
GS2125CEEW
Refrigerator
Maytag
GS2127CAHB
Refrigerator - Side-by-side
Maytag
GS2127CAHW
Refrigerator - Side-by-side
Maytag
GS2327GEHW
Refrigerator
Maytag
GS2726CEHQ
Refrigerator
Maytag
GS2728GEHQ
Refrigerator
Maytag
GS2788GKHQ
Refrigerator
Maytag
GZ2727GEHQ
Refrigerator
Jenn-Air
JSD2789HEB
Refrigerator - Side-by-side
Jenn-Air
JSD2789HES
Refrigerator - Side-by-side
Jenn-Air
JSD2789HEW
Refrigerator - Side-by-side
Maytag
MSD2422GRQ
Refrigerator - Side-by-side
Maytag
MSD2422GRW
Refrigerator - Side-by-side
Maytag
MSD2432GRQ
Refrigerator - Side-by-side
Maytag
MSD2432GRW
Refrigerator - Side-by-side
Maytag
MSD2433HEW
Refrigerator - Side-by-side
Maytag
MSD2434GEQ
Refrigerator - Side-by-side
Maytag
MSD2434GEW
Refrigerator - Side-by-side
Maytag
MSD2436GRQ
Refrigerator - Side-by-side
Maytag
MSD2436GRW
Refrigerator - Side-by-side
Maytag
MSD2722GRQ
Refrigerator - Side-by-side
Customer Service Representative

Get in touch, we're here to help!

Daily 8am - 9pm EST

Contact Customer Service