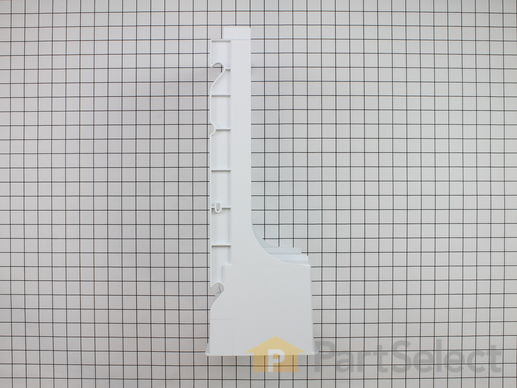
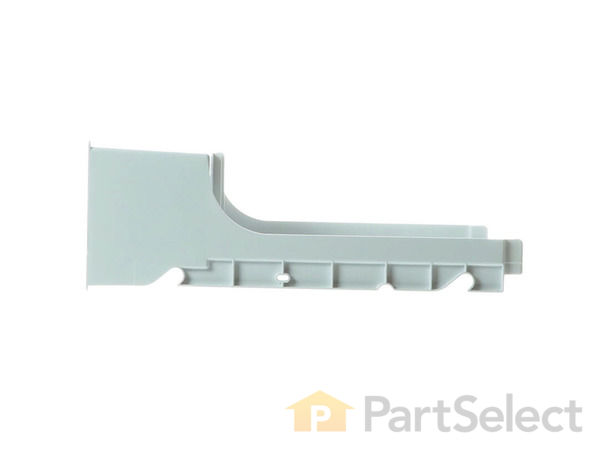
Part Location Diagram of 61005614 Whirlpool Ice Enclosure
See part 20 in the diagram
( Grid squares measure 1x1 inch )
Customer Service Representative

Get in touch, we're here to help!

Daily 8am - 9pm EST

customerservice@partselect.com

Ice Enclosure 61005614

 Fits your JSD2588AEA!
★★★★★
★★★★★
4 Reviews

Rated by 12 customers 

Easy 

15 - 30 mins 

Ratings submitted by customers like you who bought this part.

$ 154.69
  In Stock
Get FREE EconoShip on orders over $100! T&C apply

Get this part fast! Average delivery time for in-stock parts via standard shipping: 1.8 days.

 Fits your JSD2588AEA!
PartSelect Number PS2060959
Manufacturer Part Number 61005614
Manufactured by Whirlpool
Troubleshooting
This part fixes the following symptoms:
Ice maker won’t dispense ice | Ice maker not making ice
This part works with the following products:
Refrigerator.
This part works with the following products:
Maytag, Crosley, Jenn-Air, Amana.
Part# 61005614 replaces these:
AP4069637, 901794, 61004806, 61004846, 61005614
Back to Top
Customer Reviews
Average Rating:
★★★★★
★★★★★
4 Reviews
4.8
Filter By Rating:
  • 5 Stars
    3
  • 4 Stars
    1
  • 3 Stars
    0
  • 2 Stars
    0
  • 1 Star
    0
Sort by:
  • 1
Sorry, we couldn't find any existing reviews that matched. Try using some different or simpler keywords.
  • 1
Customer Repair Stories
 Average Repair Rating: 3.8 / 5.0, 12 reviews. What's this?
Sort by:
  • 1
  • 2
Sorry, we couldn't find any existing installation instruction that matched.
Replace ice enclosure
The plastic around the the drive motor on the ice enclosure fatigued and broke. Couple if screws and the whole thing came. Replacement was easy, one screw under the rail of the ice enclosure, then it slides out. Swap the parts and reinstall.
  • Charles from Columbus, OH
  • Difficulty Level:
    Easy
  • Total Repair Time:
    30 - 60 mins
  • Tools:
    Screw drivers, Socket set
6 of 7 people found this instruction helpful.
Was this instruction helpful to you?
Thank you for voting!
ice enclosure was broken
the drive motor was broken free from the tray, so I just changed it over and replaced the drive ring very esay for me
Other Parts Used:
Ice Enclosure Ice Bin Drive Ring
  • Christopher from St Petersburg, FL
  • Difficulty Level:
    Easy
  • Total Repair Time:
    30 - 60 mins
  • Tools:
    Pliers, Screw drivers
1 of 2 people found this instruction helpful.
Was this instruction helpful to you?
Thank you for voting!
ice maker motor broke out of plastic
getting it apart wasn't to bad. except when the small part that functions with the door flap fell out before i could see how it was installed orginally. after a few moments of trail and error figuired it out. previous messages you had posted from other customers helped alot, especially the gentleman who said screws were left handed made a big differance in getting it apart. glad you had the part.
works great.
  • PATRICIA from LITTLE VALLEY, NY
  • Difficulty Level:
    A Bit Difficult
  • Total Repair Time:
    30 - 60 mins
  • Tools:
    Screw drivers, Socket set
9 of 11 people found this instruction helpful.
Was this instruction helpful to you?
Thank you for voting!
Ice Maker Repair
Took my husband and son to remove the auger because it seemed to be frozen somewhat. After a little work, the auger broke loose and the repair was a quick process. I thoroughly enjoy the fact that the part was correct and I my ice maker was fixed for very little money and I did not have to buy a new refrigerator! I was not sure that we could get the replacement part because we are not the original owner of the refrigerator. So it has some age, but still works strong!
  • Paula from Waldorf, MD
  • Difficulty Level:
    Easy
  • Total Repair Time:
    15 - 30 mins
  • Tools:
    Pliers
1 person found this instruction helpful.
Was this instruction helpful to you?
Thank you for voting!
Ice Bin Enclosure Cracked
As the previous users have stated, remove the ice tray, then remove the ice bin enclosure. Watch for the screws that are used to mount the enclosure.
As you slide the enclosure forward, go slowly, there is a wiring connector at the back, you will need to un-plug this connector. The solenoid assy is kind of tricky, as it is spring loaded, but easy to figure out. As previously mentioned, the auger yoke is on a shaft that has to be removed by turning it clockwise (reverse threads). Be careful with that, as it is hard to hold on to the shaft while getting the yoke off. Now remount the motor, remount the spring loaded solenoid assy, slide the ice bin enclosure back in a ways, then reconnect the wiring harness, slide it the rest of the way in, tighten the screws, and you are ready to make ice again. Approx 30 minute job.
  • George from Reeds Spring, MO
  • Difficulty Level:
    Easy
  • Total Repair Time:
    15 - 30 mins
  • Tools:
    Nutdriver, Pliers, Screw drivers
12 of 14 people found this instruction helpful.
Was this instruction helpful to you?
Thank you for voting!
auto ice despenser woudn't work
First I removed the ice hopper, then I removed one 1/4 inch self tapper, then I removed six screws holding the motor ann solenoid. I then unplugged the wiring harness, the ice enclosure then pulled right out. I set the new one in place refastened the motor and solenoid, plugged the wiring harness in and put the self tapper back in and I was making ice.
  • Richard from Rayland, OH
  • Difficulty Level:
    Really Easy
  • Total Repair Time:
    15 - 30 mins
  • Tools:
    Nutdriver, Screw drivers
2 of 3 people found this instruction helpful.
Was this instruction helpful to you?
Thank you for voting!
broken icemaker
My son-in-law is our handyman. He diagnosed the problem, found us the part and then put it in. The part came several days before we expected it and the whole thing went very well and we saved lots of money!
  • William from Sedalia, MO
  • Difficulty Level:
    Easy
  • Total Repair Time:
    30 - 60 mins
1 of 2 people found this instruction helpful.
Was this instruction helpful to you?
Thank you for voting!
actuator pad (dispenser button) sticking "on", icemaker coating cracking & leaving pieces in ice
To replace the ice enclosure, follow 07/03/09 person's post...it's VERY helpful and pay attention to the part about the "reverse threads"! Be sure to take note how you disassemble, much easier if you write down the order to reverse it in installation.

To replace the icemaker, I turned off the water to the icemaker, removed the one screw in the support bracket, popped it out from under the 2 plastic clips, and unplugged the power source. I unplugged the wires from the old icemaker and plugged them into (and clipped the one wire under the clip) the new icemaker exactly like it was on the old one. I took the "shutoff" wire (the thing that turns off the icemaker when the ice bucket is full) from the old icemaker and put it on the new one. Ready to install! I made sure the "water hose" was in the hole , plugged it in, popped it in under the plastic clips on the side of the freezer, and screwed the bottom screw in the support bracket. Shut the door! Turn on the water, and go see what else you can order and fix! Easiest fridge I've EVER HAD!!!

Oh, and I replaced the actuator pad, too - another super easy feat! Slide the drip tray out, use the "star tool screwdriver" to remove the screws, remove the "face", follow the instructions given previous to mine, it's easy as pie. I'm a 52 year old WOMAN and if I can do this, YOU CAN TOO!
Other Parts Used:
Ice Enclosure Actuator Pad Water Fill Cup and Bearing
  • Cynthia from Groveland, FL
  • Difficulty Level:
    Really Easy
  • Total Repair Time:
    15 - 30 mins
  • Tools:
    Nutdriver, Screw drivers
1 of 5 people found this instruction helpful.
Was this instruction helpful to you?
Thank you for voting!
Yoke auger tore hole in plastic ice enclosure
Very simple repair. First Remove ice tray. Next remove enclosure. Believe there were 3 screws to remove enclosure (1 bottom, 2 top). Slide enclosure out slowly to gain access to power connector mounted on back wall. removed components from enclosure (motor and solenoid). Take extra care removing solenoid with spring/rod as it is 3 separate pieces (spring, rod, and coil). Easy to figure out reassemble but easier if you take note during disassembly. Took me a while to get yoke off from motor assmbly. noticed they were reverse threads (lefty). So to remove yoke from shaft had to turn CW vs CCW on regular threads. Once had yoke off, rest of assembly was easy. Mounted motor, reinstalled yoke. Put entire re-assembled enclosure back in fridge. Slide in part way, to give yourself plenty of room to plug power connector in. Reattach assembly with 3 screws. Works like a champ.
  • Craig from East Fairfield, VT
  • Difficulty Level:
    Really Easy
  • Total Repair Time:
    15 - 30 mins
  • Tools:
    Nutdriver, Pliers
36 of 37 people found this instruction helpful.
Was this instruction helpful to you?
Thank you for voting!
Ice would not come out of dispenser
Remove 2 screws, and GENTLY remove tray. There are two motors on the back side that are wired in to the back of the fridge. Unplug the harness and the whole assembly will come out. Take note of the way the plunger comes out, if not, it will take a little more time to figure out. reassemble motors onto new tray then GENTLY slide into postion, with one hand plug in wiring harness then seat tray into position and reinstall screws. Done.
  • Erik from Wilmington, DE
  • Difficulty Level:
    Easy
  • Total Repair Time:
    15 - 30 mins
  • Tools:
    Nutdriver, Screw drivers
0 of 2 people found this instruction helpful.
Was this instruction helpful to you?
Thank you for voting!
  • 1
  • 2
Questions and Answers

Ask our experts a question about this part and we'll get back to you as soon as possible!

1 question answered by our experts.
Sort by:
  • 1
Sorry, we couldn't find any existing answers that matched.Try using some different or simpler keywords, or submit your new question by using the "Ask a Question" button above!
Pete
February 21, 2018
The discharge port for the ice flapper does not close causing sweating under the ice bin? Can I purchase the ice bin with the auger installed or are they separate? Or do I just change out the flapper? Thanks
For model number MSD2456GEW
PartSelect logo
Hi Pete, Thank you for the question. If the flapper is not closing it will need to be replaced. It is only sold as part of the Ice Dispenser Solenoid and Door Kit, PartSelect Number: PS2003478. Hope this helps!

1 person found this helpful.

Was this helpful?
Thank you for voting!
Related Parts:
  • 1
Model Cross Reference
This part works with the following models:
PartSelect Number: PS2060959
Manufacturer Part Number: 61005614
Brand
Model Number
Description
Maytag
12001685
Ice Maker
Maytag
12001747
Ice Maker
Maytag
12001748
Refrigerator - Maytag Refrigerator Model 12001748 Parts
Maytag
12001749
Refrigerator - Maytag Refrigerator Model 12001749 Parts
Maytag
12001750
Refrigerator - Maytag Refrigerator Model 12001750 Parts
Admiral
ASD2514ARA
Refrigerator - Side-by-side
Admiral
ASD2514ARQ
Refrigerator - Side-by-side
Admiral
ASD2514ARW
Refrigerator - Side-by-side
Crosley
CS23B6DA
Refrigerator - Side-by-side
Crosley
CS23B6DQ
Refrigerator - Side-by-side
Crosley
CS23B6DW
Refrigerator - Side-by-side
Crosley
CS24G6DB
Refrigerator - Side-by-side
Crosley
CS24G6DQ
Refrigerator - Side-by-side
Crosley
CS24G6DW
Refrigerator - Side-by-side
Crosley
CS25A7DA
Refrigerator - Side-by-side
Crosley
CS25A7DB
Refrigerator - Side-by-side
Crosley
CS25A7DQ
Refrigerator - Side-by-side
Crosley
CS25A7DW
Refrigerator - Side-by-side
Crosley
CS25B7DB
Refrigerator - Side-by-side
Crosley
CS25B7DQ
Refrigerator - Side-by-side
Crosley
CS25B7DW
Refrigerator - Side-by-side
Amana
CSD2324ARA
Refrigerator - Side-by-side
Amana
CSD2324ARW
Refrigerator - Side-by-side
Amana
CSD2325ARA
Refrigerator - Side-by-side
Magic Chef
CSD2325ARB
Refrigerator - Side-by-side
Amana
CSD2325ARW
Refrigerator - Side-by-side
Amana
CSD2524ARA
Refrigerator - Side-by-side
Amana
CSD2524ARW
Refrigerator - Side-by-side
Amana
CSD2525ARA
Refrigerator - Side-by-side
Magic Chef
CSD2525ARB
Refrigerator - Side-by-side
Customer Service Representative

Get in touch, we're here to help!

Daily 8am - 9pm EST

Contact Customer Service