Meant as a backup to a high limit thermostat, this fuse is typically set to trip at a higher temperature than that of a high limit thermostat. This is a one-time use fuse, so when it does trip, you do need to replace it. It's letting you know that something is wrong with your dryer.
How Buying OEM Parts Can Save You Time and Money
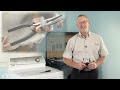
Part Videos
Replacing your Amana Dryer High Limit Thermal Fuse
Keep searches simple. Use keywords, e.g. "leaking", "pump", "broken" or "fit".
Sorry, we couldn't find any existing reviews that matched. Try using some different or simpler keywords.
★★★★★
★★★★★
Will R - October 25, 2019
Verified Purchase
Easy fix
Dryer wouldn’t start, but buzzed slightly when the start button was pushed. High limit thermal fuse was a possible issue. Checked the fuse and it was bad. Got the new part in a few days and now the dryer is happy again. Easy to change out.
★★★★★
★★★★★
Scottie S - March 26, 2019
Verified Purchase
Fast Delivery
The part was exactly what I needed, and it was very easy to diagnose my problem using the website. The parts I ordered were delivered several days earlier than I expected as well! Thank you for a great service experience!
★★★★★
★★★★★
Patrick D - January 24, 2019
Verified Purchase
Saved ol' Betsy.....
Our beloved dryer, affectionately named Betsy for her calm demeanor was dead.....flatlined, if you will. My wife screamed in horror as Betsy showed no life. Resigned to the fact that Betsy may meet her maker, I set upon the arduous task of bringing her back to life. A heating coil and thermal fuse later, Betsy sprang back to life. Tears of joy welled in my wife's eyes as an old friend whispered, I'm here for you. Betsy has lived a long life... she may now outlive us all!
★★★★★
★★★★★
Jerri H - December 13, 2018
Verified Purchase
2 for 2 out of the ballpark
This is my second purchase using their “repairman” I check the symptoms then use the percentages to guide my purchases. These items cost half of a service call! The staff all all really helpful also!
Jerri
★★★★★
★★★★★
Kevin T - December 3, 2018
Verified Purchase
Great replacement part
This part is exactly what I itdeeed.
★★★★★
★★★★★
Randy S - October 8, 2018
Verified Purchase
We have heat
Part was delivered promptly and I was able to complete the repair
★★★★★
★★★★★
STANLEY D - September 5, 2018
Verified Purchase
Great experience
I wrote an email to you as follows: I received subject order today. That was before I expected it. All was well and all parts were as represented and packed well.
I thank you for a job well done, including your website that makes it easy to locate the parts and I appreciate the pictures of the parts.
Good job, I will call on you for any additional pars I need and I will pass on your company to any friends with a need for your products.
★★★★★
★★★★★
Tommy F - September 1, 2018
Verified Purchase
Easy Repair
did some research on what might have caused my dryer failure, the high limit Thermal fuse was the problem, followed the video instruction as shown, and was and easy repair. Dryer works great again. Didn't have to buy the wife a new one. Thanks
★★★★★
★★★★★
DOUG R - August 22, 2018
Verified Purchase
part didn't work
Purchased the part installed it and didn't work. Removed the part and checked it on my OHMs meter and it failed. Sent email to customer service looking for a refund and never received an email back. Very unhappy!!! I have to give 1 Star not by my choice but the system won't let me hit submit with zero stars........
August 22, 2018
I’m sorry to hear you had that experience. We would like the opportunity to fix this situation. I will be sending you an email shortly. Look forward to hearing from you!
★★★★★
★★★★★
Sueann G - August 17, 2018
Verified Purchase
Easy repair
It was an easy fix. Just under a half an hour and dryer is working fine.
< Prev
1
2
Next >
Customer Repair Stories
Average Repair Rating: 3.3 / 5.0, 59 reviews.
What's this?
Sort by:
< Prev
1
2
3
Next >
Search filter:
Clear Filter
Your search term must have 3 or more characters.
Keep searches simple. Use keywords, e.g. "leaking", "pump", "broken" or "fit".
Sorry, we couldn't find any existing installation instruction that matched.
Dryer would not stay running
Using instructions from your website, I was able to remove access covers from my driver & find the pieces that needed to be replaced. It was a simple repair job & now my dryer is working properly again.
I had recently had the low limit thermal fuse replaced for the same problem. About a month later same problem but different fuse. I checked the low limit fuse with an ohm meter and it had continuity. When I checked the High limit fuse it did not, there was infinite resistance meaning it was open and not providing current to the heater ele
... Read morements. Out of concern why the high limit blew, I decided to replace the thermostat as well. As I dissembled the dryer there was an over abundance of lint from years of use. I also notice the drum belt had some chunks missing and decided to replace it since I was removing it anyway. Ordered the parts from Part Select and they arrived in a timely manner as promised. Replaced the defective parts, vacuumed out all the lint and junk that was coating the drive motor and other items. Resembled the dryer and it worked good as new. total cost of $60 in parts, and couple of hours and back in business!
very easy after the learning curve. I ordered this thermal fuse on Friday morning and got it Monday by 11:00 am. I love this kind of service. I will use this company again.
Steven from SAGLE, ID
Difficulty Level:
Very Easy
Total Repair Time:
Less than 15 mins
Tools:
Nutdriver
1 personfound this instruction helpful.
Was this instruction helpful to you?
Thank you for voting!
Threading the drive belt around the motor and tensioner pully.
I followed the instructions and it went very well. The only confusing part was the drive belt for the tumbler barrel I just had to visualize the threading arrangement to get it right. Much like a car fan belt.
Steven from STANCHFIELD, MN
Difficulty Level:
Really Easy
Total Repair Time:
30 - 60 mins
Tools:
Nutdriver, Pliers, Screw drivers
1 personfound this instruction helpful.
Was this instruction helpful to you?
Thank you for voting!
Dryer-off and on heat then no heat.
Most of the issue was in trying to determine why the dryer had heat then no heat off and on. The timer was running thru all the cycles, so for the time being dismissed that as the problem. Began to test the various thermostats and thermal fuse and the heating element with ohm meter for continuity. Also, gave the heating element a close vi
... Read moresual exam for any breaks in the coils. Confusingly, all these parts tested as OK. Re-installed the heating element, cycling thermostat and high limit thermal fuse. After re-connecting power plug, ran dryer and had heat for 3 loads. Then heat went out again. After 'educating myself' some more on this site , decided to purchase a new timer (had to buy elsewhere), Cycling Thermostat, High LImit Thermal Fuse even though the original parts tested Ok, because the fact remained the dryer was still not heating all the time. The cost of all these parts was very minimal versus calling out a repairman (labor cost), and the repair video's has for each part simplifies the tear down and re-install. In the meantime, also ordered a new belt from this site after discovering this one was cracked in several places. The new parts arrived in a day and half after ordering. Installed all the new parts, then finally the new timer last. Dryer now working perfectly! I found this website to be Very user friendly. They make it simple to find your parts and help you make a diagnosis as to what parts need replacing. Could not have done it without them!
High limit thermal fuse blew because of lint buildup in discharge vent pipe
Opened things, saw lint buildup, cleaned inside of dryer, then cleaned entire vent discharge system, put new thermal fuse back, turned on dryer and heard metal to metal, opened dryer back up, saw missing glides (both gone). Ordered what I thought were 2 glides, 2 days later 1 showed, called and was told I didn't "update" when I changed or
... Read moreder info (parts supplier cautioned to replace 2, should only sell in pairs) so then had to wait again for 2nd glide to show up. Replaced them today and noticed dried clothes are now cooler when finished. Will note in future if clothes are warmer, clean ductwork.
Read less
Gary from PORTSMOUTH, OH
Difficulty Level:
Easy
Total Repair Time:
1- 2 hours
Tools:
Nutdriver, Socket set
4 of 4 peoplefound this instruction helpful.
Was this instruction helpful to you?
Thank you for voting!
Dryer would not start
After taken apart to replace high limit thermostat fuse and limit thermostat took about 5 minutes. Also our dryer always ran very hot no matter what setting it was on. Replaced idler pulley wheel also because seemed not to rotate very well. Put all back together and worked perfect. Ran and does not overheat now.
The video on the site was very helpful in completing the repair. The one suggestion I woul make is to check the actual heating element before ordering the Thermal Fuse. In my case the new fuse did not work because there was a break in the actual heatng coils. I replaced the heating element and it works fine now.
Ronald from Fairfax, VA
Difficulty Level:
Easy
Total Repair Time:
30 - 60 mins
Tools:
Nutdriver, Pliers
0 of 1 peoplefound this instruction helpful.
Was this instruction helpful to you?
Thank you for voting!
< Prev
1
2
3
Next >
Questions and Answers
Ask our experts a question about this part and we'll get back to you as soon as possible!
21 questions answered by our experts.
Sort by:
< Prev
1
2
3
Next >
Search filter:
Clear Filter
Your search term must have 3 or more characters.
Keep searches simple. Use keywords, e.g. "leaking", "pump", "broken" or "fit".
Sorry, we couldn't find any existing answers that matched.Try using some different or simpler keywords, or submit your new question by using the "Ask a Question" button above!
Tom
September 30, 2017
Dryer suddenly won't turn on, power is getting to it. Is the 5 buck fuse you sell the only fuse that i should replace? Is there anything else that could cause this?
For model number ADE7005AYW
Hi Tom,
Thank you for your question. It is more than likely your fuse that is the issue. You can test it with a multi meter to double check. You can also test your thermostats and your door switch as well. Those parts can also cause this issue as well. Good luck with your repair.
7 people found this helpful.
Was this helpful?
Thank you for voting!
Jason
October 11, 2017
If i push the start button it starts but as soon as i let go it stops. If i push and hold the button it runs while i hold it but will quit while holding. Do you no the problem? Thanks
For model number SDE305DAYW
Hi Jason,
Thank you for your inquiry. It sounds like it could be an issue with the start switch, part number 33001618. If so this part has been discontinued by Whirlpool and you will need to contact them for a replacement. Their telephone number is 1-866-698-2538. If this is not an issue \here are some parts that you will need to check to see which one is causing the issue. You will need to check the door switch, the high limit thermal fuse, the door catch and strike, the motor, the high limit thermostat and the belt. I hope this helps. Thank you and have a great day!
3 people found this helpful.
Was this helpful?
Thank you for voting!
Dana
February 4, 2018
Dryer ran for half a day, while i was not at home. I started it before i left and when i returned it was still running. The sensor heat anti-wrinkle setting had advanced about 1/2 inch or a 1/4 of the cycle line. There was no heat inside the drum either. Ideas? 3 years ago we replaced the felt, one of the sensors, and the belt. I’ve turned the breaker on and off to verify there was no issue with power to the electrical outlet.
For model number MDET336AYW
Hello Dana, Thank you for your inquiry. We would recommend checking the following parts to fix your issue: high limit thermal fuse, heating element, limit thermostat, cycling thermostat, door switch kit and the timer. You can test the parts with a multimeter. If you are unfamiliar with how a multimeter functions, there are YouTube videos available to assist you. Hope this helps!
3 people found this helpful.
Was this helpful?
Thank you for voting!
Chris
April 19, 2018
At what temperature does this switch open?
Hi Chris,
Thank you for your question. Unfortunately the manufacturer has not given us that information. However, when you test this part disconnected from the machine with a multi meter, it should read 0 ohms to be working correctly. I hope that helps. Good luck with your repair.
3 people found this helpful.
Was this helpful?
Thank you for voting!
Laura
February 20, 2023
Dryer gets super hot at the end of the drying cycle. All sensors, fuse, etc have continuity. Bought a used timer. Still has the issue. Double checked wiring as per wiring diagram.
For model number Amana Le8317w2
Hi Laura, thank you for reaching out to PartSelect. If your dryer gets extra hot at the end of the drying cycle and your fuse and sensors have continuity, the issue you are facing is a malfunctioning limit thermostat, part number PS11748479. This thermostat acts as a safety mechanism that keeps the dryer from overheating. With this thermostat, a dryer's heating element will cut out if the internal temperature reaches 225 degrees Fahrenheit. The heating element will kick back in when the temperature drops to 185 degrees Fahrenheit - a differential of 40 degrees. We hope this information is helpful!
My dryer is turning itself off before the cycle is complete. I replaced the high-limit thermostat but did not correct the problem. Should I replace the thermal fuse or the cycling thermostat, or both?
For model number LEA10AW
Hello Jerry,
Thanks for your question. There are a few parts you will want to test for continuity using a multimeter. Replace any that do not show continuity. Test the thermal fuse, motor, limit thermostat, and the door switch. You may also want to examine the door catch kit for any signs of wear and tear.
I hope this helps.
Replaced the thermal fuse, but the dryer still will not come on. Any suggestions??
For model number MDET336AYW
Hello Ralph, thank you for inquiring. For this symptom you will want to replace either the Door Switch Kit part PS1964648, the Door Catch Kit part PS2162263, or the Motor Assembly part PS11739459. We hope this helps.
1 person found this helpful.
Was this helpful?
Thank you for voting!
Tim
July 24, 2019
Would this part prevent my dryer from heating.
For model number Mde3757ayw
Hello Tim, Thank you for the question.The fuse is meant as a backup to a high limit thermostat, this fuse is typically set to trip at a higher temperature than that of a high limit thermostat. This is a one-time use fuse, so when it does trip, you do need to replace it. It's letting you know that something is wrong with your dryer and it will prevent it from drying. The high limit thermostat should be replaced at the same time and the cabinet of the appliance and the vent and vent pipe should be cleaned to ensure proper air flow. Hope this helps!
1 person found this helpful.
Was this helpful?
Thank you for voting!
Roger
March 13, 2020
Dryer will not run when you press the start button, it has power and you press the button it just makes a noise. Do you know what it could be?
For model number MDE508DAYW
Hi Roger, Thank you for your question. It is more than likely your fuse that is the issue. You can test it with a multi meter to double check. You can also test your thermostats and your door switch as well. Those parts can also cause this issue as well. Good luck with your repair.
1 person found this helpful.
Was this helpful?
Thank you for voting!
Tim
July 24, 2019
There is a black wire on the inside back wall that has its insulation burned off and the wire broke off at the connection. It was connected to what looked like a porcelain something on the back wall below and to the left of the high limit thermal fuse of which i asked a question about earlier.I traced the wire back to the wiring harness on the motor.What could’ve caused the wire to burn off like that. I’m thinking that this could be the reason i’m getting no heat.
For model number MDE3757AYW
Hello Tim, Thank you for the question. The part that is next to the Fuse is the Limit Thermostat, PartSelect Number PS11748479. Hope this helps!


 – Part Number: WPY504514")


 – Part Number: WPY503978")