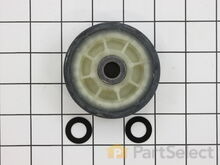
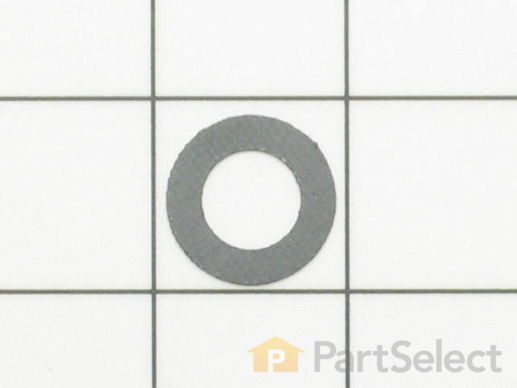
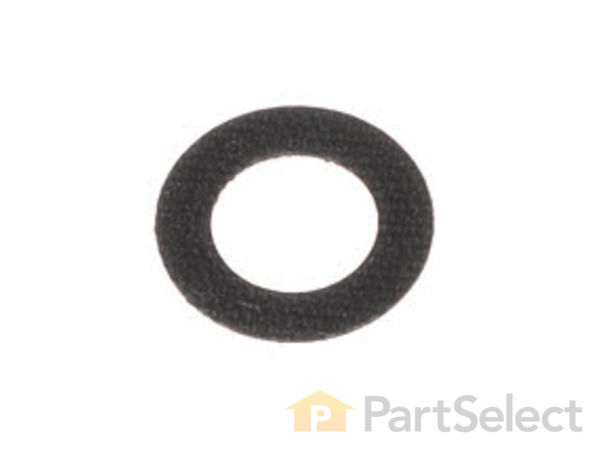
Part Location Diagram of WP312535 Whirlpool Drum Roller Shaft Washer
See part 8 in the diagram
Replacing your Maytag Dryer Drum Roller Shaft Washer
( Grid squares measure 1x1 inch )
Customer Service Representative

Get in touch, we're here to help!

Daily 8am - 9pm EST

customerservice@partselect.com

Drum Roller Shaft Washer WP312535

★★★★★
★★★★★
1 Review

Rated by 33 customers 

Easy 

1- 2 hours 

Ratings submitted by customers like you who bought this part.

$ 13.79
  In Stock
Get FREE EconoShip on orders over $100! T&C apply

Get this part fast! Average delivery time for in-stock parts via standard shipping: 1.8 days.

PartSelect Number PS11740748
Manufacturer Part Number WP312535
Manufactured by Whirlpool
Product Description

Drum Roller Shaft Washer Specifications

If you notice that your dryer is noisy or will not tumble, then you may need to replace the drum roller shaft washer. This drum roller shaft washer is just under an inch in diameter and is sold individually. It is located on the shaft of the drum roller, in the interior of your dryer. To access the drum roller shaft, you will need to remove the front panel of your dryer, and then remove the drum. Before completing this repair, be sure to disconnect the power source from the dryer. Tools required for this repair include a 5/16 nut driver, a stubby Phillips screwdriver, and a pair of snap ring pliers.
How Buying OEM Parts Can Save You Time and Money

How Buying OEM Parts Can Save You Time and Money

Part Videos

Replacing your Maytag Dryer Drum Roller Shaft Washer

Replacing your Maytag Dryer Drum Roller Shaft Washer
Troubleshooting
This part fixes the following symptoms:
Noisy
This part works with the following products:
Dryer, Washer Dryer Combo.
This part works with the following products:
Maytag, International, Jenn-Air, Crosley.
Part# WP312535 replaces these:
AP6007631, 3-10413, 3-12535, 3-13347, 310413, 312535, 313347, W10116753, Y313347
Back to Top
Customer Reviews
Average Rating:
★★★★★
★★★★★
1 Review
5.0
Filter By Rating:
  • 5 Stars
    1
  • 4 Stars
    0
  • 3 Stars
    0
  • 2 Stars
    0
  • 1 Star
    0
Sort by:
  • 1
Sorry, we couldn't find any existing reviews that matched. Try using some different or simpler keywords.
  • 1
Customer Repair Stories
 Average Repair Rating: 2.8 / 5.0, 33 reviews. What's this?
Sort by:
  • 1
  • 2
  • 3
Sorry, we couldn't find any existing installation instruction that matched.
Dryer would not start
This website is awesome. After imputing my dryer model I was able to select from the list if symptoms my issue...Dryer will not start. From there was percentage of issues that would cause my issue. After determining it was the motor (after 25 years who would have thought that!!!). In this process I discovered other non related issues that i should attend to. So I basically rebuilt the dryer and it worked right away. I am retired military and in the tax preparation/representation business now, so a lot of this was new to me. The detailed instruction and especially the videos provided foolproof methods to complete each of the repairs. It was a little time consuming but very easy to complete. I did gain some new tools and diagnostic equipment that will come in handy in the future. Now I am going to tackle my daughters dishwasher. Thank you Parts Select and Steve (on the videos). John Beazle
Other Parts Used:
Roller Shaft Motor Pulley Front or Rear Drum Felt Seal Drum Roller Shaft Washer Drive Motor - 60Hz 115V Front Glide Kit Drum Support Roller Kit
  • John from COHUTTA, GA
  • Difficulty Level:
    Easy
  • Total Repair Time:
    More than 2 hours
  • Tools:
    Nutdriver, Pliers, Screw drivers, Socket set, Wrench set
6 of 12 people found this instruction helpful.
Was this instruction helpful to you?
Thank you for voting!
noisy
replaced
Other Parts Used:
Roller Shaft Drum Roller Shaft Washer Front Glide Kit Drum Support Roller Kit
  • Ray from MUKWONAGO, WI
  • Difficulty Level:
    A Bit Difficult
  • Total Repair Time:
    More than 2 hours
  • Tools:
    Nutdriver, Socket set
1 of 2 people found this instruction helpful.
Was this instruction helpful to you?
Thank you for voting!
Here are a couple of tidbits to add to the excellent instructions already here.
1) I replaced my idler wheel because the bracket was flopping about. However, so did the new one. Apparently it's engineered in, as the idler wheel is self-centering. The play allows for some leeway in placement of the tumbler belt on the tumbler. 2) The ribbed side of the tumbler belt should face away from the tumbler; the flat side rides on the tumbler surface. One of the videos had this backward I thought. 3) I put white lithium grease on the white friction block on the idler wheel bracket as there appeared to have been grease on the old one. I never could get clear direction on whether the drum roller and idle wheel shafts should be lubricated. I opted to leave them dry as they are plain bearing and there is no service interval specified for them. My dryer is 35 years old (go, Maytag!) and never was lubricated by me. As I can't imagine any factory lubrication would last that long I conclude they should be left dry. Just my guess though. YMMV. 4) it should be obvious, but the idler wheel is best serviced through the access panel on the rear of the dryer. 5). If you're replacing the drum rollers, you really need snap ring pliers. Mine were broken so I struggled for a long time removing the nuts on the roller shafts blind. Then I went out afterward and bought the pliers at AutoZone. Go figure. 6) unless you've got the right size stubby Phillips screwdriver, it's a lot easier to get the dryer face panel off if you prop the front of the dryer up on a wood block for clearance. 7) I thought the screw attaching the idler pulley bracket to the frame was rounded off because I kept turning it and nothing happened. In fact, the flopping of the bracket had destroyed some of the screw threads over time so they had no purchase. I used a screwdriver to lever the screw head away from the frame so that the remaining threads could track and that finally got it; 8) Finally, don't buy the two drum roller shaft fiber washers for $22 separately as I did. They are include in the package with the new rollers.
Other Parts Used:
Tumbler and Motor Belt Roller Shaft Drum Roller Shaft Washer Front Glide Kit Drum Support Roller Kit
  • Chylly from WINCHESTER, MA
  • Difficulty Level:
    A Bit Difficult
  • Total Repair Time:
    More than 2 hours
  • Tools:
    Nutdriver, Pliers, Screw drivers, Socket set
1 person found this instruction helpful.
Was this instruction helpful to you?
Thank you for voting!
noisy MAYTAG DRYER ,LDE4000ACW,SN A3104842FF MFG NEWTON,IOWA
Tear down completely and clean.Look at all parts for wear an flaws,mic several parts.First teardown took several hours. The next time I can repair in two hours.The dryer is very quiet,no vibration.
Other Parts Used:
Tumbler and Motor Belt Roller Shaft Drum Roller Shaft Washer Front Glide Kit Drum Support Roller Kit
  • Sam from FRANKLIN, TN
  • Difficulty Level:
    Really Easy
  • Total Repair Time:
    More than 2 hours
  • Tools:
    Nutdriver, Screw drivers, Socket set
1 person found this instruction helpful.
Was this instruction helpful to you?
Thank you for voting!
Loud squeak while running, mostly at the beginning of run.
Unplug dryer, many exposed wires inside. Replace rollers, remember to order two, since there is one on each side for drum support. Use small amount of a good long term oil to help give the drum rollers added friction release. The belt was replaced since it was worn and the added cost is minimal compared to the repair. The shafts were actually in good shape, but since I ordered one I did install it. Be sure to clean up the shafts if left unreplaced since they will be dirty from priro use. The inside of dryer has various sharp edges so I recommend wearing protective gloves to prevent a nasty surface cut.
Other Parts Used:
Roller Shaft Tumbler and Motor Belt Drum Roller Shaft Washer Drum Support Roller Kit
  • Stanley from Chattanooga, TN
  • Difficulty Level:
    A Bit Difficult
  • Total Repair Time:
    30 - 60 mins
  • Tools:
    Pliers, Screw drivers, Wrench (Adjustable), Wrench set
0 of 1 people found this instruction helpful.
Was this instruction helpful to you?
Thank you for voting!
One of the roller shafts was worn
Replaced both rollers,shafts, bearings and snap rings.
Other Parts Used:
Roller Shaft Drum Roller Shaft Washer Drum Support Roller Kit Retaining Ring
  • William from Springfield, OH
  • Difficulty Level:
    Really Easy
  • Total Repair Time:
    15 - 30 mins
  • Tools:
    Nutdriver, Screw drivers
3 of 4 people found this instruction helpful.
Was this instruction helpful to you?
Thank you for voting!
Intermittent Squealing sound ..Getting worse
First of all I looked at the Video, which made it a lot easier. I decided to replace both rollers, the idler pulley, the idler bracket, and the belt so I should be fixed for a while. Installing the parts was not that hard. When installing the drum turn it by hand to make sure their are no binds, this will also insure the belt is not twisted and the felt around the drum is installed correctly. The hardest thing was getting all the panels back together with the right screws. Use a small screwdriver to line up the holes. Parts Select resources on their web site make it easier for the handyman to complete this repair. Parts were in Stock, at a fair price, and received in two days on normal delivery. I will use you again and give you a 10 on your service....
Other Parts Used:
Idler Arm and Shaft Idler Pulley Wheel and Bearing Roller Shaft Multi Rib Belt - 91-5/8 Inches Drum Roller Shaft Washer Drum Support Roller Kit Retaining Ring
  • Ralph from Eight Mile, AL
  • Difficulty Level:
    A Bit Difficult
  • Total Repair Time:
    1- 2 hours
  • Tools:
    Screw drivers, Socket set, Wrench (Adjustable)
0 of 1 people found this instruction helpful.
Was this instruction helpful to you?
Thank you for voting!
Made loud noise when tumbling "ALL LOADS"
We went to Lowe's to look at a new washer/dryer set. We told the sales lady what our dryer was doing, she said she had that problem before and told us it was probably the rollers had gone bad. The next morning, 5 a.m my wife couldn't sleep so she took the dryer front off, pulled out the tumbler and found the rollers, the lady was right . My wife already had your web site pulled up on the computer so I could look to see what parts I needed. We called to order our parts, we were told it would be 2-5 days before they would get here, they were here the NEXT DAY!!! That was awesome!! I put the new roller on, my wife put everything back together, she turned the dryer on and.... it was so quiet we weren't sure if it was on so I opened the door and held the button to watch it turning, peacefully. Thank you all and the sales lady at Lowe's for saving us $1200. We did our repair with your parts and only spent $85.00.
Other Parts Used:
Roller Shaft Screw Multi Rib Belt - 91-5/8 Inches Tall Baffle Drum Roller Shaft Washer Drum Support Roller Kit
  • Kenneth from Purdy, MO
  • Difficulty Level:
    Really Easy
  • Total Repair Time:
    30 - 60 mins
  • Tools:
    Screw drivers, Wrench (Adjustable)
12 of 470 people found this instruction helpful.
Was this instruction helpful to you?
Thank you for voting!
Loud noise
My first time repairing a clothes dryer. viewed online demonstration on "how to remove parts for repair. Followed these instructions and did not have a problem finishing the job.
Other Parts Used:
Tumbler and Motor Belt Drum Roller Shaft Washer Drum Support Roller Kit
  • joseph from greer, SC
  • Difficulty Level:
    Really Easy
  • Total Repair Time:
    1- 2 hours
  • Tools:
    Nutdriver, Screw drivers, Socket set
0 of 1 people found this instruction helpful.
Was this instruction helpful to you?
Thank you for voting!
the dryer started sqealing really badly, did not know how long it would last. has been doing this for several months.
Took the dryer front panel off, loosened the drum, but not all the way out. Removed and checked the old rollers and shafts. Then put all the new shafts and rollers in. Put the drum back in place and front panel. Now it drys without a sound and this is a 25+ year old dryer.
Other Parts Used:
Roller Shaft Roller Shaft Hex Nut Front or Rear Drum Felt Seal Drum Roller Shaft Washer Drum Support Roller Kit
  • Cassandra from Salem, IA
  • Difficulty Level:
    Easy
  • Total Repair Time:
    30 - 60 mins
  • Tools:
    Pliers, Screw drivers, Socket set, Wrench set
0 of 1 people found this instruction helpful.
Was this instruction helpful to you?
Thank you for voting!
  • 1
  • 2
  • 3
Questions and Answers

Ask our experts a question about this part and we'll get back to you as soon as possible!

4 questions answered by our experts.
Sort by:
  • 1
Sorry, we couldn't find any existing answers that matched.Try using some different or simpler keywords, or submit your new question by using the "Ask a Question" button above!
Robin
November 22, 2017
Are these washers the metal wave washer
PartSelect logo
Hi Robin, Thank you for your question. These are fibre washers. There is video listed with the part on our website that you may reference for more information. I hope this helps. Thank you and have a great day!

6 people found this helpful.

Was this helpful?
Thank you for voting!
Geoff
November 18, 2021
Hi. I just received my replacement drum rollers. But I noticed that both included washers are flat. The original rollers had a "spring" type flexible convex washer on the back side of the roller against the machine to keep it away from the metal back wall. In any event, one of the spring type washers was completely chewed up when I removed the original wheel. Is it ok to use a regular flat washer like the ones that came with the new rollers in place of the spring type bent flexible washer? I don't see the spring type flexible washer on the parts list. Am I making sense? Please let me know asap so I can get the dryer going again. Thank you!
For model number MDG9606AWW
PartSelect logo
Hello Geoff, Thank you for the question. Maytag has made updates to the Drum Support Roller and can now be used with the Flat Washers that are included. We hope this helps!

Was this helpful?
Thank you for voting!
Dennis
December 28, 2022
Dryer will not start. Only after approximately 30 minutes did it start and run for a short while five or 10 minutes. After trying to restart it for several minutes will not start. possible overheat?
For model number MDE9420AYW
PartSelect logo
Hello Dennis, thank you for contacting us. Please inspect the door switch, part number PS1964648, and make sure it is not shorted. If this is not the case the issue is probably related to a faulty thermal fuse, part number PS11741067, a defective high-limit thermostat, part number PS11740647, or a problematic cycling thermostat, part number PS11740684. Please check these parts to pinpoint the faulty one. Customer service is available 7 days a week if you require assistance placing an order. Thanks again for reaching out!

Was this helpful?
Thank you for voting!
Related Parts:
Richard
March 23, 2023
After replacing a drum roller I tested the dryer & it was fine. I installed it in its spot and now it dries cold. Where do I go from here?
For model number LDE9304ASC
PartSelect logo
Hello Richard, thank you for contacting us. Based on our research, we would recommend checking the thermal fuse, part number PS11740687, and the heating element, part number PS11740682. If the issue still occurs, you may need to check the high-limit thermostat, part number PS11740647, and the cyclic thermostat, part number PS11741406. We hope this solves your problem!

Was this helpful?
Thank you for voting!
Related Parts:
  • 1
You May Also Need ?
Model Cross Reference
This part works with the following models:
PartSelect Number: PS11740748
Manufacturer Part Number: WP312535
Brand
Model Number
Description
Maytag
601C
Dryer - Residential
Maytag
602W
Dryer - Residential
Maytag
61C
Dryer - Residential
Maytag
640C
Dryer - Residential
Maytag
640W
Dryer - Residential
Maytag
65C
Dryer - Residential
Maytag
66CB
Dryer - Gas
Maytag
67C
Dryer - Gas
Maytag
701C
Dryer - Residential
Maytag
70C
Dryer - Residential
Maytag
740C
Dryer - Residential
Maytag
741C
Dryer - Residential
Maytag
742C
Dryer - Residential
Maytag
75C
Dryer - Residential
Maytag
76CB
Dryer - Gas
Maytag
77C
Dryer - Gas
Crosley
CDE4205AYJ
Dryer - Residential
Crosley
CDE4205AYW
Dryer - Residential
Crosley
CDE4205AZJ
Dryer - Residential
Crosley
CDE4205AZW
Dryer - Residential
Crosley
CDG4205AWJ
Dryer - Residential
Crosley
CDG4205AWW
Dryer - Residential
Maytag
DE106
Dryer - Electric
Maytag
DE107
Dryer - Electric
Maytag
DE110
Dryer - Electric
Amana
DE16CA
Dryer - Electric
Amana
DE16CM
Dryer - Electric
Amana
DE16CT
Dryer - Electric
Maytag
DE18CA
Dryer - Electric
Maytag
DE18CM
Dryer - Electric
Customer Service Representative

Get in touch, we're here to help!

Daily 8am - 9pm EST

Contact Customer Service