The plastic injector nozzle is used in washers and dryers. It is 3 inches long and is white in color. If your washer is leaking water, replacing the nozzle could solve your problem. For this repair project, you will need a 1/4 nut driver, 3/8 socket with extension, and a stubby Phillips screwdriver. To begin the repair, first remove the front panel by removing screws from the bottom end of both sides. Next, locate the two bolts in the interior of front panel and remove both. Pull bleach dispenser hose off before removing the top cover of washer. Remove clamp that holds the hose to the valve assembly to access the nozzle inside rubber valve and replace with new nozzle. Refer to the instructions provided by the manufacturer for further guidance.
How Buying OEM Parts Can Save You Time and Money
Part Videos
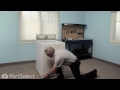
Replacing your Maytag Washer Plastic Injector Nozzle
Troubleshooting
This part fixes the following symptoms:
Leaking
This part works with the following products:
Washer, Washer Dryer Combo.
This part works with the following products:
Maytag, Jenn-Air.
Part# WP213015 replaces these:
AP6005818, 2-13015, 213015
Customer Reviews
Average Rating:
★★★★★
★★★★★
7 Reviews
4.7
Filter By Rating:
5 Stars
6
4 Stars
0
3 Stars
1
2 Stars
0
1 Star
0
Sort by:
< Prev
1
Next >
Search filter:
Clear Filter
Your search term must have 3 or more characters.
Keep searches simple. Use keywords, e.g. "leaking", "pump", "broken" or "fit".
Sorry, we couldn't find any existing reviews that matched. Try using some different or simpler keywords.
★★★★★
★★★★★
Charlie D - June 14, 2019
Verified Purchase
Easy Repair
The part was what was needed and it came fast. My washer is working great!
★★★★★
★★★★★
Stanley D - June 4, 2019
Verified Purchase
Perfect fit
Got the part for 25 year old washing machine. Fit perfect, watched video snap done. I like parts select
★★★★★
★★★★★
Eliane W - May 22, 2019
Verified Purchase
Easy Repair
I loved this website! It made it really easy to find and purchase the right part. And it came really fast, my friend installed it and my washing machine is working again..
★★★★★
★★★★★
Stan W - May 16, 2019
Verified Purchase
This, and injector tube solved our problem
Maytag washer was leaking, had repair man out twice and still not fixed. PartSelect saved me a new washing machine for less than $30.00 and 15 minutes of labor.
★★★★★
★★★★★
William V - February 10, 2018
Verified Purchase
Had leaks after repair and replacement of parts
My first parts order did not arrive for 11 days. The parts re-order actually arrived the same day that the first order arrived. When I talked to the USPS bout the delivery status, they acted like UT was on another planet. I installed the injector sleeve, the plastic injector, in a new injector jacket per instructions. Subsequently, I had a leak at the inlet to the injector jacket. I disassembled, re-assembled and still had a leak. I replaced the original clamp with a after market wider clamp and the leak stopped. However, now I was getting water out of the jacket openings. I checked the outlet hose and discharge path to the tank suspecting that there may be a restriction there. but non found. Again, I disassembled and reassembled the parts, but still had the leak from the injector jacket. Since my machine was a simple machine with no inline addition, i.e., bleach, etc., required, I removed replaced the injector bracket with a 1/2" x 2-1/2 galvanize nipple. I left the injector sleeve and plastic injector inline to provide backpressure to the inlet control valves. All leaks stopped and the water flow is as should be. The washing machine is working fine now. .
★★★★★
★★★★★
Barbara K - February 6, 2018
Verified Purchase
Easy repair
Thank you for fast shipping and correct parts!
★★★★★
★★★★★
Christopher M - February 2, 2018
Verified Purchase
I get to keep my Maytag a while longer!
This 2-piece leak fix worked great. No more injector leaks/no need to replace the entire injection hose. Take notice of the direction/order of the old parts before you pull them out.
< Prev
1
Next >
Customer Repair Stories
Average Repair Rating: 3.5 / 5.0, 57 reviews.
What's this?
Sort by:
< Prev
1
2
3
Next >
Search filter:
Clear Filter
Your search term must have 3 or more characters.
Keep searches simple. Use keywords, e.g. "leaking", "pump", "broken" or "fit".
Sorry, we couldn't find any existing installation instruction that matched.
Water leaking
I'm a 70 year old woman. I followed all instructions provided by "Steve" from Partselect video. The video was very well presented and allowed me to fix the leaking problem myself. Watch the video...you can do it.
Used a Phillips head screwdriver to allow removal of the front panel. Used a socket set to allow tipping back of the top panel of the washer, to access the injector assembly. Used nut driver to loosen hose clamp. Replaced old injector nozzle and valve. Inserted plastic injector nozzle into rubber injector valve, ensuring that the nozzle w
... Read moreas completely inserted into the valve. VERY IMPORTANT: Moistened the rim of the rubber injector valve, and gently inserted it into the hose, to ensure that the valve did not unroll from the nozzle during insertion into the hose. I found this caused a more serious leak on my first attempt at replacing the injector assembly. Inserted the hose and injector back into injector sleeve and retightened the hose clamp. Then repositioned the top panel, and replaced the front panel.
Waher was leaking at the injecotr valve at the top left of the washer.
The three parts fit together to form one unit. As has been mentioned here already I'm not sure what purpose they serve. I'm also not sure how replacing them stopped the leak but it did. If it had not stopped I think I could have bypassed the valve entirely with a piece of hose or PVC and had it work just fine.
Leak coming from underneath washer. Source unknown
Removed front panel ( 2 swrews). Turned off water to washer. Unplugged power cord. Removed two screws holding down top of washer. Located source of leak. It was the injector valve. Removed hose clamps. Removed defective injector valve (2 parts). Installed now injector valve (2 parts) as shown in video. Tightened hose clamps. Rep
... Read morelaced top cover and front panel. Done
Minor water leakage visible on floor on left side of washing machine.
I opened up the front panel of the washing machine and noticed that water was leaking from a hose along the top left of the machine. I ordered a new plastic injector nozzle and rubber injector valve. The parts arrived in 2 days. Switchout of the parts took less than 5 minutes. Tested it out; the leak was gone. Total cost $22.62. Mo
... Read moreney well spent!
Ask our experts a question about this part and we'll get back to you as soon as possible!
2 questions answered by our experts.
Sort by:
< Prev
1
Next >
Search filter:
Clear Filter
Your search term must have 3 or more characters.
Keep searches simple. Use keywords, e.g. "leaking", "pump", "broken" or "fit".
Sorry, we couldn't find any existing answers that matched.Try using some different or simpler keywords, or submit your new question by using the "Ask a Question" button above!
Wayne
October 23, 2017
Water coming out of the bleach dispenser tube.......pouring on floor......what is the problem?.......is the injector tube in the tube?
For model number Maytag A512
Hi Wayne,
Thank you for your question. I would suggest taking a look at your tube to see if there are any holes or tears which could cause the leaking. If there are, you would have to replace the tubing. Good luck with your repair.
3 people found this helpful.
Was this helpful?
Thank you for voting!
Joan
April 5, 2023
Is the plastic injector nozzle really necessary? What is it's purpose. My husband bypassed it and the washer no longer leaks. He doesn't think the part is necessary.
For model number LA212S
Hi Joan, thank you for contacting us. The purpose of the injector nozzle is to pressurize the water to deliver the proper amount of water to the required location. It is part of the appliance. We hope this information is useful!
Was this helpful?
Thank you for voting!
< Prev
1
Next >
✖
Ask a Question
Ask our experts a question on this part and we'll respond as soon as we can.