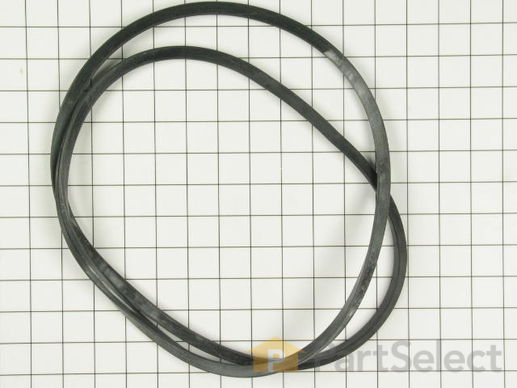
Outer Tub Clamp Seal WP211232
Rated by 2 customers
A Bit Difficult
1- 2 hours
Ratings submitted by customers like you who bought this part.
Get this part fast! Average delivery time for in-stock parts via standard shipping: 1.8 days.
Outer Tub Clamp Seal Specifications

How Buying OEM Parts Can Save You Time and Money
-
5 Stars 1
-
4 Stars 0
-
3 Stars 0
-
2 Stars 0
-
1 Star 0
- < Prev
- 1
- Next >
- < Prev
- 1
- Next >
- < Prev
- 1
- Next >
-
JIM from PINE RIVER, MN
-
Difficulty Level:A Bit Difficult
-
Total Repair Time:30 - 60 mins
-
Tools:Nutdriver, Screw drivers
Got clamp from partselect.com in 1 day which was great.
Removed two PH screws from front cover then pulled bottom of front cover outward and down to remove.
Caution for those doing this: take a piece of 220 or 240 grit paper and sand all the edges of ... Read more the clamp. Trying to put it on without doing so will result in countless paper cuts in hands.
Before putting new clamp on be sure to use either some soap or silicon lube on the rubber V seal between upper and lover tub.
Also need to put some 1/4" to 3/8" spacers at three equally spaced places beneath the upper tub and the lower tub. If this isn't done the upper tub will drop down too far inside the lower tub and the inner lower tub, when it starts to spin, will rub on the underside of the upper tub = cause the main drive belt to smoke and tub to "freeze up"
Spacers I used were simply 3 pieces of multi strand sheathed electrical wire 3/8" so that I could bend them down at an angle and put them out once clamp was in place. Wire pieces need to be about 4-5" long.
Assemble one bolt in clamp and thread around tub in CCW direction.
Position one bolt of the clamp in right rear corner. this is important so that when tub goes out of balance, there's clearance for the clamp bolts and they don't contact the cabinet.
Make sure before threading clamp arount tub that the screw that will end up in the front left corner has a hex head on it so that you can apply some clamping "muscle" with a socket wrench.
I had trouble getting the front left screw inserted in the clamp (its only 2" long) so I used a 3" bolt to make the preliminary connection to pull the clamp semi tight. I planned ahead and got a light wire coat hanger to use as a "tie-tie" in the event that I had to remove the 3" slotted screw to revert back to the 2" hex head screw. Luckily when I removed the 3" screw I was able to quickly pop the 2" hex head back in and tighten completely.
Before putting front cover on, do one load with front cover off to make sure that upper and lower/inner tub don't rub each other.
If ok, turn power back off and put front cover back on.
Note: Would advised ordering the rubber V-seal if you are ordreing the clamp. If you buy the seal there are four bolts in the lid that let you lift the lid to work on the tub, clamp and seal MUCH more easily. Sticky part is getting water fill tube in top left rear disconnected so that new rubber v-seal can slide over tub.
Note also that in order to get to front left lid bolt that single bolt holding diaphram onto front left upright must be removed so as the let diaphram assembly drop away to access front left lid bolt. The two bolts in the rear can be accessed from the top very easily. Also need to disconnect the bleach fill tube in order to lift the lid (right side lifts up to vertical position)
-
George from Fort Myers Beach, FL
-
Difficulty Level:Difficult
-
Total Repair Time:1- 2 hours
-
Tools:Nutdriver, Pliers, Socket set, Wrench (Adjustable), Wrench set
- < Prev
- 1
- Next >
Ask our experts a question about this part and we'll get back to you as soon as possible!
- < Prev
- 1
- Next >

11 people found this helpful.


- < Prev
- 1
- Next >


Manufacturer Part Number: WP211232

Item is in stock and will ship today if your order is placed before 4:00 PM Eastern Standard Time.
If your order is placed after 4:00 PM EST, the in stock items will ship on the next business day.
Item is not in stock and usually ships 3-5 business days from the time you place your order.
Item is not in stock and usually ships 10-15 business days from the time you place your order.
This item is no longer being made by the manufacturer, and cannot be added to your shopping cart.


