This surface element is for ranges.
The surface element supplies the heat to a cooking area on top of the range.
Unplug the range or shut off the house circuit breaker for the range before installing this part. Wear work gloves to protect your hands.
How Buying OEM Parts Can Save You Time and Money
Part Videos
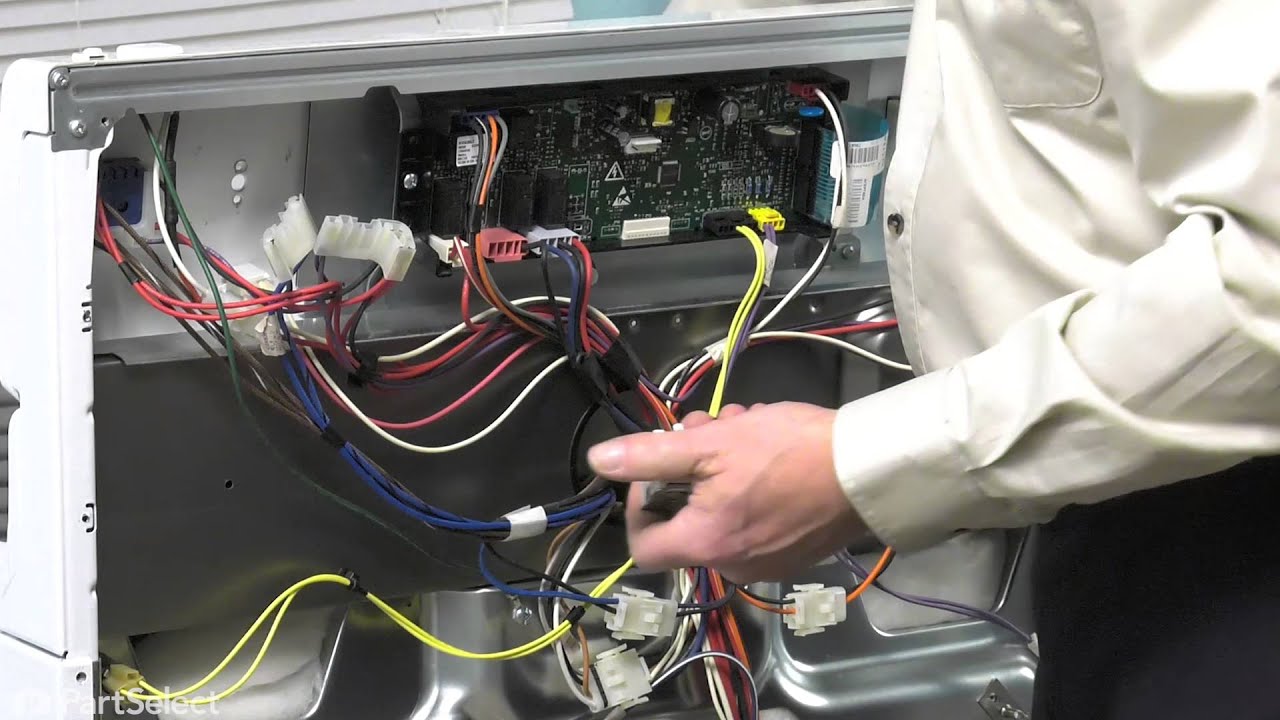
Replacing your KitchenAid Range Burner Element - Right Front
Replacing your KitchenAid Range Burner Element - Right Front
Keep searches simple. Use keywords, e.g. "leaking", "pump", "broken" or "fit".
Sorry, we couldn't find any existing reviews that matched. Try using some different or simpler keywords.
★★★★★
★★★★★
Jon T - March 5, 2022
Verified Purchase
Wiring was a bit different but not difficult to install
I am always careful to replace wires in the same position that they are removed from the old part. The positions did not work for this element. If wired the same, it powered the "hot surface" light full time and put no voltage across the element terminals. I had to meter things to sort it out and remove the cover on the little switch box to understand the logic. After sorting it out, it worked fine. It required reversing two leads.
< Prev
1
Next >
Customer Repair Stories
Average Repair Rating: 3.4 / 5.0, 4 reviews.
What's this?
Sort by:
< Prev
1
Next >
Search filter:
Clear Filter
Your search term must have 3 or more characters.
Keep searches simple. Use keywords, e.g. "leaking", "pump", "broken" or "fit".
Sorry, we couldn't find any existing installation instruction that matched.
Burner was non functioning
Tools required - #2 Phillips and needle nose pliers. (possibly a new spade connector and stripper/crimper) (possibly a multi-meter)
Shut off the power and slide the range forward about 8-10 inches from the wall. It does not need to be completely in the open and perhaps would not need to be moved at all. Some of the parts may
... Read morebe stuck with accumulation of cooking debris and grease, depending on age. Disassembly will be a bit more difficult than a new range because of this. Clean everything up before reassembly.
Open the oven door. Remove two screws, one on either side, below the control panel. Lift and work the control panel loose. It has two bullet shaped posts that engage slots in the front of the range. These are tight. Be patient and work it by lifting and pulling and wiggling the entire control panel. When loose, it will lay down flat supported by all of the wiring harnesses. In our case it did not stress the wires. If concerned, support it somehow.
There is a galvanized bracket that runs most of the width of the range and retains a rubber gasket on the front edge of the glass. Remove two screws that hold this bracket. The bracket easily comes loose, set it aside.
There is a stainless steel trim piece on each side of the cooktop, running from front to back. Each one is held in place by one screw in the front. Remove the screws and the two trim pieces will slide forward and can be removed. Set them aside.
There is a rubber gasket across the front edge of the glass cook surface. Remove it. The cooktop glass can now be lifted and worked loose from the rear rubber gasket that seals across the back edge. Set the cooking surface aside in a safe place. You now have access to the burner elements.
Using the needle nose pliers, work the spade terminal connectors loose from the burner that is to be replaced. Note their positions. The burner is held in place by two spring clips that attach the burner to a galvanized support bar that runs from front to back of the range. A screwdriver can be used to compress each clip allowing a tab to be lifted out of a slot in the galvanized bar. If needed, you can remove one front screw that holds the bar in place and lift it for better access, but while this is not necessary, it allows for a better view of the retainer clips and the tabs that fit into slots in the support bar. With both clips released, the burner is free to be removed.
Our burner clearly had a break in the coil, so there was no doubt about the cause of non-functionality.
The spring clips must be removed and transferred to the new burner. With both burners, face down on a bench, remove the screws that retain the clips to the old burner. Make note of the index numbers at the position of the old clips and place them at the same position on the new burner. This positions the burner when it is mounted so that the terminals are properly positioned to allow the wiring harness to be attached as it was.
With the spring clips in place on the new burner, place the burner back in the range and engage the tabs in the slots on the support bar. They will snap back into place. Reconnect the spade connectors. The burner should now be tested before reassembly. (see later)
In our case, when power was reestablished (but burner control in the off position) the Surface Hot light was on art all times, so we knew something was wired wrong, even though it was re-connected exactly as it had previously been. There are slight differences between the new burners and old burners that apparently impact the wiring. There are no markings on either the old burner or new burner to give clues as to how it should be wired. Neither was there any advice in the instruction sheet that came with the new burner. We tested all of the terminals with the power on (burner off) to determine what voltages were where and removed the cover of the small box to which the terminals are attached. This box contains small switches, and we were able to determine the new wiring scheme. By wiring it exactly as it originally was, we had inadvertently put power to the Surface Hot light full time and the same potential to both sides of the coil so it would not heat. With this corrected, it worked fine.
As always, reassembly is just the reveres of the steps taken to disassemble. It is a bit tricky to place the glass back in the rear gasket. Just be careful and work it into place. Also the front control panel can be challenging. Line up the bullets with the slots and work it into place. It will snap into place when it is close with the aid of the heel of your hand.
One other note. One of the four wires in the harness had a smaller female spade connector which had to be cut off and a new one crimped on in order to fit the new burner.
Because of the wiring logic issue that had to be troubleshot, this took about three hours, which included disassembly and reassembly twice (because we reassembled before testing), figurin
Read less
Jon from Saint Louis, MO
Difficulty Level:
A Bit Difficult
Total Repair Time:
1- 2 hours
Tools:
Screw drivers
1 personfound this instruction helpful.
Was this instruction helpful to you?
Thank you for voting!
Defective Surface Burner Element - 1800W
First discount Ac from wall, then take out 2 screws on the front of the range top and lift up the top of the range surface, then while holding up the surface top take out the front burner and replaced new burner element.Let the surface top down and screw in the two screws. the surface top of the range is hinged so it would be good to hav
... Read moree someone to hold the top up while you replace the element or use a piece of wood to hold it up,this is a piece of cake to repair. would like to thank parts select for their service. I have ordered from them before and they back up their products Robert
Read less
Robert from Daytona Beach, FL
Difficulty Level:
Really Easy
Total Repair Time:
30 - 60 mins
Tools:
Screw drivers
23 of 35 peoplefound this instruction helpful.
Was this instruction helpful to you?
Thank you for voting!
the burner didn't work and digital part too
I used the digital multimeter for measure the voltage in the burner and in the digital part,I saw the electric cables
Eduardo from Lenexa, KS
Difficulty Level:
Easy
Total Repair Time:
30 - 60 mins
Tools:
Wrench set
7 of 23 peoplefound this instruction helpful.
Was this instruction helpful to you?
Thank you for voting!
No heat on burner
Turned off electricity! Pulled stove out -lifted up glass top(carefully) simply removed burned out coil and replaced it with new one.
paul from trumbull, CT
Difficulty Level:
Really Easy
Total Repair Time:
Less than 15 mins
Tools:
Screw drivers, Socket set
34 of 49 peoplefound this instruction helpful.
Was this instruction helpful to you?
Thank you for voting!
< Prev
1
Next >
Questions and Answers
Ask our experts a question about this part and we'll get back to you as soon as possible!
12 questions answered by our experts.
Sort by:
< Prev
1
2
Next >
Search filter:
Clear Filter
Your search term must have 3 or more characters.
Keep searches simple. Use keywords, e.g. "leaking", "pump", "broken" or "fit".
Sorry, we couldn't find any existing answers that matched.Try using some different or simpler keywords, or submit your new question by using the "Ask a Question" button above!
Margaret
September 6, 2017
The large element gets very hot even when set to low. What part will fix this?
For model number GR445LXMS0
Hi Margaret,
Thank you for your inquiry. Usually if the temperature on a burner is set to low and the burner is getting hotter than it should the issue is with the burner switch. I hope this helps. Thank you and have a great day!
3 people found this helpful.
Was this helpful?
Thank you for voting!
Jo
May 3, 2018
Small burner does not work at all, larger burner seems to work ok
For model number ACH100WW
Hi Jo, Thank you for the question. If the burner is not working it can be one of two parts. I suggest testing the switch that controls the burner for continuity and if the switch tests good you would need to replace the element. Hope this helps!
2 people found this helpful.
Was this helpful?
Thank you for voting!
Luis
December 24, 2019
Are the wires goes the same order as the old one?
Hello Luis and thank you for writing.
Yes they will, it is always a good idea to mark them or take a picture before taking it off so you have a reference. We hope this helps. Please contact us anytime if you require further assistance.
1 person found this helpful.
Was this helpful?
Thank you for voting!
Carlos
January 10, 2020
I need to know if it fits my model, Whirlpool, front right. I guess it is about 8 inches diameter. Does it comes just ready to replace or do i need any other small part?
For model number GR465LXLS1
Hello Carlos,
Thank you for your question. Yes, this is the front right burner element that is 8 inches in diameter, and it does not need any additional parts to replace, just remove the old one and replace it with the new one. We hope this helps!
1 person found this helpful.
Was this helpful?
Thank you for voting!
Brian
October 18, 2021
The right front element PARTIALLY heats when dial is on HIGH. What do you suppose is wrong?
For model number YKERC507HW4
Hello Brian, thank you for your question. We have researched the model you have provided, and we would suggest the Burner Element - Right Front, part number PS11764908. We hope this helps!
Was this helpful?
Thank you for voting!
Alexandre
December 27, 2021
I need the front right burner part #
For model number GR445LXMS
Hello Alexandre, thank you for your question. We have researched the model you have provided, and we would suggest the Burner Element - Right Front, part number PS11764908. If you need help placing an order, our customer service is open 7 days a week. Please feel free to give us a call. We look forward to hearing from you!
Was this helpful?
Thank you for voting!
Harold
March 31, 2022
I have a 22 year old Maytag stove. The front right burner is not working. The number on the burner is Z95F20136U655Z. I didn't see the wattage anywhere. It's a 7 inch element. Do you know whether the replacement for this unit is W10823698?
For model number YKESC300HW4
Hello harold, thank you for writing. For your model YKESC300HW4, the Right Front is PS11764908. The Left Rear is PS11764909. The Left Front is PS11764902 and the Right Rear is PS11764907. If you need help placing an order, customer service is open 7 days a week. Please feel free to give us a call. We look forward to hearing from you.
Is this element (Right Front) would be fit my Kitchen Aid 30" Built in Electric Range ? Right Front is single size but most powerful.
Also it won't work of Indicator Light Lenz. which part # should I order ?
Thank you very much
For model number YKESS907SS00
Hi Kimmy, thank you for contacting us. You need to check the following parts to fix the issue: Infinite Switch, part number PS11747406, and Burner Element, part number PS11764908. We hope this sorts out your problem! If you need help placing an order, customer service is open 7 days a week. Thanks again for your great question.
The large left element on my Inglis flat top stove only heats up on the high setting. It does not heat up at the lower temperatures. What is the problem and how do I fix it? Thank you
For model number IRE82302
Hello Terry, thank you for contacting us. According to our research, this issue could be caused by a faulty element switch, part number PS11747308. It controls the surface burner. We have attached a related video for your assistance. We hope this helps, good luck with this repair.
The front right burner although does get hot does not get hot enough to boil water. I’m assuming part of the heat element is going. Based on the model I am guessing W10823698 is what I need correct?
For model number Whirlpool GR450LXHQ2
Hello John, thank you for contacting us. The right front burner element, part number PS11764908, fits your model. You can check the burner element for continuity. If the element doesn't have continuity replace it. We hope this helps.
Was this helpful?
Thank you for voting!
< Prev
1
2
Next >
✖
Ask a Question
Ask our experts a question on this part and we'll respond as soon as we can.


 – Part Number: WP9761048")