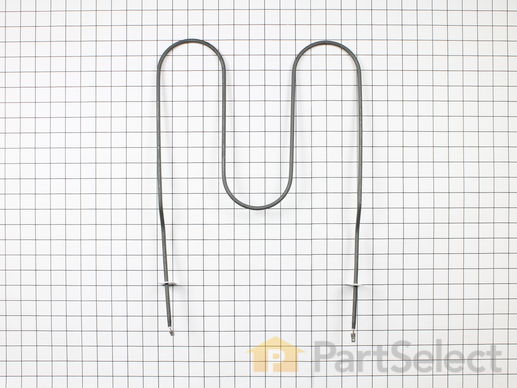
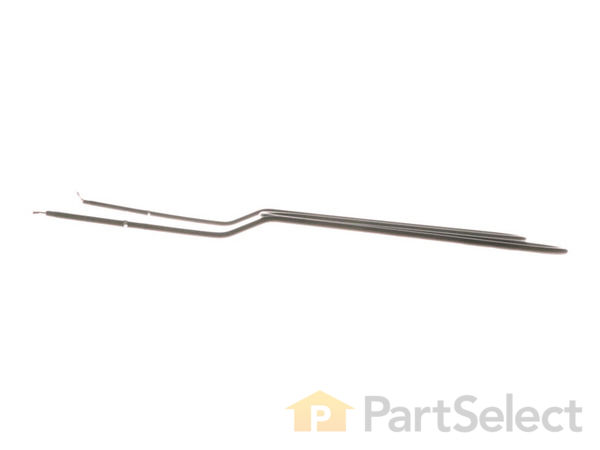
Part Location Diagram of WPW10310249 Whirlpool Broil Element
See part 3 in the diagram
Replacing your Maytag Range Broil Element
( Grid squares measure 1x1 inch )
Customer Service Representative

Get in touch, we're here to help!

Daily 8am - 9pm EST

customerservice@partselect.com

Broil Element WPW10310249

 Fits your LER3725AAC!
★★★★★
★★★★★
10 Reviews

Rated by 11 customers 

Easy 

30 - 60 mins 

Ratings submitted by customers like you who bought this part.

$ 99.73
  In Stock
Get FREE EconoShip on orders over $100! T&C apply

Get this part fast! Average delivery time for in-stock parts via standard shipping: 1.8 days.

 Fits your LER3725AAC!
PartSelect Number PS11752536
Manufacturer Part Number WPW10310249
Manufactured by Whirlpool
Product Description

Broil Element Specifications

This broil element is found on the roof of the oven.
How Buying OEM Parts Can Save You Time and Money

How Buying OEM Parts Can Save You Time and Money

Part Videos

Replacing your Maytag Range Broil Element

Replacing your Maytag Range Broil Element
Troubleshooting
This part fixes the following symptoms:
Element will not heat | Little to no heat when broiling | Little to no heat when baking
This part works with the following products:
Range, Wall Oven.
This part works with the following products:
Maytag, Magic Chef, Crosley, Amana.
Part# WPW10310249 replaces these:
AP6019230, 74003041, 7406P205-60, W10310249
Back to Top
Customer Reviews
Average Rating:
★★★★★
★★★★★
10 Reviews
4.7
Filter By Rating:
  • 5 Stars
    8
  • 4 Stars
    1
  • 3 Stars
    1
  • 2 Stars
    0
  • 1 Star
    0
Sort by:
  • 1
Sorry, we couldn't find any existing reviews that matched. Try using some different or simpler keywords.
  • 1
Customer Repair Stories
 Average Repair Rating: 3.4 / 5.0, 11 reviews. What's this?
Sort by:
  • 1
  • 2
Sorry, we couldn't find any existing installation instruction that matched.
top electric element (broiler) burned up/melted/dropped in several parts onto oven floor
I checked out Maytag.com - found the parts page on my computer - found the top oven element - ordered it from Part Select - it arrived just a few days later......

Before it arrived, I removed the damaged electric element from top of oven - easy.

Oven was ready for me to install new element - the video on your website was perfect - it helped me remove the old & install the new element from Part Select. It took me about an hour.

Thank you for your fast service, good instructions & the video!

I'm an 84 year old female. Did this by myself! Thank you!
  • jos from COLDWATER, MI
  • Difficulty Level:
    Very Easy
  • Total Repair Time:
    30 - 60 mins
  • Tools:
    Screw drivers
1 person found this instruction helpful.
Was this instruction helpful to you?
Thank you for voting!
The broiler broke at the ends.
My daughter repaired it without any problems.
  • Linda from TROY, MI
  • Difficulty Level:
    Really Easy
  • Total Repair Time:
    Less than 15 mins
  • Tools:
    Screw drivers, Socket set
1 person found this instruction helpful.
Was this instruction helpful to you?
Thank you for voting!
Broiler Element on Upper Oven Cracked in several places.
I've been trying to remove the bracket at the roof of upper oven so I can get to the broiler element itself. The screws are in place so tight, the won't move. I've used regular as well as ratchet screwdrivers and the screws still won't move. I don't want to spray WD 40 in oven because of a possible fire hazard, so I haven't changed out element yet. Tried calling customer service for advise, but to no avail. All other screws loosen easily. What should I do next.
  • Phillip from SAN ANTONIO, TX
  • Difficulty Level:
    Very Difficult
  • Total Repair Time:
    More than 2 hours
  • Tools:
    Screw drivers
1 of 2 people found this instruction helpful.
Was this instruction helpful to you?
Thank you for voting!
Broil element broke/burned out
I just bought my first condo and sure enough something broke in my oven. I thought "Oh great - I'll need to buy a new one..." After some research and a friend's advice - I was assured that I only needed to replace the broiler element. After researching the issue I googled replacement parts which led me to this web-site. I was amazed how easy and inexpensive it was for me to replace the part. The directions were easy, simple, and spot-on! The instructions that were provided were easy to follow. I also utilized YouTube instructions as well for additional visual guidance. The shipping was super fast and the element was packaged very well. Thank you so much!
  • Jonathan from Woonsocket, RI
  • Difficulty Level:
    Easy
  • Total Repair Time:
    15 - 30 mins
  • Tools:
    Screw drivers
7 of 9 people found this instruction helpful.
Was this instruction helpful to you?
Thank you for voting!
broil element burn out
Shipped on timely manner,I will order again from Part Select, installing was a 15 minute job, that what I did, 1 unplugged stove, 2) removed 4 screws, (2 on top bracket and 2 on back) , 3) slide unit out couple inches enough to disconnected the wires from each end of unit and removed old part, installed new unit by reconnecting end wires, pushing unit slowly toward back of oven until wires find it's right position, set it back in place with the 2 screws on top bracket and 2 screws on back, done!!
  • JORGE from CANTONMENT, FL
  • Difficulty Level:
    Really Easy
  • Total Repair Time:
    15 - 30 mins
  • Tools:
    Screw drivers
7 of 9 people found this instruction helpful.
Was this instruction helpful to you?
Thank you for voting!
Broil element non functional
Power turned off. Door of the oven lifted off. Four screws removed, old element pulled out to reveal electrical connectors. Wires easily removed, and element discarded. New element connected to the two conductors, four screws installed and the job was completed.
Very easy. Took about 10 minutes.
  • Clifford A from Melbourne Beach, FL
  • Difficulty Level:
    Really Easy
  • Total Repair Time:
    Less than 15 mins
  • Tools:
    Screw drivers
3 of 4 people found this instruction helpful.
Was this instruction helpful to you?
Thank you for voting!
Broiler Element was snapped in to two pieces
The toughest part was seeing the two screws in the dark rear of the oven, so a good flashlight with adjustable beam is helpful. After removing the pots and pan drawer from it's tracks, take the opportunity to clean out that space underneath the drawer when you unplug the oven. Once that was done, I removed the bracket screws holding the broken broiler element on the roof of the oven and the two screws holding the element in the rear of the oven. It's an uncomfortable reach so, setting a flashlight on the open over door helped me see what I was doing. The element slides right out of the holes from with in the insulation behind the oven's rear panel. Each side is connected to a wire pin that may need a good tug with pliers to slip the wire clip off the old element end. The new element connected right to the old wire clips with ease. You may have to jiggle the element end as you poke it back through the hole into the insulation where it came from. The element ends screwed right back into it's original position with the old screws. I slipped the roof bracket over the new element and reattached to the oven roof. I plugged the oven back in, replaced the drawer on it's tracks, tested the broiler and it works like a charm. Total time 35 minutes.
Other Parts Used:
Broil Element ELMNT-SURF
  • Patricia from Severna Park, MD
  • Difficulty Level:
    Easy
  • Total Repair Time:
    30 - 60 mins
  • Tools:
    Pliers, Screw drivers
4 of 5 people found this instruction helpful.
Was this instruction helpful to you?
Thank you for voting!
Top element wasn't working on ~1.5 year old oven
FIgured it was either a bad heating element or a realy expensive repair so I purchased a replacement element to rule out the simple and inexpensive possibility. Pulled oven out from wall and disconnected power supply. Removed retaining bracket from top of oven, two screws that held in heating element, disconnected from fittings, replaced with new element, and reattached screws and retaining bracket. Plugged in power supply, tested lower oven (it worked just fine) pushed oven back against the wall. Threw away the old element and packaging. Job done.
  • gabrielle from Hopewell Junction, NY
  • Difficulty Level:
    Really Easy
  • Total Repair Time:
    15 - 30 mins
  • Tools:
    Screw drivers
15 of 16 people found this instruction helpful.
Was this instruction helpful to you?
Thank you for voting!
broiler element would not heat up.
not to offend anybody but what i learned on prior posts helped alot..
1. remove unit and unplug.
2. remove door by opening to 45 degree angle and lifting door face towards you.
3. remove back panel to unit.e.
4.unscrew burner element from back inside of oven.
5.gently pry clip off each off burner element from rear of unit. Pull gently towards you.
6.unscrew support from inside oven.
7. remove old element and just reverse directions to reinstall.
  • debbie from walden, NY
  • Difficulty Level:
    A Bit Difficult
  • Total Repair Time:
    30 - 60 mins
  • Tools:
    Pliers, Screw drivers
5 of 6 people found this instruction helpful.
Was this instruction helpful to you?
Thank you for voting!
broiler element broke
removed screws and disconnected the wires removed element and did the replacement less than 15 minutes, and cost less than locally by 25.00 and received part the next day. EXCELLENT
  • michael from Norwich, CT
  • Difficulty Level:
    Really Easy
  • Total Repair Time:
    Less than 15 mins
  • Tools:
    Screw drivers
4 of 6 people found this instruction helpful.
Was this instruction helpful to you?
Thank you for voting!
  • 1
  • 2
Questions and Answers

Be the first to ask our experts a question about this part!

Model Cross Reference
This part works with the following models:
PartSelect Number: PS11752536
Manufacturer Part Number: WPW10310249
Brand
Model Number
Description
Kenmore
22-98002
Range - Kenmore Range/Stove/Oven Model 22-.98002 (2298002, 22 98002) Parts
Kenmore
22-98009
Range - Kenmore Range/Stove/Oven Model 22-.98009 (2298009, 22 98009) Parts
Kenmore
62260002600
Range
Kenmore
62260003600
Range
Kenmore
62260008600
Range
Kenmore
62260009600
Range
Kenmore
62960002600
Range
Kenmore
62960002606
Range
Kenmore
62960003600
Range
Kenmore
62960008600
Range
Kenmore
62960008606
Range
Kenmore
62960009600
Range
Kenmore
62960009606
Range
Kenmore
66598002700
Range
Kenmore
66598003700
Range
Kenmore
66598009700
Range
Kenmore
66598013700
Range
Kenmore
66598019700
Range
Amana
ACS4140BB
Range - Electric
Amana
ACS4140BW
Range - Electric
Admiral
AER1110AAH
Range - Freestanding, Electric
Admiral
AER1110BAH
Range
Maytag
AER1140AGH
Range
Admiral
AER1150AAH
Range - Built-in, Electric
Admiral
AER1350AAH
Range - Freestanding, Electric
Admiral
AER1350AAL
Range - Freestanding, Electric
Admiral
AER1350AAT
Range - Freestanding, Electric
Admiral
AER1350BAH
Range
Admiral
AER1350BAT
Range
Maytag
AER1360AGW
Range - Freestanding, Electric
Customer Service Representative

Get in touch, we're here to help!

Daily 8am - 9pm EST

Contact Customer Service