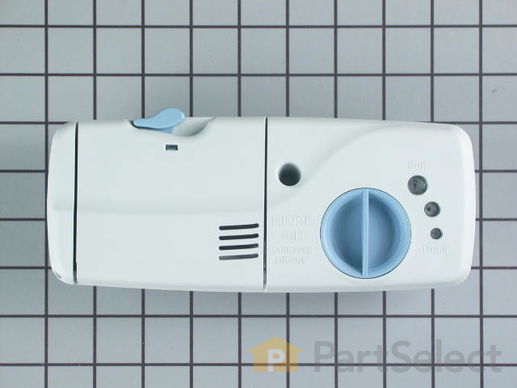
Part Location Diagram of WP99003317 Whirlpool Detergent and Rinse Aid Dispenser
See part 11 in the diagram
Replacing your Maytag Dishwasher Detergent and Rinse Aid Dispenser
( Grid squares measure 1x1 inch )
Customer Service Representative

Get in touch, we're here to help!

Daily 8am - 9pm EST

customerservice@partselect.com

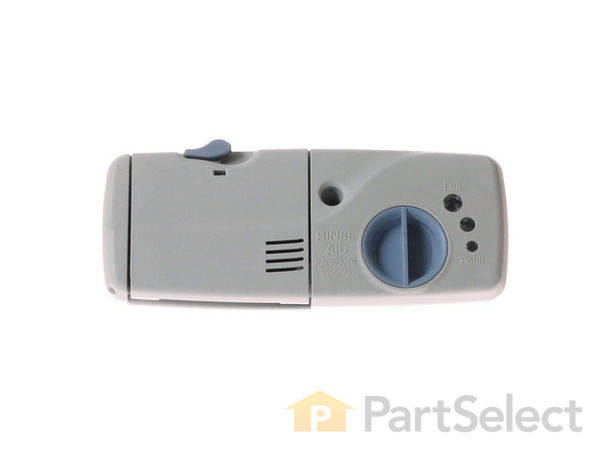
Detergent and Rinse Aid Dispenser WP99003317

 Fits your MDB7751AWW!
★★★★★
★★★★★
6 Reviews

Rated by 10 customers 

Easy 

30 - 60 mins 

Ratings submitted by customers like you who bought this part.

$ 194.34
  Special Order
Get FREE EconoShip on orders over $100! T&C apply
 Fits your MDB7751AWW!
PartSelect Number PS11747768
Manufacturer Part Number WP99003317
Manufactured by Whirlpool
Product Description

Detergent and Rinse Aid Dispenser Specifications

This part releases the detergent and rinse aid into the dishwasher.
How Buying OEM Parts Can Save You Time and Money

How Buying OEM Parts Can Save You Time and Money

Part Videos

Replacing your Maytag Dishwasher Detergent and Rinse Aid Dispenser

Replacing your Maytag Dishwasher Detergent and Rinse Aid Dispenser
Troubleshooting
This part fixes the following symptoms:
Will not dispense detergent | Door latch failure | Not cleaning dishes properly | Leaking
This part works with the following products:
Dishwasher.
This part works with the following products:
Maytag, Jenn-Air, Amana, Magic Chef.
Part# WP99003317 replaces these:
AP6014528, 99002180, 99002611, 99002991, 99003059, 99003317, 99003320, 99003321, 99003322
Back to Top
Customer Reviews
Average Rating:
★★★★★
★★★★★
6 Reviews
4.7
Filter By Rating:
  • 5 Stars
    5
  • 4 Stars
    0
  • 3 Stars
    1
  • 2 Stars
    0
  • 1 Star
    0
Sort by:
  • 1
Sorry, we couldn't find any existing reviews that matched. Try using some different or simpler keywords.
  • 1
Customer Repair Stories
 Average Repair Rating: 3.5 / 5.0, 10 reviews. What's this?
Sort by:
  • 1
Sorry, we couldn't find any existing installation instruction that matched.
Soap not dispensing
I followed the you tube video exactly. Very easy to do. I did not tighten the screws sequentially as shown in the video, rather I did the opposite ones to make sure nothing was skewed. Very easy, about 20 minutes.
  • Sue from SAN FRANCISCO, CA
  • Difficulty Level:
    Really Easy
  • Total Repair Time:
    30 - 60 mins
  • Tools:
    Nutdriver, Screw drivers
3 of 3 people found this instruction helpful.
Was this instruction helpful to you?
Thank you for voting!
Replace detergent dispenser
I watched a couple of videos on Youtube, and for once it was actually easier than anticipated. Unplug unit. Remove door screws. Separate inner door from outer door. Remove connector from dispenser (needed flat blade screwdriver to pry it at first.) Remove six screws holder dispenser in. Removed old dispenser, inserted new one, tightened six screws, re-connected wires, attached inner door to outer door, and was done in literally less than 10 minutes. Note: I was using a battery powered screw driver to remove the screws, so that's one reason why it went so fast.
  • Burt from LOGAN, UT
  • Difficulty Level:
    Very Easy
  • Total Repair Time:
    Less than 15 mins
  • Tools:
    Screw drivers
2 of 2 people found this instruction helpful.
Was this instruction helpful to you?
Thank you for voting!
dishes still dirty, soap remained in dispenser.
After repairing this dishwasher 5 times during the past 8 years this one was real easy: Open door, unscrew inside cover and carefully move over to one side. Unplug soap dispenser, unscrew soap dispenser and remove. Fit new dispenser, reconnect it, put inner cover back in its place and secure it with the retained screws and you are back in operation. Hans.
  • Hans from Show Low, AZ
  • Difficulty Level:
    Really Easy
  • Total Repair Time:
    15 - 30 mins
  • Tools:
    Nutdriver, Screw drivers
35 of 42 people found this instruction helpful.
Was this instruction helpful to you?
Thank you for voting!
broken dishwasher detergent apparatus
n/a
  • David from Anoka, MN
  • Difficulty Level:
    Very Difficult
  • Total Repair Time:
    More than 2 hours
4 of 11 people found this instruction helpful.
Was this instruction helpful to you?
Thank you for voting!
the soap dispenser wouldn't open during cycle
I unscrewed the door panel. removed the plastic cover protecting the dispenser. unscrewed the dispenser (6 screws). I removed the old dispenser and put the new one on and put it all back together. It was pretty easy.
  • paul from spring hill, TN
  • Difficulty Level:
    Easy
  • Total Repair Time:
    15 - 30 mins
  • Tools:
    Nutdriver, Socket set
10 of 11 people found this instruction helpful.
Was this instruction helpful to you?
Thank you for voting!
Dispenser latch had broken
We unscrewed the inner door panel and pulled it apart, disconnected the wiring, removed the screws holding the dispenser in place and swaped it out. One problem we had putting everything back together was that the latch for the door didn't line up and we couldn't shut the door but we simply unscrewed the door, readjusted the latch and put it back together. Works great now!
  • Joan from New York, NY
  • Difficulty Level:
    A Bit Difficult
  • Total Repair Time:
    30 - 60 mins
  • Tools:
    Socket set, Wrench set
2 of 5 people found this instruction helpful.
Was this instruction helpful to you?
Thank you for voting!
Closer tab on the door broken.
All that was broken on the old detergent dispenser was the door but the door can not be ordered without buying the whole detergent/rinse aid assembly. When I got the new item I just removed the old door and replaced it with the new door that I had taken off the new one. I still have the new detergent/rinse aid assembly that I can keep if I need to change it in the future.
  • Paul from Austin, TX
  • Difficulty Level:
    Really Easy
  • Total Repair Time:
    Less than 15 mins
9 of 10 people found this instruction helpful.
Was this instruction helpful to you?
Thank you for voting!
rinse dispenser was clogged and unusable.
I remove the inner door panel, disconnected two quick release connectors, unscrewed the old part from the inner panel and installed the new one.

The new part arrived quickly and was the perfect match.
  • Stuart from Rockaway, NJ
  • Difficulty Level:
    Really Easy
  • Total Repair Time:
    15 - 30 mins
6 of 11 people found this instruction helpful.
Was this instruction helpful to you?
Thank you for voting!
detergent dispenser door latch not holding
from inside the door remove torx screws down each side and top , pull panel back , removed 6 screws from back of dispenser ,unplug 1 wire connection ,reverse procedure , real easy repair.
  • fred from henderson, NV
  • Difficulty Level:
    Easy
  • Total Repair Time:
    15 - 30 mins
  • Tools:
    Nutdriver, Screw drivers
4 of 5 people found this instruction helpful.
Was this instruction helpful to you?
Thank you for voting!
Latch on soap dispenser door broke
I pulled the AC to the device, took the door apart , unscrewed the mounting to the door, unplugged the wires to it, plugged the wires on the new part, screwed it to the door, and finally put the door back together. Oh yeah, had to plug AC back in.
  • Ronald from Longmont, CO
  • Difficulty Level:
    Really Easy
  • Total Repair Time:
    15 - 30 mins
  • Tools:
    Pliers, Screw drivers
4 of 6 people found this instruction helpful.
Was this instruction helpful to you?
Thank you for voting!
  • 1
Questions and Answers

Ask our experts a question about this part and we'll get back to you as soon as possible!

5 questions answered by our experts.
Sort by:
  • 1
Sorry, we couldn't find any existing answers that matched.Try using some different or simpler keywords, or submit your new question by using the "Ask a Question" button above!
Jay
February 20, 2018
Soap door is open when done, but soap pod is not dissolved and stuck in compartment? Happened 2 times in a row. Is it the door opening to late? Or another problem in computer panel?
For model number MDBH950AWS
PartSelect logo
Hi Jay, Thank you for the question. It could be the unit is not filling properly. Check for a stuck float and check the water level during the fill cycle. Check the spray arms to ensure they are working and spraying the water around as well. Hope this helps!

1 person found this helpful.

Was this helpful?
Thank you for voting!
Jim
February 12, 2019
Hi: I bought this part, in your video there is a black and beige wire connected to the unit, the person in the video switches the wires when he puts the new unit in....can i assume it does not matter which wire is connected to which terminal on the wax unit?
PartSelect logo
Hi Jim, thank you for your question. I would suggest following the steps in the video. The manufacturer has not specified that so it might be safer to follow the video information. I hope that helps. Good luck with your repair.

1 person found this helpful.

Was this helpful?
Thank you for voting!
Jim
February 11, 2019
Hi. Replaced this but can not remember which wire goes to what terminal. I have a double black wire and a single tan wire, does it matter.Think double black wa towards the inside but video shows other way.
For model number 99003317 dispenser
PartSelect logo
Hello Jim, Thank you for contacting us. The purple and black wire harness goes to the dispenser terminal. The beige and black wire harness goes to the wax motor terminal. Hope this helps!

Was this helpful?
Thank you for voting!
JAMES
November 30, 2019
How do I replace the soap dispenser part wp99003317
For model number MDBTT79AWW
PartSelect logo
Hi James, watch our video here: https://www.youtube.com/watch?v=UmxbRi28UyQ&feature=emb_title. Thank you for your question and good luck with your repair!

Was this helpful?
Thank you for voting!
Larry
November 23, 2021
Plastic peg came out of detergent dispenser and latch will not stay closed.
For model number MDB7749AWM2
PartSelect logo
Hello Larry, Thank you for your inquiry. We have researched the model number you have provided and this part is only available as part of the detergent dispenser. We hope this helps.

Was this helpful?
Thank you for voting!
Related Parts:
  • 1
Model Cross Reference
This part works with the following models:
PartSelect Number: PS11747768
Manufacturer Part Number: WP99003317
Brand
Model Number
Description
Amana
ADB1200AWB
Dishwasher - Tall Tub
Amana
ADB1200AWQ
Dishwasher - Tall Tub
Amana
ADB1200AWS
Dishwasher - Tall Tub
Amana
ADB1200AWW
Dishwasher - Tall Tub
Amana
ADB1500AWB
Dishwasher
Amana
ADB1500AWB0
Dishwasher - DISHWASHER
Amana
ADB1500AWB1
Dishwasher - DISHWASHER
Amana
ADB1500AWB10
Dishwasher
Amana
ADB1500AWB2
Dishwasher - UNDERCOUNTER DISHWASHER
Maytag
ADB1500AWB3
Amana
ADB1500AWB37
Dishwasher
Amana
ADB1500AWB41
Dishwasher - DISHWASHER
Amana
ADB1500AWB46
Dishwasher - DISHWASHER
Amana
ADB1500AWQ
Dishwasher
Amana
ADB1500AWQ0
Dishwasher - DISHWASHER
Amana
ADB1500AWQ1
Dishwasher - DISHWASHER
Amana
ADB1500AWQ10
Dishwasher
Amana
ADB1500AWQ2
Dishwasher - UNDERCOUNTER DISHWASHER
Whirlpool
ADB1500AWQ3
Amana
ADB1500AWQ37
Dishwasher
Amana
ADB1500AWQ41
Dishwasher - DISHWASHER
Amana
ADB1500AWQ46
Dishwasher - DISHWASHER
Amana
ADB1500AWS
Dishwasher
Amana
ADB1500AWS0
Dishwasher - DISHWASHER
Amana
ADB1500AWS1
Dishwasher - DISHWASHER
Amana
ADB1500AWS10
Dishwasher
Amana
ADB1500AWS2
Dishwasher - UNDERCOUNTER DISHWASHER
Amana
ADB1500AWS3
Amana
ADB1500AWS37
Dishwasher
Amana
ADB1500AWS41
Dishwasher - DISHWASHER
Customer Service Representative

Get in touch, we're here to help!

Daily 8am - 9pm EST

Contact Customer Service