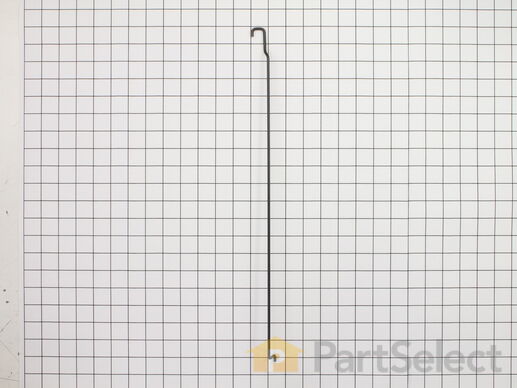
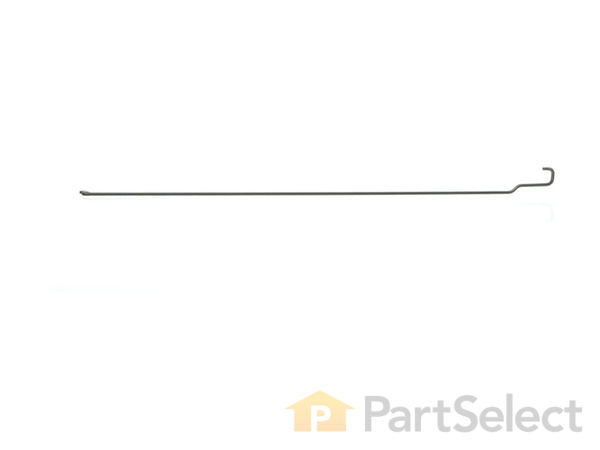
Part Location Diagram of WP4452396 Whirlpool Torsion Spring - Stainless Steel - Right Side
See part 36 in the diagram
( Grid squares measure 1x1 inch )
Customer Service Representative

Get in touch, we're here to help!

Daily 8am - 9pm EST

customerservice@partselect.com

Torsion Spring - Stainless Steel - Right Side WP4452396

 Fits your KBMC140HBL0!
★★★★★
★★★★★
7 Reviews

Rated by 6 customers 

A Bit Difficult 

1- 2 hours 

Ratings submitted by customers like you who bought this part.

$ 70.06
  In Stock
Get FREE EconoShip on orders over $100! T&C apply

Get this part fast! Average delivery time for in-stock parts via standard shipping: 1.8 days.

 Fits your KBMC140HBL0!
PartSelect Number PS11742586
Manufacturer Part Number WP4452396
Manufactured by Whirlpool
Product Description

Torsion Spring - Stainless Steel - Right Side Specifications

This is to be used with Stainless Steel models.
How Buying OEM Parts Can Save You Time and Money

How Buying OEM Parts Can Save You Time and Money

Troubleshooting
This part fixes the following symptoms:
Door not closing properly
This part works with the following products:
Microwave Oven Combo.
This part works with the following products:
KitchenAid, Whirlpool.
Part# WP4452396 replaces these:
AP6009427, 4452396
Back to Top
Customer Reviews
Average Rating:
★★★★★
★★★★★
7 Reviews
4.9
Filter By Rating:
  • 5 Stars
    6
  • 4 Stars
    1
  • 3 Stars
    0
  • 2 Stars
    0
  • 1 Star
    0
Sort by:
  • 1
Sorry, we couldn't find any existing reviews that matched. Try using some different or simpler keywords.
  • 1
Customer Repair Stories
 Average Repair Rating: 2.5 / 5.0, 6 reviews. What's this?
Sort by:
  • 1
Sorry, we couldn't find any existing installation instruction that matched.
Right Torsion Spring broke at an elbow.
Watched a U-Tube video that was helpful but did not address how fragile the plastic door frame was that the exterior glass front sat in / mounted to. The plastic door frame holes did not have metal inserts and plastic door holes were enlarged/stripped. Had to use larger screws. Also the plastic door frame was fragile and cracked in a couple locations. Luckily I was able to use duck tape to firm up the cracks in the plastic door frame. I tried to replace the plastic door frame but was not in stock/available.
That said easy to install the two Torsion Springs.
Other Parts Used:
Torsion Spring - Stainless Steel - Right Side Torsion Spring - Stainless Steel - Left Side
  • Denis from SAN RAMON, CA
  • Difficulty Level:
    Really Easy
  • Total Repair Time:
    More than 2 hours
  • Tools:
    Screw drivers
1 person found this instruction helpful.
Was this instruction helpful to you?
Thank you for voting!
door springs broken
In another post it recommends replacing both right and left torsion bars. I took that advice and when it was taken apart it was apparent there had been stress put on the left hand spring, so glad I bought both. When the torsion bars arrived do not be alarmed one (right) is a much larger diameter than the left, went together easily. I thought taking the plastic guard off between the oven and the microwave first allowed me to see how the springs were installed and then I just kept all the screws separate to install back the way it came apart. Another set of hands did make this a much easier job. when you reinstall the bars it seems really tight but after putting the door back on and after opening a dozen times it feels like new again.
Other Parts Used:
Torsion Spring - Stainless Steel - Left Side Torsion Spring - Stainless Steel - Right Side
  • Mark from Franklin, TN
  • Difficulty Level:
    A Bit Difficult
  • Total Repair Time:
    30 - 60 mins
  • Tools:
    Pliers, Screw drivers
28 of 35 people found this instruction helpful.
Was this instruction helpful to you?
Thank you for voting!
Door spring broke
Open the door and removed the 2 screws that hold the front
glass and stainless steel panel (Hold on to the door handle
or the face and glass will come crashing to the floor; learned this after the first time a couple of years ago $$$). Set the stainless steel panel in a safe area until ready for reassembly.
Next, you must remove the black plastic cover which is still
remaining on the door in order to get to the springs. There are 2 screws that hold the plastic cover which are difficult
to access without removing the side and bottom trim of the
microwave opening. The spring was easy to replace at this point and didn't require any tools; just observe when taking
the broken one off, plus you can use the other spring as a
go by. Replace the black plastic cover, the bottom trim, the
side trims and the stainless door panel and it's complete!
  • Randall from Little Rock, AR
  • Difficulty Level:
    A Bit Difficult
  • Total Repair Time:
    15 - 30 mins
  • Tools:
    Screw drivers
7 of 11 people found this instruction helpful.
Was this instruction helpful to you?
Thank you for voting!
Door right-side torsion spring snapped.
The KitchenAid stainless steel microwave model appears to be a bit different from other install instructions posted:

1) Removing the two inside-door screws will completely release the fairly heavy exterior door panel from two holding clips at the bottom of the door unit. So BE PREPARED and HOLD THE DOOR HANDLE while removing the two screws or panel will crash to the floor. Fortunately I did. Consider help to hold and "catch" the exterior door panel.
2) The inside-door (which the exterior door is attached to) has a plastic frame that needs to be removed to gain access to the springs. However, removing the two screws holding the plastic frame located in the bottom-edge of the inside-door required removing stainless steel framing around the sides and bottom of the MW unit. This additional SS framing around my microwave/oven combo might be the result of a custom cabinet install.
3) Inserting the spring (torque tension rod) was a bit tricky using screw driver and needle nose plyers to hold and twist both ends into place. Again, a second set of hands might help. At this point, the door spring action feels too strong but when re-installed, the weight of the exterior door will normalize this.
4) Re-install plastic frame, SS cabinet framing if applicable, exterior door centered onto holding clips, and you should be finished. Check that two screws in step # 1 holding exterior door are tight without stripping to ensure your repair job doesn't result in the exterior door crashing to the floor following normal use.
5) In all, the spring cost $45 w/tax and 3-day delivery and the repair time was about 30 minutes vs. repair estimates starting at $129.
  • Michael from Austin, TX
  • Difficulty Level:
    A Bit Difficult
  • Total Repair Time:
    15 - 30 mins
  • Tools:
    Pliers, Screw drivers
14 of 20 people found this instruction helpful.
Was this instruction helpful to you?
Thank you for voting!
Tension spring replacement
Here's a 21st century tip for all repairs: Get out your cell phone and take pictures of the steps as you go so you'll always have a reference if you forget something.

The replacement of the tension spring is easy. Getting there is the hard part. First, you need to remove the grill between the oven and microwave doors. There are 2 screw in the center and one on each end. Then just pull it away from the oven. This allows access to the the two clips that hold the bottom of the door on.
Next, remove the 2 u-shaped clips on the bottom of the door on both sides. 1 screw each. The bottom of the door will be loose, so be careful on the next step.
Open the door. Clamping the outer part of the door and the inner part with one hand, remove the 2 screws on the the inside of the door cover. They are closest to you at 10 and 2 o'clock. The outer door trim will now come off. Put it aside and close the door. On the bottom of the door frame, locate and remove 2 more screws about 6 inches from the ends and the inside plastic cover will be free to remove.
Now you will be able to remove the broken tension spring by lifting and threading it out of the groove it sits in. Replace with the new tension spring by threading the looped side into that groove first and criss-crossing it over the other tension spring. Then locate the hole on the opposite hinge and slide it in place. This will lock it in. Reverse the procedure for putting the door back together as you did removing it. You may want to get someone to help you hold the door open considering the new spring will snap it shut without the weight of the door on it. After you reassemble the door, replace the vent grill between the doors and you're done.
  • Perry from Farmingdale, NY
  • Difficulty Level:
    A Bit Difficult
  • Total Repair Time:
    15 - 30 mins
  • Tools:
    Screw drivers
17 of 18 people found this instruction helpful.
Was this instruction helpful to you?
Thank you for voting!
Light out and Door spring broken
Remove side deco strips to remove screws that hold to cabinet. Pull microwave out and set on saw horses (power cable should be long enough to do this). Remove screws to top cover and lift enough to remove all connectors from the front panel pcb. Remove grounding wires from next top lid. Remove connectors from transformer on rigt side and the two connectionss at the rear fan assy. Remove top cover/vent assy. Remove the next top cover to get access to the light bulb assy. Use a cloth or kleenex while handling the new bulb as you replace it. The clip thta holds the bulb is easily released and use reverse procedure when assembling. For springs those can be replaced without removing the microwave from the cabinet. Remove the 2 screws that hold the door together accessed from the inside of the door at top. Pull door up to release from the clip at the bottom. Remove the broken spring and replace with new one. Use a screwdriver to help twist the torsion spring to clip into place. Replace door assy in reverse order.
Other Parts Used:
Microwave Halogen Bulb Torsion Spring - Stainless Steel - Right Side Torsion Spring - Black/White/Biscuit - Right side
  • Lance from Angels Camp, CA
  • Difficulty Level:
    A Bit Difficult
  • Total Repair Time:
    More than 2 hours
  • Tools:
    Screw drivers
53 of 85 people found this instruction helpful.
Was this instruction helpful to you?
Thank you for voting!
  • 1
Questions and Answers

Ask our experts a question about this part and we'll get back to you as soon as possible!

12 questions answered by our experts.
Sort by:
  • 1
  • 2
Sorry, we couldn't find any existing answers that matched.Try using some different or simpler keywords, or submit your new question by using the "Ask a Question" button above!
Sam
January 22, 2018
I believe the torsion spring snapped. The door just falls open now and i found a segment of the spring on the floor. I am fairly handy. If i purchase this part, is it difficult to install?
For model number KBHC109JSS03
PartSelect logo
Hi Sam, Thank you for your question. There is some information that a customer provided on how to install the springs that you may find helpful. Before you begin any repair please unplug the appliance from the electrical outlet or turn the circuit breaker off. The customer advised, "1) Removing the two inside-door screws will completely release the fairly heavy exterior door panel from two holding clips at the bottom of the door unit. So BE PREPARED and HOLD THE DOOR HANDLE while removing the two screws or panel will crash to the floor. Fortunately I did. Consider help to hold and "catch" the exterior door panel. 2) The inside-door (which the exterior door is attached to) has a plastic frame that needs to be removed to gain access to the springs. However, removing the two screws holding the plastic frame located in the bottom-edge of the inside-door required removing stainless steel framing around the sides and bottom of the MW unit. This additional SS framing around my microwave/oven combo might be the result of a custom cabinet install. 3) Inserting the spring (torque tension rod) was a bit tricky using screw driver and needle nose plyers to hold and twist both ends into place. Again, a second set of hands might help. At this point, the door spring action feels too strong but when re-installed, the weight of the exterior door will normalize this. 4) Re-install plastic frame, SS cabinet framing if applicable, exterior door centered onto holding clips, and you should be finished. Check that two screws in step # 1 holding exterior door are tight without stripping to ensure your repair job doesn't result in the exterior door crashing to the floor following normal use. 5) In all, the spring cost $45 w/tax and 3-day delivery and the repair time was about 30 minutes vs. repair estimates starting at $129." I hope this helps. Thank you and have a great day!

13 people found this helpful.

Was this helpful?
Thank you for voting!
Walt
December 10, 2019
What are the part numbers for the left and right torsion springs for the microwave door? It seems to be wp4452395 and wp4452396, but then the compatibility tool says no. Another website says the right spring is wp4451009 but no answer for the left spring.
For model number KEHC309JSS05
PartSelect logo
Hello Walt, thank you for your question. If the unit is a stainless steel model the following parts will work. STAINLESS MODELS, USE # 4452396 FOR RIGHT SIDE AND # 4452395 FOR LEFT SIDE. I hope this helps!

2 people found this helpful.

Was this helpful?
Thank you for voting!
David
August 10, 2017
Are there one or two torsion springs in the microwave door? If there are two, what is the part number for the left side?
For model number GSC309PVS02
PartSelect logo
Hi David, Thank you for the question. The left side Spring is part number PS11742561. Please note these are not to be used on the Stainless Steel models. For the Right side on a Stainless Steel model is part number PS11742586 and the left side is PS11742585. Hope this helps!

1 person found this helpful.

Was this helpful?
Thank you for voting!
Related Parts:
Ken
June 11, 2019
What are the part numbers for the left and right torsion springs for my kitchen aid microwave door? Microwave is a stainless steel unit if that makes a difference. Thx
For model number KBHC179JSS0
PartSelect logo
Hello Ken, Thank you for contacting us. I have researched the model you have provided and have found the part you are looking for is PartSelect Number PS11742587 for the Right Side and PartSelect Number PS11742585 for the left Side. Hope this helps!

1 person found this helpful.

Was this helpful?
Thank you for voting!
Related Parts:
James
March 10, 2020
Will i need a special tool to remove and replace the door spring bars (parts #ps11742585 and ps11742586) on this model microwave oven?
For model number KEMC 308KSS04
PartSelect logo
Hi James, Thank you for your question. There is some information that a customer provided on how to install the springs that you may find helpful. Before you begin any repair please unplug the appliance from the electrical outlet or turn the circuit breaker off. The customer advised, "1) Removing the two inside-door screws will completely release the fairly heavy exterior door panel from two holding clips at the bottom of the door unit. So BE PREPARED and HOLD THE DOOR HANDLE while removing the two screws or panel will crash to the floor. Fortunately I did. Consider help to hold and "catch" the exterior door panel. 2) The inside-door (which the exterior door is attached to) has a plastic frame that needs to be removed to gain access to the springs. However, removing the two screws holding the plastic frame located in the bottom-edge of the inside-door required removing stainless steel framing around the sides and bottom of the MW unit. This additional SS framing around my microwave/oven combo might be the result of a custom cabinet install. 3) Inserting the spring (torque tension rod) was a bit tricky using screw driver and needle nose plyers to hold and twist both ends into place. Again, a second set of hands might help. At this point, the door spring action feels too strong but when re-installed, the weight of the exterior door will normalize this. 4) Re-install plastic frame, SS cabinet framing if applicable, exterior door centered onto holding clips, and you should be finished. Check that two screws in step # 1 holding exterior door are tight without stripping to ensure your repair job doesn't result in the exterior door crashing to the floor following normal use. 5) In all, the spring cost $45 w/tax and 3-day delivery and the repair time was about 30 minutes vs. repair estimates starting at $129." We hope this helps. Thank you and have a great day!

1 person found this helpful.

Was this helpful?
Thank you for voting!
David
May 1, 2019
I want to order the right side torsion spring for the microwave oven, which is stainless steel. I found part ps11742586 that is for stainless steel ovens, but for the list of approved models it shows kemc308kss04 but not kemc308kss02. Is this the right part for my oven? It not, please give me the correct part number. As soon as I get it I will place my order. Thanks
For model number KEMC308KSS02
PartSelect logo
Hello David, thank you for inquiring. For your model the Right Side Torsion Spring is part PS11742562.

Was this helpful?
Thank you for voting!
Walt
December 10, 2019
Microwave door torsion springs are shown as wp4452395 left and wp4452396 right. When i check the compatibility tool at the bottom of the page, it says those part numbers do not fit. Is the compatibility tool wrong?
For model number KEHC309JSS05
PartSelect logo
Hello Walt and thanks for writing. It only shows the torsion spring right side for your model. Part Number: PS11742562 is in the list of compatible items for your model. Hope this helps. Please contact us anytime. NOTE: This spring is not to be used on stainless steel models. Use with black, white or bisque models only. Stainless models need a stronger spring.

Was this helpful?
Thank you for voting!
Related Parts:
Walt
December 10, 2019
The torsion springs for my model (stainless steel) microwave door are listed as wp4452395 and wp4452396. On that same page, when I enter my model number to check with the compatibility tool on your website, it says those springs are not correct. Which is the right answer?
For model number KEHC309JSS05
PartSelect logo
Hello Walt, Thank you for contacting us. I have researched the model you have provided and have found the part you are looking for is WP4452396 for the Right Side and WP4452395 for the Left. The ones listed for the model are for non Stainless Steel Appliance options. Hope this helps!

Was this helpful?
Thank you for voting!
Don Harrison
November 11, 2019
Do i need to replace both the right and left tension springs or just the broken one? Which one may brake sooner? My unit is about 11 years old and i have already replaced one spring. Thank you. I will order the correct part[s] from you. Don
For model number KBHC109JSSO3
PartSelect logo
Hello Don, thank you for your question. It is recommended that both springs are replaced at the same time. I hope this helps!

Was this helpful?
Thank you for voting!
Frank
March 4, 2022
Are the right and left microwave door spring the same?
For model number KEMC308KSS04
PartSelect logo
Hello Frank, thank you for writing. The Torsion Spring - Stainless Steel - Right Side is part PS11742586 and the Torsion Spring - Stainless Steel - Left Side is PS11742585. If you need help placing an order, customer service is open 7 days a week. Please feel free to give us a call. We look forward to hearing from you.

Was this helpful?
Thank you for voting!
Related Parts:
  • 1
  • 2
You May Also Need ?
Model Cross Reference
This part works with the following models:
PartSelect Number: PS11742586
Manufacturer Part Number: WP4452396
Brand
Model Number
Description
Whirlpool
GSC308PJB06
Microwave Oven Combo - Wall, Electric, Built-in
Whirlpool
GSC308PJB1
Microwave Oven Combo - ELECTRIC OVEN/MW COMBO
Whirlpool
GSC308PJB2
Microwave Oven Combo - Wall, Built-in, Electric
Whirlpool
GSC308PJB3
Microwave Oven Combo - Wall, Built-in, Electric
Whirlpool
GSC308PJB4
Microwave Oven Combo - Wall, Electric
Whirlpool
GSC308PJQ06
Microwave Oven Combo - Wall, Electric, Built-in
Whirlpool
GSC308PJQ1
Microwave Oven Combo - ELECTRIC OVEN/MW COMBO
Whirlpool
GSC308PJQ2
Microwave Oven Combo - Wall, Built-in, Electric
Whirlpool
GSC308PJQ3
Microwave Oven Combo - Wall, Built-in, Electric
Whirlpool
GSC308PJQ4
Microwave Oven Combo - Wall, Electric
Whirlpool
GSC308PJS06
Microwave Oven Combo - Wall, Electric, Built-in
Whirlpool
GSC308PJS1
Microwave Oven Combo - ELECTRIC OVEN/MW COMBO
Whirlpool
GSC308PJS2
Microwave Oven Combo - Wall, Built-in, Electric
Whirlpool
GSC308PJS3
Microwave Oven Combo - Wall, Built-in, Electric
Whirlpool
GSC308PJS4
Microwave Oven Combo - Wall, Electric
Whirlpool
GSC308PJT06
Microwave Oven Combo - Wall, Electric, Built-in
Whirlpool
GSC308PJT1
Microwave Oven Combo - ELECTRIC OVEN/MW COMBO
Whirlpool
GSC308PJT2
Microwave Oven Combo - Wall, Built-in, Electric
Whirlpool
GSC308PJT3
Microwave Oven Combo - Wall, Built-in, Electric
Whirlpool
GSC308PJT4
Microwave Oven Combo - Wall, Electric
Whirlpool
GSC308PRB00
Microwave Oven Combo - Wall, Built-in, Electric
Whirlpool
GSC308PRB01
Microwave Oven Combo - Built-in, Wall, Electric
Whirlpool
GSC308PRQ00
Microwave Oven Combo - Wall, Built-in, Electric
Whirlpool
GSC308PRQ01
Microwave Oven Combo - Built-in, Wall, Electric
Whirlpool
GSC308PRS00
Microwave Oven Combo - Wall, Built-in, Electric
Whirlpool
GSC308PRS01
Microwave Oven Combo - Built-in, Wall, Electric
Whirlpool
GSC308PRT00
Microwave Oven Combo - Wall, Built-in, Electric
Whirlpool
GSC308PRT01
Microwave Oven Combo - Built-in, Wall, Electric
KitchenAid
KBHC109JBL0
Microwave Oven Combo
KitchenAid
KBHC109JBL03
Microwave Oven Combo
Customer Service Representative

Get in touch, we're here to help!

Daily 8am - 9pm EST

Contact Customer Service