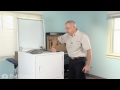
This drum support roller is used for square-ported model clothes dryers. This part is sold individually; however, rollers tend to wear at the same rate, so it is suggested that both should be replaced at the same time. It has a metallic bearing in its center. The drum support roller holds the drum in place while it rotates on the support wheels. You may have a faulty or damaged roller if your dryer will not start or tumble, takes too long to dry clothes, or starts making loud noises. Customers have ranked this repair as easy and should take 15-30 minutes to complete.
Keep searches simple. Use keywords, e.g. "leaking", "pump", "broken" or "fit".
Sorry, we couldn't find any existing reviews that matched. Try using some different or simpler keywords.
★★★★★
★★★★★
Bruce K - September 9, 2020
Verified Purchase
Straightforward repair - Part worked as expected
My order arrived as expected and part was as described. the part crossover info was spot on.
★★★★★
★★★★★
Daniel D - November 1, 2019
Verified Purchase
Easy repair, great part and part worked.
My dryer back in working condition.
★★★★★
★★★★★
Gerald B - April 16, 2019
Verified Purchase
Easy repair
Repair went better than expected.
★★★★★
★★★★★
Jim A - March 8, 2019
Verified Purchase
Easy repair. Just basic tools needed
My 21 year old dryer runs smooth again!
Just took a few screws off of the bottom plate, popped the lid back using a flat screw driver. Unplugged the two wires at the top corner, unscrewed four more screws to remove front piece/drum support. Slide drum out the front while leaving belt in place. Using a flathead screw driver and a 5/8 crescent wrench, remove the roller shaft assembly. Replaced the shaft, retaining ring, two washers, and drum roller with all new parts. Reassembled everything and was done in 30 min. Saved about $450 off the cost of a new dryer.
★★★★★
★★★★★
Doyle F - February 7, 2019
Verified Purchase
dryer
Was correct parts worked
★★★★★
★★★★★
Carolyn M - February 7, 2019
Verified Purchase
Drying back to workout
The parts were in great condition & arrived on time...my appliance is up & running great..
Thanks for your help, Carolyn
★★★★★
★★★★★
Marilyn S - December 24, 2018
Verified Purchase
Drum rollers
Very happy. My dryer is like new again. It took two of us to take it apart and put the dryer back together but it sure was worth it. Thanks again.
★★★★★
★★★★★
Stanley R - September 14, 2018
Verified Purchase
Easy repair with good product
The part was as it should be. Quality merchandise and service. Will deal with you again next opportunity I have.
★★★★★
★★★★★
Sheila O - June 5, 2018
Verified Purchase
Worked as expected
It works
★★★★★
★★★★★
David M - April 23, 2018
Verified Purchase
Exact match
Parts were exact match the problem was what I believe is called the idler pulley. Good thing I ordered all three.
< Prev
1
2
Next >
Customer Repair Stories
Average Repair Rating: 2.9 / 5.0, 83 reviews.
What's this?
Sort by:
< Prev
1
2
3
Next >
Search filter:
Clear Filter
Your search term must have 3 or more characters.
Keep searches simple. Use keywords, e.g. "leaking", "pump", "broken" or "fit".
Sorry, we couldn't find any existing installation instruction that matched.
Drum support rollers were shot, idler was changed as well, new belt installed, 2 new thrust washers and felt pads were installed as well.
Repair parts were exact OEM, went very smooth. Longest part was cleaning the inside of dryer and cutting new vent pipe exit.
Nutdriver, Pliers, Wrench (Adjustable), Wrench set
1 personfound this instruction helpful.
Was this instruction helpful to you?
Thank you for voting!
dryer made squeaking noise when first starting to run
I first watched the video and disassembled the dryer to see if I could determine what part was squeaking. All looked good except the wheel on the Idler lever which was tight. I vacuumed up the years of lint and reassembled the dryer and waited for the parts to arrive. I ordered the idler lever and also the 2 drum support wheels, belt and
... Read more2 drum guides since I thought that is was a good idea to go ahead and replace these parts once I had the dryer disassembled again. Good choice on the belt as once I removed the old belt there was a crack on the underside of the belt. I bought snap ring pliers at home depot but the tips were too big to fit the holes on the snap rings on the drum rollers. I bought another snap ring plier set from an automotive store that came wth 5 snap ring attachments - but again all were too large to fit the snap rings on the drum support rollers. I used a nail and small screwdriver to expand and pull off the snap rings but this approach was frustrating and time consuming. Not sure where to get snap ring pliers that are small enough to fit the holes on the snap rings - so hope that you have better luck locating a set thats small enough! I was able to return the pliers that I purchased - so all good. I was surprised at how easy the dryer came apart and how easy it was easy to work on. When disassembling the dryer - we took pictures of the wire connections before we disconnected them, however at one point we tilted the dryer back to clean behind it and the top slipped a little away from the side panel of the dryer and one of the wires that was connect to the wire block that is up by where the power cord connects cam loose - and it took some time to find and figure out a wiring diagram for this connection. Suggest that you take a pictire of this wire connection block once you lift the lid - just in case a slip occurs and a wire may disconnect. When replacing the idler lever - have a little grease available when you install the new idler lever (between the arm and the bolt area as it constantly moves and the old brease has probably worn away) . After making these repairs I dont think I will ever buy a new dryer as any part , including the heater and motor would be easy to replace and cheaper than a new dryer.
Replaced the two drum rollers and the tensioning arm roller. NOTES: 1. There are two drum rollers, the diagram seems to show only one. Recommend replacing both drum rollers and the support bracket shaft assemblies since the shafts might be scored. 2. The tensioning arm roller was actually much worse and frozen, so once you are in it
... Read moreis best to replace ALL three rollers. 3. I also replaced the belt since it was worse for wear from the frozen rollers. 4. The PartSelect video for the procedure is for the Whirlpool branded version of this dryer. The internal parts and construction are identical, however, the initial steps for opening up the dryer are different. On the Amana the top also tilts up, but is held down by two bolts, and not just the spring clips. Steps are: a) Remove bottom kick plate which is held in by two bolts on the lower front edge. b) remove the retention bolts that are now exposed on the front panel and remove the front panel by pulling it down from the top spring clips. c) Unbolt and remove the front drum retention panel. d) The two bolts that hold down the top can now be removed and the top panel tilted up so the drum can be lifted out after the belt is loosened. The whole process is very quick and easy. Only tricky part is fumbling around behind the motor to move the tensioning roller and arm to remove and re-install the belt. Also, I had cheap spring clip pliers so I was fumbling with the spring clips that hold the rollers on their shafts.
the drum was clunking and scraping,also it had begun to eat clothing
I disconnected power and vent hose then tipped dryer on its back. I took off lower panel and door ,disconnecting wires to door and light and hanging them over the side,i then removed the front plate and felt seal the plastic fan shroud and lint trap come out as one piece along with the front plate.when i could look down on the drum,standi
... Read moreng on the left side ,i disconnected the screw connecting the top plate to the left side plate allowing the top to gain a little play,this is the amount needed for the drum to be removed,pull belt tensioner slightly as to release tension remove the belt from motor shaft.At this point remove drum and set aside,the lower felt ring and support rollers will be exposed as well as tension spring and tension roller,i used a mirror and guided the snap ring pliers into place on the tension roller,At this point pull on rear felt ring it may come loose easy ,if not work some adhesive remover into the cracks where the glue is and keep agitating it ,eventually the glue will begin to release and more and more of the remover can get in washing the felt ring off,clean real good after using remover soap and water and allow to dry ,apply a thin ring of high heat adhesive smooth out to spread even all around when it becomes tacky begin applying new felt ring,while this adhesive cures perform the same procedure on the front panel and its felt ring while these rings are drying into place undo snap rings and pull support rollers out and replace in like order replacing thrust washers and snap rings if you damage them ,the roller on the tensioner is more tricky but if you use a mirror and a light it is easy to sneak in there lastly when preparing to reassemble and drum and belt are in place just before you replace the front panel it is prudent to replace the neoprene slides,reassemble front plate and ensure that the felt ring lines up and goes in evenly all the way around re-attach top left corner ,reinstall door and wires as well as bottom plate this will conclude the procedure i learned all of this the hard way i should have just replaced all the parts at once i was in that machine 6 different times Daniel 2017
showed starting withe removal of the dryer top. With my dryer, I needed to start by removing the bottom front panel (2 screws). Next the door panel (2 screws). Now I could remove the top panel (2 screws). From here, the tear down went like the directions th My biggest problems were, figuring out I didn't start with the dryer top. Then
... Read more getting a proper sized snap ring pliers to remove the drum rollers and and the idler pulley.
The belt tensioner was the problem and the belt had very fine cracks in it so I ordered four parts: the belt tensioner, belt and the two drum rollers. I had to work to clean the fan and the LARGE dust bunnies. I'm writing this to encourage others to consider installing new duct work, mine was becoming a fire hazard. At a minimum clean all
... Read more the duct work. Your dryer will work so much better. Thank you for your printable help!??
Rumbling and thumping then the drum failed to rotate under power
There was initial rumbling and thumping then the drum failed to rotate under power. I could however rotate the drum by hand. This site suggested the rollers or belt as well as the idler assembly. I decided to renew all the wearable parts and ordered the belt, rollers, glides and idler assembly. It was in fact the idler. The idler wheel h
... Read moread disintegrated and collapsed in the center. It must have run (rumbling) until it finally seized and stopped. Replaced all the parts and the dryer is even better now than new. It was a good opportunity to vacuum out all the lint inside the cavity (that took most of the time and also found $0.36 in loose change). Also found it easier to remove the electrical connections with pliers rather than pull on the wires and risk detaching the wire from the clip.
Followed the recommended repair under noisy machine, replacing the 3 recommended parts. The 10 minute video was extremely helpful. Important note: there are two(2) drum support rollers. Also, you definitely need very small C ring pliers and don't forget to label all wires before disconnecting.
Went on line to this sites video's to diagnose the problem. Steve Ash is EXCELLENT. Put idler& roller replacement video's in my Favorite File! Ordered parts PS11741930&PS11741913 from this site on line. Good price, Fantastic 1 1/2 day delivery (Fed Ex ) Referred to great videos for installation. Hints: 1) Be sure to identify ALL wires 2
... Read more) Be careful removing snap rings from rollers, I stretched mine and had to reform them.(new ones did not come with the rollers. 3) It would be a good time to replace the belt & drum pads when the drum is out.
This dryer is an older one. I have kept it running throughout the years by just replacing parts a needed. This was a kind of rebuild. The dryer was making that squeaking noise when running so I knew the "glides" were worn and the belt, rollers and idler pulley had never been replaced. I ordered the parts from this website and I must say i
... Read moret took a while for them to ship, of course I guess since it was during the holidays that's to be expected. Once I received the parts I took the dryer apart. This model has a lower panel that comes off first then there are two 5/16" sheet metal screws that hold the door panel in place and then two more to hold the top down. Then I removed the front bulkhead which holds the drum glides. I replaced the glides then removed the drum from the dryer. To removed the motor there are two 5/16" screws to removed then pull the motor from the bottom. I then replaced the idler pulley, the two drum rollers on the rear of the dryer and the belt on the drum. Reassembly went fairly easy. I found the door switch was bad during reassembly because the dryer would not shut off once the door was opened. So picked up a new door switch from a local supplier, replaced it and all is good now. There really isn't that much to a dryer. A motor, heating unit (in the rear), control unit/timer on top, and then the rollers, idler pulley, and drum belt. The video instructions on this website were quite helpful. Hopefully it will last another year.
Ask our experts a question about this part and we'll get back to you as soon as possible!
8 questions answered by our experts.
Sort by:
< Prev
1
Next >
Search filter:
Clear Filter
Your search term must have 3 or more characters.
Keep searches simple. Use keywords, e.g. "leaking", "pump", "broken" or "fit".
Sorry, we couldn't find any existing answers that matched.Try using some different or simpler keywords, or submit your new question by using the "Ask a Question" button above!
Steve
February 17, 2018
Are there one or two rollers included in wp37001042?
For model number ADE7005AYW
Hello Steve,
Thanks for your question. This part is sold individually.
I hope this helps.
13 people found this helpful.
Was this helpful?
Thank you for voting!
Marcel
April 15, 2018
Do the drum rollers come with the washers on both sides of it? Or will I need to purchase those as well? I am planning on both drum rollers, glides and belt purchase, unsure if the washers are included. Btw thanks for great videos.
For model number mdgt446aww
Hi Marcel, Thank you for the question, The Wave Washer and Retaining Ring are sold separately from the rollers. Happy to hear the videos have been helpful!
9 people found this helpful.
Was this helpful?
Thank you for voting!
Mike
November 6, 2019
Hello! My dryer heats but has trouble tumbling. We suspect it isn’t the motor only because it will still move but it’s hesitant and the drum is difficult to turn manually. Upon inspection, we replaced the pulley wheel and belt because it was difficult to spin the wheel. It seemed to help a lot! But we are finding the dryer still has a hard time spinning the drum, and when it does spin, it makes a high pitched squeaking noise. Would replacing these wheels help? Or do we also need to replace the felt seal?
For model number MDG308DAWW
Hello Mike,
Thank you for your question. Yes, the drum support roller are the most likely needed to be replaced. Hope this helps!
3 people found this helpful.
Was this helpful?
Thank you for voting!
Tracey
January 14, 2020
Would there be parts compatible with my 40 yr old dryer. I love it and want to keep it running.It makes loud noises when it runs. squealing when it tumbles.
For model number LDG710
Hello Tracey,
Thank you for your question. Yes, there are still replacement parts available for your Maytag dryer, and our sources suggest replacing the drum support roller kit under part PS1570070 for your model to fix the noise issues when it tumbles. We hope this helps.
Hi Wolfdieter, thank you for your question. You should check your rollers, your belt, and your motor when you are having this sort of issue in your appliance. I hope that helps. Good luck with your repair.
2 people found this helpful.
Was this helpful?
Thank you for voting!
Debbie
August 27, 2019
My dryer is making a squeezing noise when i turn it on. The clothes do dry. How do i tell which belt it needs?
For model number MDET446AYW
Hi Debbie, thank you for your question. I have linked that part below for you. However for squeaking, the parts you may want to check first are your felt seal and the glides. Those parts actually help your drum spin smoothly and without noise. You may also want to look at your pulley and drum rollers as well. Then I would suggest looking at your belt if all of those parts are fine. I hope that helps. Good luck with your repair.
do you need to buy 2 drum support rollers? thre is 2, correct?
For model number mde4806ayw
Hello Sabrina, thank you for reaching out. This part is sold individually. Your model has two drum rollers, so you will need to order two in quantity. Customer service is available 7 days a week if you require assistance placing an order. Thanks again for reaching out!
Was this helpful?
Thank you for voting!
Robert
July 11, 2023
Couldn't get the top to release from the clips.
For model number NDE2330AYW
Hello Robert, thank you for the great question. According to our research, you may need to unlock the locks that are holding the top panel in place. Use a putty to unlock the locks and then slide the top panel forward. We hope this helps!
Was this helpful?
Thank you for voting!
< Prev
1
Next >
✖
Ask a Question
Ask our experts a question on this part and we'll respond as soon as we can.