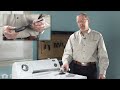
This thermostat (Dryer Operating Thermostat, Dryer Cycling Thermostat, Cycling Thermostat, Dryer Thermostat) is used to maintain a temperature of 155 degrees in the dryer drum. The internal bias heater also allows this thermostat to provide a low heat temperature of approximately 140 degrees when the low temperature setting is selected. The part measures 2 by 1.5 inches, comes in black/silver and is constructed of plastic and metal. The thermostat attaches to the blower wheel housing.
Keep searches simple. Use keywords, e.g. "leaking", "pump", "broken" or "fit".
Sorry, we couldn't find any existing reviews that matched. Try using some different or simpler keywords.
★★★★★
★★★★★
Donald S - February 17, 2024
Verified Purchase
Easy repair
Part solved problem. Video very helpful so knew I could do the repair. Will continue to be a customer
★★★★★
★★★★★
Brian T - October 14, 2023
Verified Purchase
My dryer
??
★★★★★
★★★★★
Emil W - April 5, 2023
Verified Purchase
Easy Repair.
Part fixed the problem.
★★★★★
★★★★★
Maggie G - April 3, 2023
Verified Purchase
Perfectly fitting replacement parts!
This was the exact part that I needed. The videos provided by Part select are greatly appreciated and easy to follow!
★★★★★
★★★★★
Bruce S - March 15, 2023
Verified Purchase
Exact part for my dryer
Didn't fix my dryer heating problem but at least verified this part wasn't the problem. I'll review the Parts Select website to see what other part is suggested. They have great service and ship promptly.
★★★★★
★★★★★
Frances A - December 21, 2022
Verified Purchase
Dryers
Working good now. Easy to fix.
★★★★★
★★★★★
Brian P - December 21, 2022
Verified Purchase
Right part-fast-fair rice
Exactly what I needed
★★★★★
★★★★★
Patrick W - May 28, 2022
Verified Purchase
Dryer not heating up
Did not fix the problem
June 29, 2022
Hi Patrick,
Thank you for your review. Please accept our apologies for this situation. We will be in touch with you shortly regarding your order.
★★★★★
★★★★★
Don C - December 13, 2021
Verified Purchase
OEM parts, great site, Fast shipping.
When it comes to electrical parts, don’t waste time and money on off-brand parts like I did. Bought this part to replace an off-brand unit that failed in 2 weeks after install. Your time is worth money. Just buy the factory made part for a little bit more money.
★★★★★
★★★★★
Ruth C - October 20, 2021
Verified Purchase
Easy repair
Okay, from the information on your website, I was pretty sure it was the part needed to fix a dryer that only had heat when on high. The replacement part was easy to install and I had an opportunity to clean the whole duct, which had some really strange things. It is not my dryer and I didn't have anything that needed drying to try out the dryer. Still haven't heard from the tenant to know whether or not it's working better. If not I am confident that I can replace the other thermostat and that should fix the problem. Fingers crossed.
< Prev
1
2
3
Next >
Customer Repair Stories
Average Repair Rating: 3.7 / 5.0, 161 reviews.
What's this?
Sort by:
< Prev
1
2
3
Next >
Search filter:
Clear Filter
Your search term must have 3 or more characters.
Keep searches simple. Use keywords, e.g. "leaking", "pump", "broken" or "fit".
Sorry, we couldn't find any existing installation instruction that matched.
Dryer quit heating.
This dryer is 30 plus years old. I am a 71 year old female that has never taken on this type of repair. First I very carefully ordered all parts possibly associated with this problem. Watched all videos available for this model. Could not find one at Parts Select that addressed this particular dryer. Model number was correct. Finally
... Read morefound YouTube video that addressed an "Old Kenmore Wood Top". It showed the correct way to remove the Heating Element unit. Also Parts Select never mentions that fuses and sensors are not "polarized". Very important info for a novice. But Google helped me with that. Heating Element is "polarized", very important not to cross wires. I did order a couple Heating Element Connection Wire Kits that were not needed for this repair. Got all parts replaced, put dryer back together, crossed my fingers and turned it on, so far it has been working really well. I chose to replace all the parts I did because of the dryers age, plus I am not familiar with multimeters. Didn't want to risk one old part messing up a new part. Thank you Parts Select. It is not a 2 hr. repair, but I worked slowly, didn't want to make any mistakes. It would be good if everyone is aware of some of the above information and the YouTube video done by an individual on this particular dryer.
Dryer would intermittently work on economy drying, never on timed dry. (Heat failed tumbler was always good)
Disconnect power cord. Removed upper and lower panels. Disconnected "push on" spade connectors and removed the single screw holding each device and removed same. Timer had a two multi wire plug and 2 screws. Reversed process and installed same. Was fairly sure only timer was bad. But due to age of dryer and posts found here, decided to ju
... Read morest install fuse and cut out. Everything works perfect!
The dryer took at least 3 rounds to dry light clothes and 4-5 for towels.
This was my second time making repairs. The only difference this time I replaced all parts from top to bottom. When I pulled the heating element out only one coil was working the others had burned out. It was easy to do and the videos on the site are very helpful and informative. I followed the steps and if I thought I missed a step I re
... Read moreplayed it again. I am a woman and found it very easy and not at all intimidating at all. I am going to hopefully have it for another 10 yrs. You guys keep up the good work.
I squeeze the cable connection to heating element so the thermal fuse does not cut the electrical current. The loose connection cause the thermal fuse to blow.
Clothes still damp after a dry cycle and a high pitched sound while the drum is tumbling
Installing the cycling thermostat was easy. Where I encountered difficulty was disconnecting the door switch connector so I can remove the front cover. The other area I found difficulty was removing the old tri-rings from the rear drum roller shaft. I ended cutting them up with diagonal pliers.
All in all, it was well worth
... Read more it. I’m the type that try to fix things instead of throwing it away and buying new ones. It’s more earth friendly.
Got heat only on start of cycle and no repeat of flame. Suspected coils on gas valve.
I used a multi meter to find coils failed in warmed temperature condition. I tested main switch for different cycle operation. Main switch was worn out inside and not making good contact for soft cycles. This dryer is 25 years old. I chose to replace all the sensors, fuses, ignitor, gas valve coils, cycle switch and thermostat.
... Read more This was cost effective for me, because now, I actually have a good dryer that might just last another 25 years. I might replace the drive belt soon. I'll order from Parts Select. This was easy and fun. Thanks!
The drum would not rotate because power was not being applied to the motor.
Replaced the non-resettable thermal fuse because mine was open circuit (one screw). While I had it apart, I also replaced the thermostat for internal-bias (one screw) because a bad thermostat can make the fuse blow again. During disassembly, I found the lint trapping housing seal was worn. It is just a cheap piece of open cell foam wea
... Read moretherstripping with one sticky side where it attaches to the back of the painted surface of the rear cabinet. To replace that, you just peel up the old seal which was loose and deformed. Stick down a new seal with a little more care than the factory originally did.
Ask our experts a question about this part and we'll get back to you as soon as possible!
245 questions answered by our experts.
Sort by:
< Prev
1
2
3
Next >
Search filter:
Clear Filter
Your search term must have 3 or more characters.
Keep searches simple. Use keywords, e.g. "leaking", "pump", "broken" or "fit".
Sorry, we couldn't find any existing answers that matched.Try using some different or simpler keywords, or submit your new question by using the "Ask a Question" button above!
Jerry
July 24, 2017
Is there a way to test the thermal interna bias switch to be sure it is the problem
For model number Ler7646ez2
Hello Jerry, thank you for contacting us. With a multimeter you can test the two large terminals on the thermostat, they should read closed for continuity and the two small ones should show an ohms resistance value. We hope this helps and good luck with the repair!
93 people found this helpful.
Was this helpful?
Thank you for voting!
Kealan
July 20, 2017
I’m not sure how often this happens because it hasn’t happened to me or anyone I know before. But our dryer seems to be getting too hot during cycles. The clothes are way too hot when they come out, even on the lower settings. The heater element is still cycling on and off though which is think is normal. I’ve already checked the flow and the vents and everything seems to be square there. What would you recommend I check next. Do you think it’s the thermostat?
Hi Kealan, we recommend trying to dry a load with the vent unhooked from your dryer. If you are still experiencing these symptoms you could have a faulty dryer cycling thermostat WP3387134. I hope this helps!
84 people found this helpful.
Was this helpful?
Thank you for voting!
Tony
August 3, 2018
Have seen 2 different answers about continuity on thermostat internal bias. One said both should read 0 at room temperature. The other said the small terminals will read an "ohm value". Which is correct?
Hi Tony, Thank you for the question. You would need to check the outer 2 terminals on the thermostat for continuity. If this checks ok then test the inner smaller terminals for resistance of 4.5K ohms. Hope this helps!
64 people found this helpful.
Was this helpful?
Thank you for voting!
Dylan
July 20, 2017
My dryer is taking too long to dry the clothes in it and I am not over filling it. My friend suggested a blockage but we already checked for that. We also tried using the different settings and the only one that seems to be buggy and not working is the highest setting. So do you have any suggestions of parts to check or tests to try to fix this.
Hi Dylan, we recommend testing the temperature coming from the dryer when on high heat, which should be about 110 (low end) to 160 (high end) degrees. If your dryer is cycling before it hits the 150 degrees, you most likely have a faulty cycling thermostat. This can be tested with a multi-meter with temperature. Best of luck with this repair!
45 people found this helpful.
Was this helpful?
Thank you for voting!
Steve
February 8, 2018
Greetings, i recently replaced the thermal fuse, cleared the venting ducts, etc. The dryer started up right away, i thought all was well. However, the next day my daughter informed me that her dryer had stopped working again after drying a tablecloth for approximately 20 minutes. I suspect the thermostat is not cycling properly and is causing the dryer too overheat and blow the thermal fuse. Wondering if i should replace the thermostat and the thermal fuse(again). Thank you very much.
For model number IED4400VQ1
Hello Steve, thank you for your question. I would recommend changing the fuse, as well as the Thermostat, Internal-Bias WP3387134. This thermostat is in tune with the temperature of your dryer and regulates it in order to maintain a certain temperature. This thermostat reaches a temperature of 155 degrees, turns off, and then turns on again once it has dropped by 25 degrees. If the thermostat isn't turning off, the unit will overheat and the fuse will blow. I hope this helps!
38 people found this helpful.
Was this helpful?
Thank you for voting!
Marty
November 28, 2017
My dryer is not heating. Trouble shooting leads me to the internal-bias thermostat. Testing with an ohm meter shows continuity between the large terminals and open between the small terminals. Should the small ones read continuity or some resistance reading?
For model number 110.70702990
Hi Marty,
Thank you for your question. Both sets of prongs should read 0 ohms at room temperature. If your meter needle does not move or your display does not change, the part is bad and will need to be replaced. I hope that helps. Good luck with your repair.
30 people found this helpful.
Was this helpful?
Thank you for voting!
Leo
July 20, 2017
My dryer is turning on and “working” but it is not heating properly. It is a gas dryer and it doesn’t seem to have a problem igniting. What should I check?
Hi Leo, we recommend testing the coils 279834 to see if they are faulty. You can test them using a multi-meter tool. Please let us know if you have any further questions.
16 people found this helpful.
Was this helpful?
Thank you for voting!
Vic
August 25, 2017
How do you test thermostat internal-bias
For model number lgr4634pq0
Hi Vic,
Thank you for your inquiry. To test to see if the internal bias thermostat is working you will need to use a multimeter to check the continuity of the part. I hope this helps. Thank you and have a great day!
15 people found this helpful.
Was this helpful?
Thank you for voting!
Danny
October 7, 2017
None of the components are testing bad. ? The thermal fuse, the high temp sensors, start switch, door switch, all are showing continuity or resistance. The heating element is good. I have only 2 choices left. The timer or the motor. The motor is last as it is hard to get to. The problems began when the timed dry cycle quit heating as it ran. So i used the auto-sense cycle and it worked great. Problem solved for 6 months. Yesterday i put the clothes in and set the timer and pushed start. Nothing! No hum, no buzz, nothing. Not on any cycle. Both parts left are expensive. So, is there a go, no go test for the motor? Would you be inclined to suspect the timer? How can i be sure it is one or the other? Thank you for the help.
For model number EED4400WQ0
Hello Danny, thank you for contacting us. It does not sound like an issue with the motor. It sounds like it would be the timer. The dryer timer is used to control the unit's cycles by regulating the length of time that power is directed to each setting. If it becomes faulty it could cause nothing to happen when you start a cycle or only work on certain cycles. Hope this helps!
How many ohms should the thermostat read when tested with a multi-meter?
For model number KEYE760WWH1
Hi Paul,
Thank you for your question. Your meter should be set at the lowest setting. The thermostat should read 0 ohms. If your meter does not move when you test the part, it will have to be replaced. I hope that helps. Good luck with your repair.
12 people found this helpful.
Was this helpful?
Thank you for voting!
< Prev
1
2
3
Next >
✖
Ask a Question
Ask our experts a question on this part and we'll respond as soon as we can.