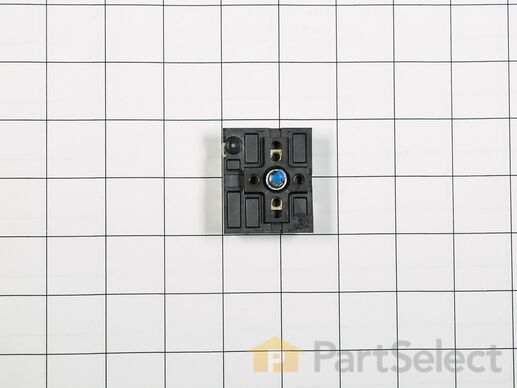
Part Location Diagram of W11121639 Whirlpool Infinite Switch
See part 2 in the diagram
( Grid squares measure 1x1 inch )
Customer Service Representative

Get in touch, we're here to help!

Daily 8am - 9pm EST

customerservice@partselect.com

Infinite Switch W11121639

 Fits your ADM1C!

Rated by 3 customers 

Easy 

15 - 30 mins 

Ratings submitted by customers like you who bought this part.

$ 80.30
  Special Order
Get FREE EconoShip on orders over $100! T&C apply
 Fits your ADM1C!
PartSelect Number PS12347313
Manufacturer Part Number W11121639
Manufactured by Whirlpool
Troubleshooting
This part fixes the following symptoms:
Element will not heat
This part works with the following products:
Range, Cooktop.
This part works with the following products:
Amana, Maytag, Caloric, Litton.
Part# W11121639 replaces these:
AP6278044, 0042060, 0042061, 0045468, 0046342, 0047059, 0058773, 0309862, 31891001, 31891002, 32064502, 74-03-068, 96598P01, M14D45, R0199134, R0702545, W10894484, WP32064502, Y0042060, Y0042061 , Y0045468, Y0046342, Y0047059, Y0058773, Y0309862 Show less
Back to Top
Customer Repair Stories
 Average Repair Rating: 3.8 / 5.0, 3 reviews. What's this?
Sort by:
  • 1
Sorry, we couldn't find any existing installation instruction that matched.
Amana Cooktop Dual Burner switch burned out
Dual Switch Amana Part # 0309550 is no longer available. Opted for this part. YOU MUST ALSO GET KSWITCH KNOB AS OLD ONE WILL NOT WORK Both burners are on but who cares. Better than spending $800 on a new cooktop. Turn off power. Push up top from underneath or carefully pry up top with screw driver. Top has sticky seal around rim so may require a little force. Put short piece of wood pieces across each corner to hold cooktop up. Remove all screws from around edge. Remove ceramic top. DO NOT TOUCH BURNERS Remove 2 scres on each end of switch panel. In order to lift out you must remove 2 screws on frame corner and 2 screws THAT hold burner support on frame. You can then lift up switch panel. Remove 2 screws holding OLD switch to panel. Remove wires from switch. MAKE SURE YOU PUT NEW WIRES IN SAME POSITION AS OLD SWITCH. Reverse to reassemble. Carefully test the burners before putting on the cooktop. Remmber to turn off power before putting on cooktop. NOTE: CHECK ORIENTATION OF SWITCH (COULD BE 180 DEGRESS) OFF. MAKE SURE KNOB OFF POSITION IS CORRECT.
Other Parts Used:
Infinite Switch Infinite Switch Knob
  • James from Prior Lake, MN
  • Difficulty Level:
    Easy
  • Total Repair Time:
    15 - 30 mins
  • Tools:
    Screw drivers
7 of 9 people found this instruction helpful.
Was this instruction helpful to you?
Thank you for voting!
Range burner control switch had a direct short. Burner would not heat up.
First I removed the two screws that held the switch in place and disconnected the five different wires to the device. Then I connected the five wires back in there same locations on the new part and placed it back into the mounting slot / hole. Then put the two screws back to hold it in place. Put the range's back cover back on and connected it back to the power supply box under the cabinet. Turned the breaker back on and turned the new burner knobs on high and got the red glow from the burners and the red indication lights from the range. Yeah, back in service just in time for Thanksgiving cooking. (Changed out 2 burner controls and replaced the hole covers on the switch knobs) Complete project. Thanks
Other Parts Used:
Electric Hole Cover Infinite Switch
  • John from Pride, LA
  • Difficulty Level:
    Really Easy
  • Total Repair Time:
    30 - 60 mins
  • Tools:
    Nutdriver, Screw drivers
2 of 3 people found this instruction helpful.
Was this instruction helpful to you?
Thank you for voting!
The infinite switch controlling one of the range top burners failed.
1 - Turned off electricity to the cook top.
2 - Removed the range top from the cutout in the counter.
3 - Removed the smooth top by removing the screws around the perimiter of the smooth top.
4 - Removed the screws securing the corner closest to the dead switch.
5 - Removed the screws holding the channel, onto which the infinite switched were attached, to the frame of the cooktop base.
6 - Removed the dead switch by removing the screws that hold it to the channel.
7 - One by one move the wires from the old switch to the new one.
8 - Reversed the process, 6 - 5 - 4 - 3 - 2 - 1, to put the cook top back together.

All in all the part was an exact replacement and the repair went really well.
  • erik from chester springs, PA
  • Difficulty Level:
    Easy
  • Total Repair Time:
    15 - 30 mins
  • Tools:
    Screw drivers
12 of 19 people found this instruction helpful.
Was this instruction helpful to you?
Thank you for voting!
  • 1
Questions and Answers

Be the first to ask our experts a question about this part!

Model Cross Reference
This part works with the following models:
PartSelect Number: PS12347313
Manufacturer Part Number: W11121639
Brand
Model Number
Description
Litton
933000
Litton
933010
Maytag
955000
Maytag
975000
Amana
ACU-514
Range - Downdraft, Gas
Amana
ACU-516
Range - Downdraft, Gas
Amana
ADM-1B
Range - Downdraft, Gas
Amana
ADM-1B-P85548-2S
Range - DROP-IN MODULAR RANGE
Amana
ADM-1B-P85548-4S
Range - DROP-IN MODULAR RANGE
Amana
ADM1B
Range
Amana
ADM1C
Range
Amana
ADMIC
Range - Downdraft, Gas
Amana
ADMIC-P8592801S
Range - Amana Range/Stove/Oven Model ADMIC-P8592801S (ADMICP8592801S, ADMIC P8592801S) Parts
Amana
ADMIC-P8592803S
Range - DROP-IN MODULAR RANGE
Amana
AET-480
Cooktop
Amana
AEU-516
Range - Downdraft, Gas
Amana
AK2H30E2
Cooktop
Amana
AK2H30E3
Cooktop
Amana
AK2H30E4
Cooktop
Amana
AK2H30E4-P1131578N
Cooktop - ELECTRIC COOKTOP
Amana
AK2H30E4-P1143705NE
Cooktop - ELECTRIC COOKTOP
Amana
AK2H30E4-P1143719NE
Cooktop - ELECTRIC COOKTOP
Amana
AK2H30W2
Cooktop
Amana
AK2H30W3
Cooktop
Amana
AK2H30W3-P1143705NWW
Cooktop - ELECTRIC COOKTOP
Amana
AK2H30W3-P1143719NWW
Cooktop - ELECTRIC COOKTOP
Amana
AK2H30W3-P1143720NWW
Cooktop - ELECTRIC COOKTOP
Amana
AK2H36E2
Cooktop
Amana
AK2H36E3
Cooktop
Amana
AK2H36E4
Cooktop
Customer Service Representative

Get in touch, we're here to help!

Daily 8am - 9pm EST

Contact Customer Service