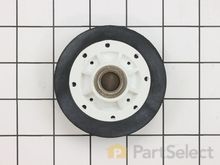
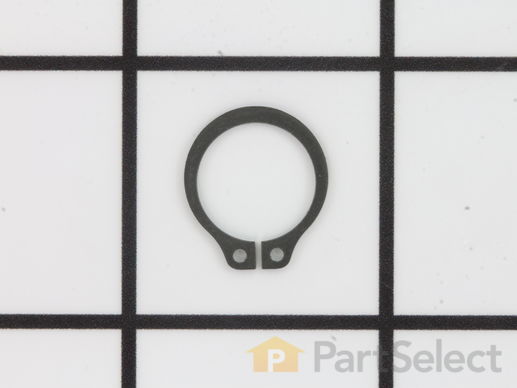
Part Location Diagram of WP23748 Whirlpool Retaining Ring
See part 20 in the diagram
Replacing your Amana Dryer Retaining Ring
( Grid squares measure 1x1 inch )
Customer Service Representative

Get in touch, we're here to help!

Daily 8am - 9pm EST

customerservice@partselect.com

Retaining Ring WP23748

 Fits your LW8201L2!

Rated by 35 customers 

Easy 

1- 2 hours 

Ratings submitted by customers like you who bought this part.

$ 13.58
  In Stock
Get FREE EconoShip on orders over $100! T&C apply

Get this part fast! Average delivery time for in-stock parts via standard shipping: 1.8 days.

 Fits your LW8201L2!
PartSelect Number PS11740487
Manufacturer Part Number WP23748
Manufactured by Whirlpool
Product Description

Retaining Ring Specifications

The metal retaining ring, which is under an inch long, holds the rear wheels on the axels of the dryer. The main reason why it would need to replaced is if the retaining ring has sprung out of place or is damaged. Some the symptoms could be that your dryer does not tumble, it makes a loud buzzing noise, or if it pumps, but will not spin. The tools needed for this project are a putty knife, 5/16 nut driver, and snap ring pliers. Refer to the installation video and diagram for further instructions and guidance. Customers ranked this replacement project as easy.
How Buying OEM Parts Can Save You Time and Money

How Buying OEM Parts Can Save You Time and Money

Part Videos

Replacing your Amana Dryer Retaining Ring

Replacing your Amana Dryer Retaining Ring
Troubleshooting
This part fixes the following symptoms:
Noisy | Will not agitate | Burning smell
This part works with the following products:
Dryer, Washer, Washer Dryer Combo.
This part works with the following products:
Amana, Speed Queen, Maytag, Crosley.
Part# WP23748 replaces these:
AP6007373, 23748, R0601527
Back to Top
Customer Repair Stories
 Average Repair Rating: 2.9 / 5.0, 35 reviews. What's this?
Sort by:
  • 1
  • 2
  • 3
Sorry, we couldn't find any existing installation instruction that matched.
Loud squealing noise
Loud squealing noise coming from the idler pulley. The pulley was not spinning freely on the shaft of the idler pulley lever to the point of putting a groove in the pulley and damaging the belt. To fix the problem replaced the belt, idler pulley, and idler pulley lever. Because I had the dryer apart also replace the following items. Drum support roller and drum slides.
Other Parts Used:
Idler Pulley Wheel with Bearing Idler Pulley Spring Multi Rib Belt Drum Glide Idler Pulley Lever and Shaft Drum Support Roller Retaining Ring Single Drum Glide Felt Pad Thrust Washer
  • Bruce from Frazer, PA
  • Difficulty Level:
    Easy
  • Total Repair Time:
    1- 2 hours
  • Tools:
    Nutdriver, Screw drivers, Socket set
1 person found this instruction helpful.
Was this instruction helpful to you?
Thank you for voting!
Loud Nosies and Screeching
Took the dryer apart, replace parts....put back together....all is well...until I tried to put the belt back on and broke the belt tensioner. Had to put a rush on that order
Other Parts Used:
Wave Washer Drum Support Roller and Shaft Assembly Drum Support Roller Retaining Ring Thrust Washer
  • David from Madison, WI
  • Difficulty Level:
    Easy
  • Total Repair Time:
    15 - 30 mins
  • Tools:
    Nutdriver, Pliers
3 of 8 people found this instruction helpful.
Was this instruction helpful to you?
Thank you for voting!
Noisy drum support rollers
1-Unplugged drier
2-removed lower panel-(2)-8mm screws
3-removed intake from fan-(3)-8mm screws
4-removed dryer's front panel-w/door assembly-(2)-8mm screws. (note there is a door switch you will need to disconnect the wires and remember which terminals they go to.
5-remove the front drum support-(4)-8mm screws
***** at this point the drum is exposed *****
6-reached under the drum pulled the tensioner to relieve tension on belt, then dismounted the belt from only the tensioner and motor shaft; leave the belt on the drum!
7-pull drum toward you and forward about 3-to-4 inches, this exposes the drum rollers.
8-use a screwdriver and pry-off the retaining clip on the end of the roller's shaft and remove the roller.
9-remove the roller support-(2)-8mm screws
10- reinstall new roller support
11- apply a light coat of disc-brake hi-temp wheel bearing grease to the roller support shaft, very light!
12-install a new wavy thrust washer, new roller(note they will say "front" on the side that should face you. Don't mount it backwards!
13-install the outer thrust washer and the new retaining clip; use a flashlight for this part!
14-repeat for the other drum roller.
**** while you have it apart use a vacuum to remove lint from every where you see it; it is a fire hazard!
**** if you think you need a drive belt now is the best time to change it *****
15- re-assemble the dryer in the reverse order, don't forget to re-install the drive belt and be careful not to pinch the door switch wires.
16-re-plug the drier and test
Other Parts Used:
Drum Support Roller and Shaft Assembly Drum Support Roller Retaining Ring Thrust Washer
  • Remy from Santa Maria, CA
  • Difficulty Level:
    Really Easy
  • Total Repair Time:
    30 - 60 mins
  • Tools:
    Nutdriver, Pliers, Screw drivers, Socket set
6 of 7 people found this instruction helpful.
Was this instruction helpful to you?
Thank you for voting!
noisy
Took apart front of dryer, took out tub, replaced pully wheel, put tub back in with new belt, and put front back on. I would recomend replacing wear pads when doing this type of job.
Other Parts Used:
Idler Pulley Wheel with Bearing Multi Rib Belt Retaining Ring Thrust Washer
  • Arthur from Lebanon, ME
  • Difficulty Level:
    Easy
  • Total Repair Time:
    30 - 60 mins
  • Tools:
    Nutdriver, Screw drivers, Wrench (Adjustable), Wrench set
0 of 2 people found this instruction helpful.
Was this instruction helpful to you?
Thank you for voting!
Screeching dryer followed by later clunking when roller went
I pretty much followed a lot of the earlier postings on partselect.com that provided encouragement to pursue replacing this part on my 17 year old dryer (sorry, money is tight these days and I prefer repair to $800 replacement).

I'd like to add that I borrowed a pair of snap-ring pliers from work which made removal and later securing of roller onto shaft much easier and probably avoided a lot of knuckle bruising and cursing.

I erred though in a couple of places during the replacement. Disassembly took about 20 minutes. However, when I re-assembled I had mistakenly already put the roller onto the shaft before trying to put the drum back in. That isn't possible so I had to remove (an initial groan but only a few extra minutes in the end) the roller from the shaft, then reposition the drum and then the roller back on the shaft.

I also decided to replace the belt while I was in there and I should have taken a picture or made a drawing of the belt route before I took it off since I was later left pondering how the heck to snake the belt onto the shaft and also the tensioner. A quick trip to the internet though showed me a similar route and reminded me how to route it.

I'd also like to add to be cognizant of the wires on the door and front panel when disassembling.

Anyone with any sense of mechanical ability and a little common sense ought to be able to do this repiar.

Thanks Part Select!
Other Parts Used:
Drum Support Roller and Shaft Assembly Multi Rib Belt Drum Support Roller Retaining Ring Thrust Washer
  • Joseph from Upper Montclair, NJ
  • Difficulty Level:
    Easy
  • Total Repair Time:
    1- 2 hours
  • Tools:
    Pliers, Screw drivers, Socket set
2 of 3 people found this instruction helpful.
Was this instruction helpful to you?
Thank you for voting!
Squeak and slight burning smell during spin cycle.
I took off the lower front panel and “watched” with a flashlight during the spin cycle. I could see that the idler pulley was intermittently stopping and starting. The back of the drive belt was also worn in the center. When the idler pulley was moving, it squeaked, when it didn’t, the friction wore the belt and made the smell.
Other Parts Used:
Idler Pulley Wheel V-Style Spin and Agitate Belt - 28-3/4 inches long Retaining Ring Thrust Washer
  • Jim from Swanton, OH
  • Difficulty Level:
    Easy
  • Total Repair Time:
    1- 2 hours
  • Tools:
    Nutdriver, Pliers, Screw drivers, Socket set
13 of 15 people found this instruction helpful.
Was this instruction helpful to you?
Thank you for voting!
Loud banging sound. Worn out roller.
Pulled off the lower panel with 5/16 socket.Pulled off the door assembly by removing the two screws at the bottom of the door assembly. I pulled down a little and then out. be carefull of the wires. Other posts said to remove. The wires were long enough I did not have to remove them. I just leaned it against the wall. I then removed the 4 screws that hold the front piece in.pulled it off replaced brackets , installed self adhesive felt(stuck good) and then glides. Mine were thin but not the problem. I then reached under the drum and released the belt from the tensioner. I then pulled the whole drum out.This is the time to vacum out good. I could get to the rear rollers very easy. The left roller was shot and the shaft half wore into(the problem). I pulled off the two screws holding the roller support. Normally You have to remove the wheel with snap ring pliers first to remove the support. In this case snap ring long gone. Replaced support shaft, installed thrust washers and roller with grease for both sides. The right support shaft was still good. Removed tensioner pulley and inspected. It was just as good as the new one. Cleaned and greased and reinstalled. Put new belt on the tub and slid it back in. Be carefull to get the belt on the proper side of the tensioner. I then installed the front supprt in place to support the tub with the 4 screws. Spun the tub(felt good) then reached under and reinstalled belt to motor and tensioner. Spun again to check for belt alignment. (Check) Reinstalled door an lower panel. Test Quiet Sounds like new. Very easy! I hope this helps someone just as the other post has helped me. Blessings to all.
Other Parts Used:
Idler Pulley Wheel with Bearing Drum Support Roller and Shaft Assembly Multi Rib Belt Drum Glide Drum Support Roller Retaining Ring Glide Bracket Kit Single Drum Glide Felt Pad Thrust Washer
  • David from Underwood, IA
  • Difficulty Level:
    Really Easy
  • Total Repair Time:
    15 - 30 mins
  • Tools:
    Socket set
163 of 234 people found this instruction helpful.
Was this instruction helpful to you?
Thank you for voting!
dryer was load & loud banging noise when drying
I researched on this site as well as a few other sites for the possible cause of the problem as I am not experienced in appliance repairs nor very experienced in being a handy man. Someone told me dryers out of all appliances are the easiest ones to repair. I agree now. I recommend taking a look at your rollers first as it is easy to get to prior to ordering all your parts so that you can get all your parts at once.

I first removed the front lower panel (4 screws), carefully removed the plastic vent from lint screen to outside venting which is just held in place, then removed upper front panel which included the door (4 screws/hex), removed 4 screws/hex holding top panel on and just lifted it up and proped it up and then I pulled out drum. I was able to see the two rollers at the bottom at this point. My left roller which was over the gas heat exchanger was so badly worn I could just pull it off. Here is where if I had inspected it before ordering the parts, I would have found the roller arm needed to be replaced too.

Replacing the rollers you need to pull the retaining rings off which requires the retaining ring pliers. Slide the retaining rings off and then pull off the old rollers. I replaced the rollers and thrust washers on both sides, replaced the retaining rings and vacuumed out the entire dryer underneath then replaced everything in reversed order. Twenty minutes to replace these and we now have a quite dryer and I have a very happy wife. Well, I'm very happy that I only spent $30 to fix a dryer instead of probably over $100 for a repair man to do.
Other Parts Used:
Drum Support Roller Retaining Ring Thrust Washer
  • Barry from Waukesha, WI
  • Difficulty Level:
    Really Easy
  • Total Repair Time:
    15 - 30 mins
  • Tools:
    Pliers, Screw drivers, Socket set
1 of 2 people found this instruction helpful.
Was this instruction helpful to you?
Thank you for voting!
Dryer making loud squeeking noises
The pully wheel was completely worn down as the belt had cut into it over time. I'm not sure if the lever and shaft needed replacing but since the part was inexpensive I decided to replace it as well as the wheel. The easiest way to access the parts was to turn the dryer on its side and remove the bottom panel of the dryer. This eliminated the need to remove the drum. It was then easy to reach in with a wrench and remove nut and bolt that held on the pulley lever. I also had to remove the spring which was attached to the lever. Next I put the new pully wheel on the shaft of the new pulley lever. The most difficult part of the job was installing retainer clip which holds the wheel on the shaft. This took a little persistance. After this was done it was simple to put the assembly back in place, reattach the spring and tighten the nut and bolt. I then replaced the bottom panel of he dryer, turned it upright and plugged it in. The whole job took just over an hour. One tip: Before removing the old assembly, I took a picture of it with my cell phone camera so I would remember how it went back together.
Other Parts Used:
Idler Pulley Wheel with Bearing Idler Pulley Lever and Shaft Retaining Ring
  • James from North Kingstown, RI
  • Difficulty Level:
    Easy
  • Total Repair Time:
    1- 2 hours
  • Tools:
    Pliers, Socket set, Wrench set
15 of 15 people found this instruction helpful.
Was this instruction helpful to you?
Thank you for voting!
Drum would not turn with moderate to heavy load.
Removed the front dryer panels (lower & upper), front drum support and drum. This gave me easy access to the idler pulley and tension spring. I also took the opportunity to vacuum all of the lent that had collected over the years. After installing the new parts and aligning the belt, I reassembled the panels, plug it in and it worked like a champ! Locating the parts on your website was fast and easy. I appreciate it and thank you.
Other Parts Used:
Idler Pulley Wheel with Bearing Idler Pulley Spring Multi Rib Belt Retaining Ring Thrust Washer
  • Keith from Marietta, GA
  • Difficulty Level:
    Easy
  • Total Repair Time:
    30 - 60 mins
  • Tools:
    Screw drivers, Socket set
0 of 1 people found this instruction helpful.
Was this instruction helpful to you?
Thank you for voting!
  • 1
  • 2
  • 3
Questions and Answers

Ask our experts a question about this part and we'll get back to you as soon as possible!

1 question answered by our experts.
Sort by:
  • 1
Sorry, we couldn't find any existing answers that matched.Try using some different or simpler keywords, or submit your new question by using the "Ask a Question" button above!
Chris
November 2, 2021
What size retaining ring pliers do you need for these retaining rings?
For model number NDE2330AYW
PartSelect logo
Hello Chris, Thank you for the question. You can use 0.5mm Snap Ring Pliers. We hope this helps!

2 people found this helpful.

Was this helpful?
Thank you for voting!
  • 1
You May Also Need ?
Model Cross Reference
This part works with the following models:
PartSelect Number: PS11740487
Manufacturer Part Number: WP23748
Brand
Model Number
Description
Amana
7493-LEM437
Dryer - DRYER
Amana
AA3110
Washer - Top Loading
Amana
AA3111
Washer - Top Loading
Amana
AA3210
Washer - Top Loading
Amana
AA3410
Washer - Top Loading
Amana
AA4110
Washer - Top Loading
Amana
AA4111
Washer - Top Loading
Amana
AA4210
Washer - Top Loading
Amana
AA4211
Washer - Top Loading
Amana
AA4410
Washer - Top Loading
Amana
AA4411
Washer - Top Loading
Amana
AA5121
Washer - Top Loading
Amana
AA5220
Washer - Top Loading
Amana
AA5221
Washer - Top Loading
Amana
AA5222
Washer - Top Loading
Amana
AA5420
Washer - Top Loading
Amana
AA5421
Washer - Top Loading
Amana
AA6121
Washer - Top Loading
Amana
AA6221
Washer - Top Loading
Amana
AA6421
Washer - Top Loading
Amana
AA7131
Washer - Top Loading
Amana
AA7231
Washer - Top Loading
Amana
AA8431
Washer - Top Loading
Amana
AA9131
Washer - Top Loading
Amana
AA9231
Washer - Top Loading
Amana
AA9431
Washer - Top Loading
Speed Queen
ADE30RGS171TW01
Dryer - DRYER
Speed Queen
ADE3LRGS171TW01
Dryer - DRYER
Speed Queen
ADE3SRGS173TW01
Dryer - Dryer
Speed Queen
ADE3SRGS175TW01
Dryer - Dryer
Customer Service Representative

Get in touch, we're here to help!

Daily 8am - 9pm EST

Contact Customer Service