This broil element supplies heat for cooking purposes and is located in the roof of an oven. If you find there is little to no heat when cooking, a burned-out element, or food is taking too long to cook, these symptoms could be solved by replacing this part. Before starting this replacement, make sure you unplug the range from the power source or shut off from the house circuit breaker. All you need to complete this repair is a Phillips screwdriver. For safety reasons, make sure to wear gloves. Refer to the manual provided by the manufacturer for more instruction.
How Buying OEM Parts Can Save You Time and Money
Part Videos
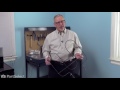
Replacing your Whirlpool Range Broil Element
Troubleshooting
This part fixes the following symptoms:
Little to no heat when broiling | Element will not heat | Oven not heating evenly | Little to no heat when baking
Keep searches simple. Use keywords, e.g. "leaking", "pump", "broken" or "fit".
Sorry, we couldn't find any existing reviews that matched. Try using some different or simpler keywords.
★★★★★
★★★★★
James C - April 28, 2021
Verified Purchase
Success story
I am not an electrician, but I was a abler to install the broil element without a problem. Now the stove heats as it hasn't been for a long time.
★★★★★
★★★★★
A B - September 24, 2019
Verified Purchase
easy repair, perfect part
the part arrived in new condition. Easy to replace, my oven back working!!!
★★★★★
★★★★★
Jeff D - November 2, 2018
Verified Purchase
Easy replacement!
Was an easy job because I viewed a video on how to replace this part. Of course, the spade connectors on the back of the stove did not come off as easily as in the video but I finally removed them (there are two) without breaking anything.
★★★★★
★★★★★
Bill E - June 19, 2018
Verified Purchase
Great part
Part was fine but didn’t solve the problem. I think it’s in the control panel.
★★★★★
★★★★★
Kenneth H - June 1, 2018
Verified Purchase
Broiler element
Part shipped out quick, easy install, great co. Next time i need something, im goin straight to partselect.com
★★★★★
★★★★★
Joyce B - January 24, 2018
Verified Purchase
Very happy
The part came very quickly in great condition My BROILER is working again
< Prev
1
Next >
Customer Repair Stories
Average Repair Rating: 4.0 / 5.0, 10 reviews.
What's this?
Sort by:
< Prev
1
Next >
Search filter:
Clear Filter
Your search term must have 3 or more characters.
Keep searches simple. Use keywords, e.g. "leaking", "pump", "broken" or "fit".
Sorry, we couldn't find any existing installation instruction that matched.
Broiler element burned out
After doing a YouTube search. I successfully completed the repair by easily diagnosing the issue with the element. I watched a video about 5 most common problems with whirlpool broiler elements. The first being to inspect the element for damage. I found a small section that appeared to be rough and had a raised bump. I
... Read moredecided to order a new element because the oven is older and it wouldn’t hurt to install a new one even if this wasn’t the issue. Once the part arrived, which it did quickly, I followed the video instructions. It was easy and straight forward. I completed the task in under thirty minutes. It was very simple and I now have a functional broiler element.
Read less
chris from HILTON HEAD, SC
Difficulty Level:
Really Easy
Total Repair Time:
15 - 30 mins
Tools:
Screw drivers
3 of 3 peoplefound this instruction helpful.
Was this instruction helpful to you?
Thank you for voting!
The large top burner and the oven bake burner elements as well as the oven light had all burned out
I looked up a how to video on You Tube which I watched and then ordered the appropriate parts which I installed as soon as they arrived. Problem solved.
Remove 2 screws inside oven holding element . Remove screws holding back panel. Plug wires (2) into new element.Install back panel . Done.
PHILIP from NORTH PORT, FL
Difficulty Level:
Really Easy
Total Repair Time:
15 - 30 mins
Tools:
Screw drivers
1 personfound this instruction helpful.
Was this instruction helpful to you?
Thank you for voting!
Sparks flying out of the oven, broiler element melting
First Things first, unplug unit, remove rear cover with Phillips head screwdriver, disconnect, wires from broiler element which is the top, one, open oven, unscrew top screws first, then two at the back, wiggle out element, then reverse Steps , test repair before putting cover back on. Then ta-da, you saved yourself a $300. Service c
... Read moreall to the appliance repair guy.
Read less
corey from SHAKER HEIGHTS, OH
Difficulty Level:
Really Easy
Total Repair Time:
15 - 30 mins
Tools:
Screw drivers
2 of 2 peoplefound this instruction helpful.
Was this instruction helpful to you?
Thank you for voting!
Broiler element failed
Slide range out,unplug range,remove rear cover to unplug element wires, open door remove screws inside oven remove element
steven from SEDRO WOOLLEY, WA
Difficulty Level:
Very Easy
Total Repair Time:
15 - 30 mins
Tools:
Screw drivers
9 of 10 peoplefound this instruction helpful.
Was this instruction helpful to you?
Thank you for voting!
Oven Demon Possession
Our repair was extrodinarily easy. As my husband was taking out the old element and the oven was off, the element heated up and actually burned him. He readjusted it and it refused to heat again. We figured at that point that there must be a short, so we never even opened the box with the new element. A short time later we decided to use
... Read morethe top of the stove for soup and a small fire started in the oven. We turned off the braker at that point and ordered a new oven.
Read less
Kevin from Greensboro, NC
Difficulty Level:
Really Easy
Total Repair Time:
Less than 15 mins
1 personfound this instruction helpful.
Was this instruction helpful to you?
Thank you for voting!
Broiler element not working
It went great. I am not very handy, but with a little help from your website reviews, I was able to easily remove the old broiler element and replace it with the new one in less than an hour. I immediately tested it and found that it worked great.
Normand from Lincoln, RI
Difficulty Level:
Easy
Total Repair Time:
30 - 60 mins
Tools:
Screw drivers
6 of 11 peoplefound this instruction helpful.
Was this instruction helpful to you?
Thank you for voting!
Broil element burned out
Very easy . Just removed four screws and removed the back cover. Then just unplugged two clips from the element . The repeated all of my steps in reverse . Be sure to unplug the oven before you start on the project .
carlton from lakeland, FL
Difficulty Level:
Really Easy
Total Repair Time:
15 - 30 mins
Tools:
Screw drivers
19 of 25 peoplefound this instruction helpful.
Was this instruction helpful to you?
Thank you for voting!
Oven doesn't heat evenly
Moved the stove out from the wall. Took out the screws from the back and then from the top. I pulled the piece through the back to unplug the clips from the elements. But the wires went back through the openings. So I had to take the back off of the stove to get to the wires to put back through the holes in the stove. Once the clips
... Read more were back together, I put the back back on the stove. Rebolted the part to the stove and moved it back.
Read less
Helen from Brush, CO
Difficulty Level:
A Bit Difficult
Total Repair Time:
1- 2 hours
Tools:
Screw drivers
23 of 36 peoplefound this instruction helpful.
Was this instruction helpful to you?
Thank you for voting!
The broiler element started sparking and melting in one spot. I thought it would catch on fire and quickly turned off the oven.
First we unplugged the range. My husband removed the old element using a screw driver. He also removed the back panel on the oven after pulling it out from the wall. He unplugged the broiler prongs and plugged in the new element, put it all back together using the screw driver. We plugged it back in, turned on the oven and it is workin
... Read moreg great! Simple and easy to do in a short amount of time. Cool!!
Read less
Ramona from Mexico, MO
Difficulty Level:
Really Easy
Total Repair Time:
15 - 30 mins
Tools:
Screw drivers
31 of 39 peoplefound this instruction helpful.
Was this instruction helpful to you?
Thank you for voting!
< Prev
1
Next >
Questions and Answers
Ask our experts a question about this part and we'll get back to you as soon as possible!
3 questions answered by our experts.
Sort by:
< Prev
1
Next >
Search filter:
Clear Filter
Your search term must have 3 or more characters.
Keep searches simple. Use keywords, e.g. "leaking", "pump", "broken" or "fit".
Sorry, we couldn't find any existing answers that matched.Try using some different or simpler keywords, or submit your new question by using the "Ask a Question" button above!
Don
February 11, 2018
Replace broiler element. Not getting hot. Just warm. What should i look at next
For model number Xfef374lvs
Hi Don,
Thank you for your question. The the oven is not heating correctly, then the issue is likely with the oven sensor, sometimes called the oven thermostat, and you will need to check with a multimeter. An oven thermostat is a switch that opens and closes in response to the temperature it senses. It is typically found in the control panel, where a liquid-filled temperature-sensing bulb senses and maintains the internal oven temperature by cycling heat on and off.
Before repairs or testing can begin you must disconnect the electricity at the fuse panel, at the circuit breaker panel, or by pulling the plug. Make sure the power is off before proceeding. A jolt from 220 volts can be fatal, use caution!
Access the oven thermostat, which is located in different places depending on the make and model:
On freestanding ranges, access the thermostat by removing the screws that hold the back panel in place at both ends.
On models with front-loading controls, remove the panel and tilt it for access. Be careful not to let the wires disconnect from their components.
Some built-in models have a removable backsplash. Lift the backsplash, rest it on the cook top and remove the screws from the backsplash, which holds the rear panel.
On wall ovens or eye-level ranges, access the control panel by opening the door and removing the screws that secure it. The screws may be under the exhaust hood or below the control panel. If the control panel is hinged, simply tilt it towards you.
On some models both the rear and front control panels must be removed. The screws may be found on the trim and occasionally the trim must be removed.
When testing the thermostat switch contacts for continuity, refer to the wiring diagram and remove only those wires being tested - and only one pair at a time. Test switch contact terminals as per your wiring diagram. If the switch lacks continuity at any of the contact terminal points then the entire thermostat switch needs to be replaced.
Adjusting the thermostat:
Test the oven temperature by placing the tester in the oven's center and leaving it for 30 minutes at 350 degrees. Record the minimum and maximum temperatures of three cycles, then add those figures together, divide the result by six and you have the oven's average temperature.
If the average temperature is more than 25 degrees off, try calibrating the thermostat by following your appliance manual instructions for thermostat calibration.
Normally, thermostats are calibrated by pulling the oven's thermostat knob off, turning the knob over and adjusting the calibration ring on the back. If your oven doesn't have a calibration ring you may need to replace the thermostat.
To remove the thermostat:
Disconnect the capillary tube and push it through the back oven wall, being careful not to break the flammable capillary tube wire.
Remove the screws that secure the thermostat to the control panel and gently pull the thermostat out, leaving the wires in place.
To install a new thermostat, reverse the disassembly procedures (Step 7 above), transferring the wires individually from the old unit to the new. I hope this helps. Thank you and have a great day!
4 people found this helpful.
Was this helpful?
Thank you for voting!
James Buckley
November 5, 2021
Broil element not heating
For model number WFE371lLVBo
Hi James,
Thank you for contacting us. If the broil element is not heating, the issue may be with the oven sensor. The oven temperature sensor is the part that monitors the oven temperature and signals the electronic control board to turn the elements on and off. Before removing this part from the oven and testing it with a multimeter for continuity, unplug the oven from the electrical outlet. To test the sensor, you will need to reference your owner’s manual to determine what the correct reading should be for your model, as this varies from model to model. To test it for continuity, use a multimeter on the Rx1 setting and touch the terminals with the probes. This test needs to be done with the sensor at room temperature to produce accurate results. If your test results do not meet the manufacturer’s guidelines, you need a replacement temperature sensor. If the sensor is fine, you will need to check the elements, the electronic control board and the wiring between the parts to see which one is causing the issue. We hope this helps! If you have any questions, please let us know.
Does the Broil Element #W10856603 work for this (apparently outdated) model? It looks the same...but I don't know if the element is bad, or if it is a control board issue. Is there a way to test either the element or the wires that plug on to the element?
For model number 8R396LXGQ Whirlpool Gold Accubake System, Super Capacity 465
Hello Aaron, thank you for getting in touch. If your model is GR396LXGQ, then the broil element, part number PS11731333, is compatible with your model. You can test the broil elements with a multimeter to see if it is working correctly or not. It should display a reading between 0 - 50 ohms. If it is faulty, you may need to replace it to fix the issue. We hope this helps!
Was this helpful?
Thank you for voting!
< Prev
1
Next >
✖
Ask a Question
Ask our experts a question on this part and we'll respond as soon as we can.