This light bulb is located on the inside of your microwave. The bulb is behind the top grill. It will need to be replaced when it has burnt out and no longer works. Unplug the unit before beginning th...
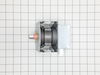
This ceramic microwave fuse is just over an inch in length. It is white in the center, and metal on both ends. This is a 20-amp fuse, and is used to power your microwave. If the touch pad on the micro...
Ask our experts a question about this model and we'll get back to you as soon as possible!
3 questions answered by our experts.
Sort by:
< Prev
1
Next >
Search filter:
Clear Filter
Your search term must have 3 or more characters.
Keep searches simple. Use keywords, e.g. "leaking", "pump", "broken" or "fit".
Sorry, we couldn't find any existing answers that matched.Try using some different or simpler keywords, or submit your new question by using the "Ask a Question" button above!
Brittany
August 12, 2021
Our microwave has started to go on the fritz. It started with the display board blinking, though the microwave itself would continue to function. Slowly, the panel stopped responding. We could usually flip the fuse box it was connected to, and get a couple of days worth of life before it started to crash again. Now when we try this trick, it works maybe once or twice, before stops completely. Sometimes, if we dont touch it for a few days, the display still doesn't work, but we can use the microwave again (thank goodness for the express button!). To date we have replaced a fuse, and the control panel- and hasn't seemed to help. Any suggestions on what to troubleshoot next?
For model number ZSC1001KSS01
Hello Brittany, Thank you for the question. This could indicate the Display Control Board is defective and may need to be replaced. We hope this helps!
Hi Sam,
Thank you for your question. Here is a link to one of our videos from YouTube that you may reference on how to install the handle, https://www.youtube.com/watch?v=JXwgttc1Cec. The oven and the door handle in the video may not show exactly like the ones you have, but it will give you a general idea on how to install the part. I hope this helps. Thank you and have a great day!
Was this helpful?
Thank you for voting!
Arthur
June 14, 2021
I have a GE advantium microwave. The clock / timer display has begun to flicker very noticeably during a cooking cycle and for a short time afterwards. It stabilizes after a few minutes of non use and looks fine until the next use. What's failing?
For model number ZSC1001KSS01
Hello Arthur, Thank you for the great question. This normally indicates the Display Control Board is defective and may need to be replaced. We hope this helps, good luck with this repair.
Turned out the issue was easily solved by replacing a single, inexpensive fuse.
First off, UNPLUG THE MICROWAVE.
The fuse is located under the plastic grill at the top of the microwave. It's held on by two screws. Once you've removed the screws and taken off the plastic grill, you go to the right side of the mic
... Read morerowave and remove another screw that holds a small metal grill in place. Removing the small metal grill is probably the toughest part of this repair. You kind of have to rock it back and forth a bit to get it to release. Once that's off, you can get to the fuse. I removed the burnt out one with a pair of needle nose pliers. I also put a small piece of cardboard under the fuse when I did this so I didn't accidentally drop it into the innards of the microwave. I did the same thing when I replaced the new fuse. I then plugged the appliance back in and made sure it worked. Once that was confirmed, I replaced both grills.
Turned of f the circuit breaker to the microwave. Unscrewed the cover (1 screw!) popped out the old bulbs and plugged in the new ones, using the bubblewrap as a handle to be sure my skin didn't touch the light bulbs so the oil from my hands didn't damage or shorten the life of the new bulbs. Turned the circuit back on. That's it!