Models > WTW4800XQ1 > Symptoms > Will Not Start

Parts That Fix Whirlpool Washer WTW4800XQ1 Will Not Start

Will Not Start is a commonly reported symptom for the WTW4800XQ1 Whirlpool Washer, and we have put together a full guide on how to fix this. This advice is based on feedback from people who own this exact appliance. We have listed the most common parts for your WTW4800XQ1 Whirlpool Washer that will fix Will Not Start. We have included repair instructions, and helpful step-by-step video tutorials. If you are experiencing this issue, not to worry, DIYers just like you have fixed this, and shared their experience to help you!

Fixes Symptom 70% of time
★★★★★
★★★★★
36 Reviews

Rated by 15 customers 


Really Easy 

30 - 60 mins 

Ratings submitted by customers like you who bought this part.   

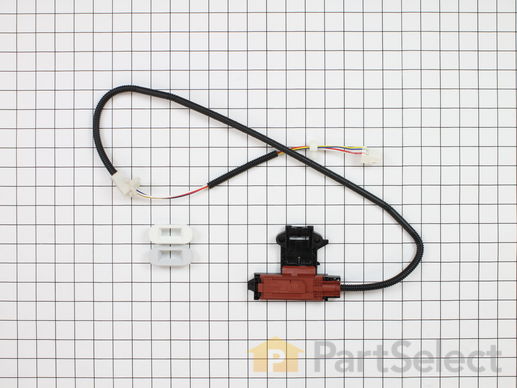
The point of the lid switch is for the tub to stop spinning when the washer lid is opened. It is a safety precaution just in case someone decides to stick their hand inside the washer while the tub is spinning.

$ 47.84
  In Stock
PartSelect Number PS3497627
Manufacturer Part Number W10404050

Customer Repair Stories

Lid would not register closed washer would not spin

Remove top of washer 5min R&R cable 20 min total time 25 min.
  • william from HOLLEY, NY
  • Difficulty Level:
    Really Easy
  • Total Repair Time:
    30 - 60 mins
  • Tools:
    Pliers, Screw drivers
28 of 35 people found this instruction helpful.
Was this instruction helpful to you?
Thank you for voting!

Defective lid latch - Cabrio Washer

The instructions that came with the part were worthless. Essentially, unplug, put in new part, plug it back in. I spent a considerable amount of time on the internet and finally found a video showing how to open the top. Unlike other models, it is held down by clamps in the back rather than clips in the front. Once finding this information the installation was simple. Remove the clamps and the back of the console, slide the top forward and lift, remove and replace the lock and reassemble. You don't even have to remove the hoses.
  • William from Wakefield, RI
  • Difficulty Level:
    Very Easy
  • Total Repair Time:
    15 - 30 mins
  • Tools:
    Nutdriver, Screw drivers
91 of 109 people found this instruction helpful.
Was this instruction helpful to you?
Thank you for voting!
Fixes Symptom 15% of time
★★★★★
★★★★★
8 Reviews

Rated by 2 customers 


Really Easy 

15 - 30 mins 

Ratings submitted by customers like you who bought this part.   

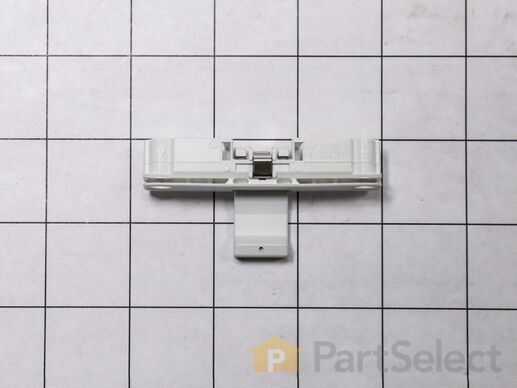
This part is the replacement lid latch or latch assembly for your top-load washer. The lid latch holds your washer door closed, and allows the washer to run its cycle. If the lid latch is damaged, your washer door may not close properly and you may not be able to run your washer. The latch is found under the lid and can be screwed out and replaced. You will need a Phillips-head screwdriver for this repair. This part is sold individually and is and OEM part from the manufacturer.

$ 44.48
  In Stock
PartSelect Number PS11750882
Manufacturer Part Number WPW10240513

Replacing your Whirlpool Washer Lid Latch Strike

Replacing your Lid Latch Strike

Customer Repair Stories

lid would not lock, washer would not run...

Removed old striker ( 2 Phillips head screws ) replaced with new striker with the 2 screws and was done, easy fix...
  • John from Hale Center, Texas, TX
  • Difficulty Level:
    Really Easy
  • Total Repair Time:
    Less than 15 mins
  • Tools:
    Screw drivers
8 of 9 people found this instruction helpful.
Was this instruction helpful to you?
Thank you for voting!
Fixes Symptom 10% of time
★★★★★
★★★★★
26 Reviews

Rated by 5 customers 


Easy 

30 - 60 mins 

Ratings submitted by customers like you who bought this part.   

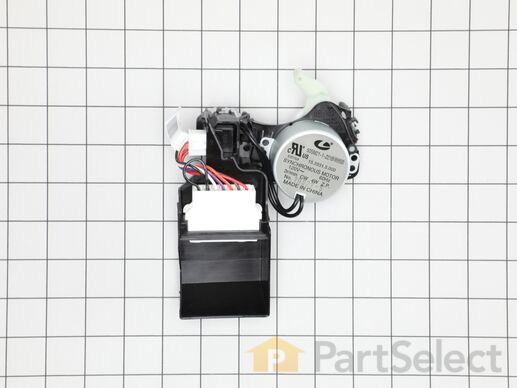
This part changes the transmission from agitation to spin mode. This actuator is for washers. Actuator shifts the splutch and monitors the position of the splutch.

$ 73.40
  In Stock
PartSelect Number PS11747977
Manufacturer Part Number WPW10006355

Customer Repair Stories

washer was draining but no spinning

Disconnect electrical plug from the wall, disconnect drain hoses and tip washer forward remove belt hosing basket and then remove the electrical plug that contains seven wires connected to actuator then remove the two small screws.
Then reverse the operation to stall the new part. Very easy.
  • JOSE from MILLBURY, MA
  • Difficulty Level:
    Really Easy
  • Total Repair Time:
    Less than 15 mins
  • Tools:
    Screw drivers, Socket set
3 of 3 people found this instruction helpful.
Was this instruction helpful to you?
Thank you for voting!

Lid Lock light blinking, machine will not start

A detailed Service Technician Service Manual is hidden inside the machine on the front panel. It is hidden by the bleach dispenser input. It gives a list of fault codes and instructions for calibration after repair, resetting fault codes, and a manual test mode for stepping the machine through each mode on command. The Tachometer failed which would not let the machine come up to maximum spin speed. The tachometer is part of the solenoid actuator that shifts the transmission. It is not specifically called out in the manual. Any failure causes the lid lock light to blink which gives the appearance of a lid lock failure
  • David from Los Alamos, NM
  • Difficulty Level:
    A Bit Difficult
  • Total Repair Time:
    30 - 60 mins
  • Tools:
    Nutdriver, Screw drivers
312 of 388 people found this instruction helpful.
Was this instruction helpful to you?
Thank you for voting!
Fixes Symptom 2% of time
★★★★★
★★★★★
356 Reviews

Rated by 276 customers 


Really Easy 

15 - 30 mins 

Ratings submitted by customers like you who bought this part.   

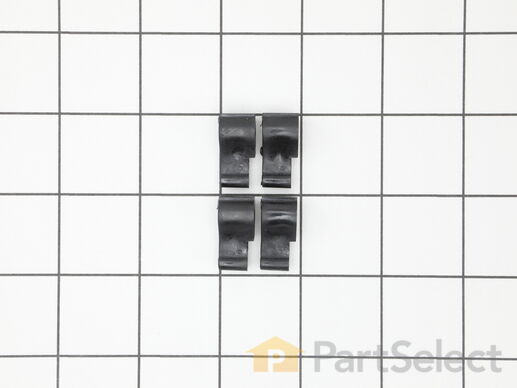
This kit is used for replacing the agitator directional cogs (Agitator Dogs, Agitator Repair Kit, Washer Agitator Dogs, Agitator Dog Ears). The agitator is what creates the thrusting motion in your washer to tumble your clothes during the washer cycle. Your agitator will rotate one way, and not the other. The agitator dogs are what prevent the agitator from rotating in both directions, while allowing it to rotate in one direction. Your agitator cogs may be malfunctioning if you can manually rotate the agitator in both directions. If broken they will need to be replaced. Cogs can be found by simply removing the softener dispenser and then removing the agitator cap. The are attached to the agitator. This replacement part features 4 agitator directional cogs. There are 4 cogs per package that are made up of high-quality plastic. This part comes in white/beige.

$ 4.39
  In Stock
PartSelect Number PS388034
Manufacturer Part Number 80040

Replacing your Whirlpool Washer Agitator Directional Cogs

Replacing your Agitator Directional Cogs

Customer Repair Stories

top half of agitator did not move during wash cycle

pull off softner dispenser, pop off agitator cap by inserting straight screw driver into small slot, remove bolt inside agitator with socket wrench and long extension, pull agitator straight up off shaft, place agitator on floor, with feet holding bottom half pull top half apart from bottom half by pulling straight up, note direction of old cogs remove and replace with new, reassemble
  • dennis from new stanton, PA
  • Difficulty Level:
    Really Easy
  • Total Repair Time:
    Less than 15 mins
  • Tools:
    Socket set
276 of 319 people found this instruction helpful.
Was this instruction helpful to you?
Thank you for voting!

washer wouldn't agitate

First pry off the cap of the agitator. Then using a socket remove the bolt that holds the plastic cup in place. Remove this cup by prying it loose from the two tabs that hold it in place. Once this cup is removed you can get to the broken cogs.
Slip the new cogs into the underside of the cup, and slide the cup back down in the agitator housing using the slots on the side for a guide. (You may want to remove the entire agitator and assemble everything upside down, then flip it all back over to mount, so the cogs don't fall out).
Tighten the bolt, snap the cap back in place on top of the agitator and your'e done. Easy repair.
  • mike from Kent, WA
  • Difficulty Level:
    Easy
  • Total Repair Time:
    15 - 30 mins
  • Tools:
    Screw drivers, Socket set
931 of 1007 people found this instruction helpful.
Was this instruction helpful to you?
Thank you for voting!
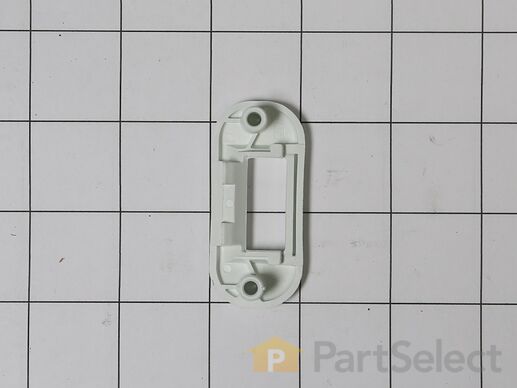
5 Bezel
Fixes Symptom 2% of time
★★★★★
★★★★★
1 Review

Rated by 1 customer 


Really Easy 

30 - 60 mins 

Ratings submitted by customers like you who bought this part.   

$ 10.83
  In Stock
PartSelect Number PS11754116
Manufacturer Part Number WPW10392041