Models > WM2277HS > Symptoms > Will Not Start

Parts That Fix LG Washer WM2277HS Will Not Start

Will Not Start is a commonly reported symptom for the WM2277HS LG Washer, and we have put together a full guide on how to fix this. This advice is based on feedback from people who own this exact appliance. We have listed the most common parts for your WM2277HS LG Washer that will fix Will Not Start. We have included repair instructions, and helpful step-by-step video tutorials. If you are experiencing this issue, not to worry, DIYers just like you have fixed this, and shared their experience to help you!

Fixes Symptom 63% of time
★★★★★
★★★★★
26 Reviews

Rated by 13 customers 


Really Easy 

30 - 60 mins 

Ratings submitted by customers like you who bought this part.   

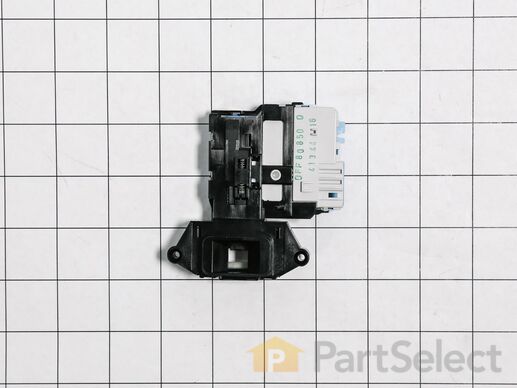
The door lock assembly is a part for your washing machine and tells the washer that the door is closed and locked into place. If the switch has shorted out and not locking, it is no longer delivering the message to the machine and it will not latch into place. If you find that your door will not close, open, or start, it is more than likely an issue with the locker switch assembly. The switch is located behind the front panel. You will need to remove the gasket to reach the switch.

$ 85.65
  In Stock
PartSelect Number PS3533609
Manufacturer Part Number EBF49827801

Replacing your LG Washer Door Lock Assembly

Replacing your Door Lock Assembly

Replacing your LG Washer Door Lock Assembly

Replacing your Door Lock Assembly

Customer Repair Stories

Would not run

I followed the instructions of your instant repairman. A Phillips screwdriver was the only tool needed. Thank you .
  • Gary from CPE GIRARDEAU, MO
  • Difficulty Level:
    Really Easy
  • Total Repair Time:
    30 - 60 mins
  • Tools:
    Screw drivers
8 of 11 people found this instruction helpful.
Was this instruction helpful to you?
Thank you for voting!

Door locking mechanism

I received the locking device. I received an email from parts select with a repair video link. I watch the video and repeated the steps. Very easy and educational. Thank you for simplifying something I have limited experience doing.
  • Aaron from SAN ANTONIO, TX
  • Difficulty Level:
    Very Easy
  • Total Repair Time:
    15 - 30 mins
  • Tools:
    Screw drivers
28 of 32 people found this instruction helpful.
Was this instruction helpful to you?
Thank you for voting!
Fixes Symptom 18% of time
★★★★★
★★★★★
2 Reviews

Rated by 1 customer 


Easy 

30 - 60 mins 

Ratings submitted by customers like you who bought this part.   

$ 73.65
  In Stock
PartSelect Number PS3528920
Manufacturer Part Number 6201EC1006T

Customer Repair Stories

Unit would not start up

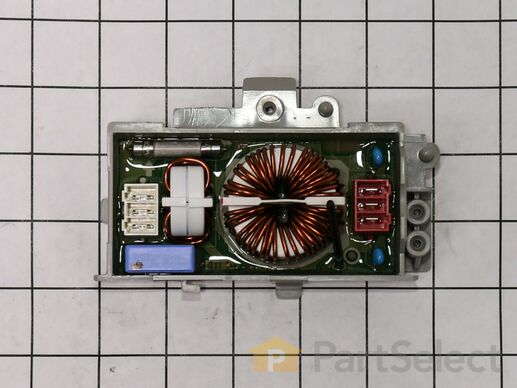
Conclusion was that either the control panel or the noise filter (an electrical fuse apparatus)was bad. Disconnected the water line, turned off power, and pulled unit out from cabinets. Determined that voltage was going into the noise filter (white harness) but almost no voltage coming out (red harness). Ordered noise filter. Hardest part was removing old noise filter from dishwasher frame without removing the whole unit from cabinet and turning upside down.One screw holds the part in the frame. With power off, I used a very small ratchet with phillips screw driver. Pried unit out with screw driver on side to the panel front. It has a retaining tab there.Installation was the reverse. Instead of putting screw back the way it was originally installed, I screwed it in from the outside of the frame. Much easier and just as solid. Tested unit with power on. Hooked up water line. Works great. Note: LG dishwahers have a high repair rate and that this part has a high failure rate. This LG unit was two years old. Never had to fix my 15 year old Sears dishwasher. It still works to this day. (I gave it to my daughter.)
  • LES from GAINESVILLE, FL
  • Difficulty Level:
    Easy
  • Total Repair Time:
    30 - 60 mins
  • Tools:
    Pliers, Screw drivers, Wrench set
Was this instruction helpful to you?
Thank you for voting!

No power to dishwasher. Confirmed that outlet had power coming out.

Turn off circuit breaker. Turn off water at shutoff valve usually located under sink. Disconnect water line from dishwasher. Disconnect wires for the power feed from cord, Marked corresponding wires upon removal for re-installation. Remove 2 mounting screws that secure dishwasher to counter. Slide dishwasher out from counter and turn upside down. Use a blanket to prevent scratching of surfaces. Locate component on the back portion of the dishwasher. Unplug 2 wiring harnesses. My part was held on by 2 phillip screws. One in front, the other in the back along the leg bracket support. Once removed, reverse the order of removal. The i a You Tube video you can locate fr this removal. They said that you needed to release a clip to get the part out. Mine had a screw holding it on the back side. This difference cause about an extra 1/2 hour before I was able to figure out that there was NO clip that was being shown on the video. After that, The replacement went smoothly and we were having the dishes washed later that day.
  • JOHN from FORT MYERS, FL
  • Difficulty Level:
    Easy
  • Total Repair Time:
    30 - 60 mins
  • Tools:
    Screw drivers, Wrench (Adjustable)
3 of 3 people found this instruction helpful.
Was this instruction helpful to you?
Thank you for voting!
Fixes Symptom 14% of time
★★★★★
★★★★★
20 Reviews

Rated by 7 customers 


Really Easy 

30 - 60 mins 

Ratings submitted by customers like you who bought this part.   

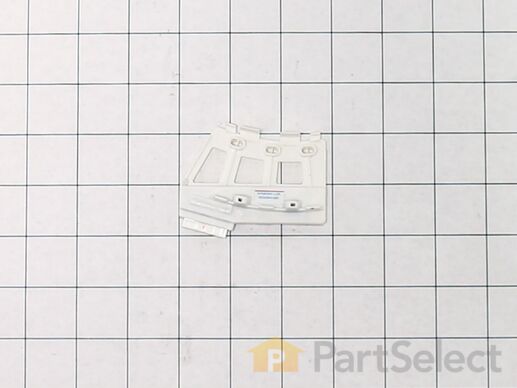
This is a replacement sensor assembly for your washer. It may also be known as a motor rotor position sensor. The sensor assembly monitors the direction and speed of the spinning rotor and communicates this information to the electronic control board. If your washer pumps but will not spin or agitate, you may have a damaged sensor assembly. This part is sold individually, and is an OEM part sourced directly from the manufacturer. Be sure to shut off the power to your washer before you begin this repair.

$ 41.72
  In Stock
PartSelect Number PS16556422
Manufacturer Part Number 6501KW2002B

Customer Repair Stories

LE fail code

Removed back of washer with screw driver, Removed outer motor cover with a 17 mm socket (1 bolt), Removed motor stater using 10 mm socket (8 bolts). Left motor plugged in and and tipped to the side exposing the sensor. Unplug and snap off sensor. Reassembled in opposite order. Machine works great. Very easy fix, and perfect fit on part.
  • scott from GODDARD, KS
  • Difficulty Level:
    Really Easy
  • Total Repair Time:
    30 - 60 mins
  • Tools:
    Screw drivers, Socket set
24 of 25 people found this instruction helpful.
Was this instruction helpful to you?
Thank you for voting!

LE Error Message and won't spin drum properly

I first tested the motor per the service manual. I checked the resistance between the terminals of the 3 pin connector. It's supposed to be 5-15 ohms. The motor checked out so I replaced the main electrical board. It turns out that wasn't the problem. After a brief web search I found out that the hall sensor (which is attached to the motor stator) was the likely cause of the failure. I replaced that and everything works great now. And now I have a spare main board in case that ever fails. I also want to mention that I took the time to remove the dispenser box (where the water comes in and is directed to the different cleaning products) and cleaned it with a very strong bleach solution. It got rid of the mildew and funky smell. It seems that the fabric softener caused a lot of mildew to form inside the dispenser directly above the fabric softener tray. The bleach took care of that. This is probably something that should be done routinely to keep the mildew from forming.
  • Mark from Harrisburg, PA
  • Difficulty Level:
    Easy
  • Total Repair Time:
    30 - 60 mins
  • Tools:
    Screw drivers, Socket set
235 of 307 people found this instruction helpful.
Was this instruction helpful to you?
Thank you for voting!
Fixes Symptom 5% of time
★★★★★
★★★★★
262 Reviews

Rated by 28 customers 


Really Easy 

1- 2 hours 

Ratings submitted by customers like you who bought this part.   

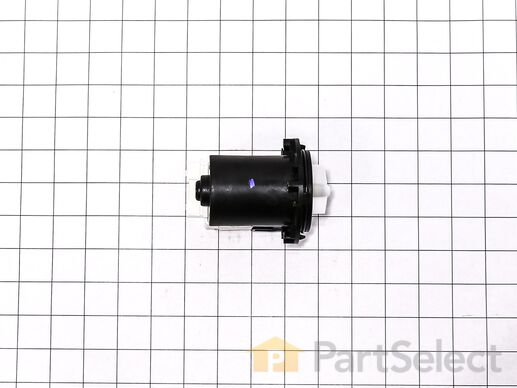
The drain pump and motor assembly may also be known as the washer drain pump and is a part for your washer. The drain pump helps expel water from the washing machine. The drain pump is activated after the spin cycle speed is maintained for a specific period of time. To make this installation you will need a Phillips screwdriver, a small flat-blade screwdriver, a pair of needle-nose pliers, and a pair of slip-joint pliers. Note that the pump casing is not included. This medium-difficulty repair may vary, but can generally be started by disconnecting power, then removing the top of the washer by taking out the four back screws and two small brackets. Then, remove the front panel by taking out the two screws and eight tabs that should be taken from the top. Moving down the front of the washer, remove the door, latch, tub gasket, and drain cover. Disconnect the drain hoses and clip from under the drain assembly, and install new assembly from there. Reassemble parts in direct reverse order -- taking photos during disassembly and keeping parts clearly organized can help here. Despite the number of steps, you will only need a standard Phillips screwdriver to complete this repair.

$ 74.11
  In Stock
PartSelect Number PS3579318
Manufacturer Part Number 4681EA2001T

Replacing your LG Washer Washing Machine Drain Pump

Replacing your Washing Machine Drain Pump

Customer Repair Stories

noisy operation, sometimes did not drain, gave OE code

Thank you for the very helpful YouTube video. After watching the video, I was able to diagnose the problem, buy the part from your website, and complete the repair. This is my personal machine - I am not a professional repairman.
  • Michael from RALEIGH, NC
  • Difficulty Level:
    Really Easy
  • Total Repair Time:
    30 - 60 mins
  • Tools:
    Pliers, Screw drivers
46 of 60 people found this instruction helpful.
Was this instruction helpful to you?
Thank you for voting!

Washing maching wouldn't drain

Removed the top of the washer by removing the 4 back screws and 2 small brackets. Then I removed the front panel, this was actually the hardest part, 2 screws and 8 tabs that you pop out carefully from the top of the panel. I only disconnected the power button and was able to rest the panel on top of the washer. The rest of the washer came apart quickly just moving down the front of the washer and removing the door, latch, tub gasket, drain cover. Removing the pump was just a mater of disconnecting the drain hoses, and one clip under the drain assembly. 3 screws attach the drain to assembly to the pump and only 2 wires that are clearly marked. Reassembly is just going back through in reverse order of disassenbly. The best thing about this is that it all comes apart with a standard phillips screwdriver.
  • Jorge from Apple Valley, CA
  • Difficulty Level:
    Easy
  • Total Repair Time:
    1- 2 hours
  • Tools:
    Screw drivers
556 of 709 people found this instruction helpful.
Was this instruction helpful to you?
Thank you for voting!