Parts That Fix Whirlpool Dryer WGD4800XQ0 Drum Not Spinning
Drum Not Spinning is a commonly reported symptom for the WGD4800XQ0 Whirlpool Dryer, and we have put together a full guide on how to fix this. This advice is based on feedback from people who own this exact appliance. We have listed the most common parts for your WGD4800XQ0 Whirlpool Dryer that will fix Drum Not Spinning. We have included repair instructions, and helpful step-by-step video tutorials. If you are experiencing this issue, not to worry, DIYers just like you have fixed this, and shared their experience to help you!
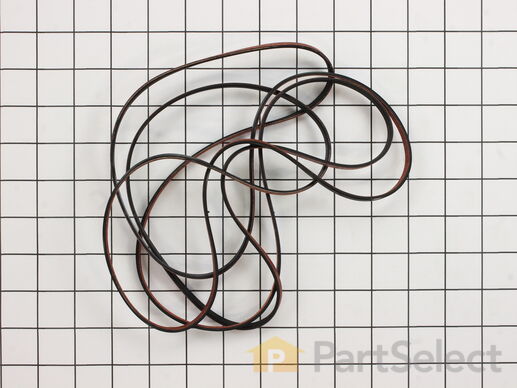
This dryer drum belt (Whirlpool Dryer Belt, Drive Belt) has four ridges, three grooves and is 1/4" wide, and 92 1/4 inches in length. It comes in black and is made of rubber. The belt transfers the rotation of the motor to turn the drum. The belt attaches to the drum, idler pulley, and motor pulley.
Customer Repair Stories
Broken belt - drum would not turn
-
Gary from Oakland, MD
-
Difficulty Level:Really Easy
-
Total Repair Time:15 - 30 mins
-
Tools:Nutdriver, Screw drivers
broken tumbler belt
2. Removed the bolts from upper rear of dryer
3. Pried off the dryer top from the front (it rests on rear hinges)
4. Disconnected dryer door wiring
5. Removed bolt from inside upper front corners; removed front panel (be careful: the edges are sharp and the tumbler will fall ... Read more when it loses support)
6. Removed broken belt and lint from interior parts; removed tensioner (which had fallen out of place). Note: The newer models have a tensioner pulley; my older model had a smooth semicircle that was confusing at first glance
7. Flipped dryer onto its back (for easier reinsertion of new belt and tumbler)
8. Placed new belt on tumbler; reinserted tumbler
9. Inserted new belt through tensioner, inserted tensioner "legs" into grooves on floor. Note: The belt will pull the tensioner upright when it's inserted properly (which isn't obvious at first)
10. Made sure belt and tumbler seal were properly installed
11. Replaced parts in reverse order
The process took over an hour because I couldn't figure out how to insert the belt through the tensioner. The trick is to insert the folded belt through the tensioner and onto the motor pulley. If I had to do it again, it would take about 30 minutes (including cleaning lint)
-
Michael from San Antonio, TX
-
Difficulty Level:Easy
-
Total Repair Time:30 - 60 mins
-
Tools:Screw drivers, Wrench set
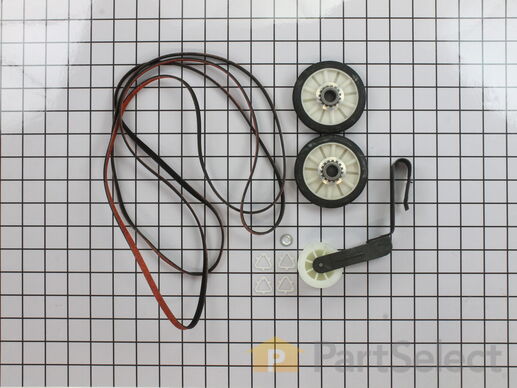
The drum support roller kit (Dryer Repair Kit) allows the dryer to tumble properly by supporting the drum cylinder. The idler pulley provides the tension required for a multi-ribbed belt. The belt attaches to the drum, idler pulley, and motor pulley. If your dryer is damaged, it may be making loud, squeaking, and/or squealing noises while the drum is turning. This is from normal wear and tear. The drum may eventually stop turning all together. This is a sign the part should be replaced. This is one complete maintenance kit. The kit includes the drum belt, drum support rollers, one idler pulley, four tri-rings, and one clip. The parts are constructed of plastic, metal, and rubber, and come in black/white/silver.
Replacing your Whirlpool Dryer Maintenance Kit

Customer Repair Stories
Dryer making extra noise while running
2nd removed two screws under lint screen cover.
3rd poped up lid with flathead screwdryer, then removed (2) 5/16 screws from door cover and unpluged lid switch, lifted up dryer door pannel
4th removed drum
5th took out plastic triangle wheel rings
6th removed old belt guild (to motor pully)
... Read more />7th removed old wheels and plastic rings stops
8th cleaned excessive hair dust with shopvac
9th put new replaicment part in dryer. made sure to turn manually to make sure belt was lined up properly, then put all dryer peices back.
10th aditional work, took back cover off and removed the (4) 1/4 screws for lint screen case (left side in dryer) vacumed out any excessive dirt lint ect, also cleaned any excessive dust I found in back of dryer, dryer , exhaust ect, and put all back together.
JUst like a new dryer aain after all PM was complete.
-
Michael from Haines City, FL
-
Difficulty Level:A Bit Difficult
-
Total Repair Time:1- 2 hours
-
Tools:Nutdriver, Screw drivers, Wrench (Adjustable)
Broken drive belt
-
DENNIS from ALTOONA, FL
-
Difficulty Level:A Bit Difficult
-
Total Repair Time:1- 2 hours
-
Tools:Nutdriver, Screw drivers
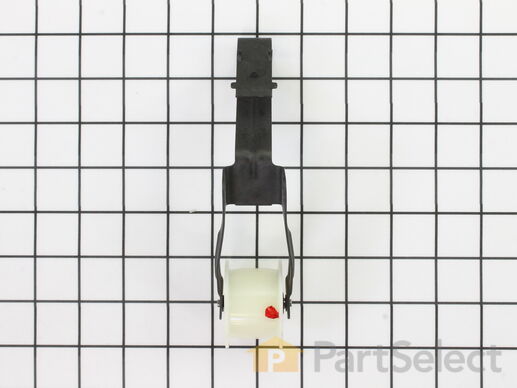
This part provides the tension required for a multi-ribbed belt. It also helps the belt rotate the drum and attaches to the idler pulley wheel. If your dryer will not start or tumble, takes too long to dry, or is noisy during operation, you may need to replace the idler pulley assembly. Make sure to disconnect power before installing this part, and wear work gloves to protect your hands. While the dryer is disassembled for this repair, consider replacing the drive belt as well. You will need a putty knife, a Phillips screwdriver, and a 5/16 nut driver for this repair.
Replacing your Kenmore Dryer Idler Pulley Assembly

Customer Repair Stories
Dryer made a terrible squealing noise
Lubricated motor and guide wheels but squealing still there. Then noticed the "idler pulley assembly" (the part that keeps the belt tight against ... Read more the drum) looked a bit old and worn. Ordered a replacement part on this site because it was much much cheaper than a service call, installed it.... and NO SQUEAL!!!
-
Will from Charlotte, NC
-
Difficulty Level:A Bit Difficult
-
Total Repair Time:15 - 30 mins
-
Tools:Screw drivers, Socket set
Busted Dryer Belt
-
Oscar from Dallas, TX
-
Difficulty Level:Really Easy
-
Total Repair Time:30 - 60 mins
-
Tools:Screw drivers
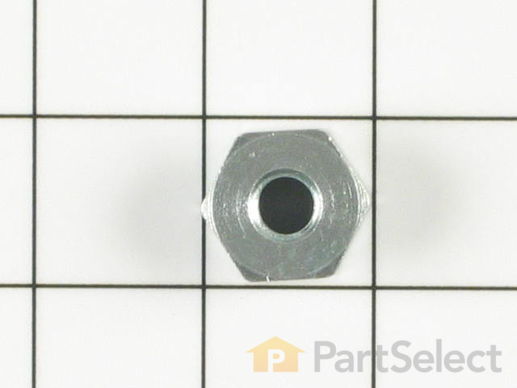
Sold individually.
Replacing your Whirlpool Dryer Motor Pulley - 60 Hz.

Customer Repair Stories
Needed to repair and replace dryer motor pulley and pully
-
Rob from GAITHERSBURG, MD
-
Difficulty Level:Really Easy
-
Total Repair Time:30 - 60 mins
-
Tools:Wrench (Adjustable)
Replaced a broken pulley.
Hint: Use a one gallon ice cream bucket to hold up the drum while connecting the belt. It makes it much easier and gives you more clearance.
-
Brian from IMLAY CITY, MI
-
Difficulty Level:Very Easy
-
Total Repair Time:15 - 30 mins
-
Tools:Nutdriver, Pliers, Screw drivers, Wrench set
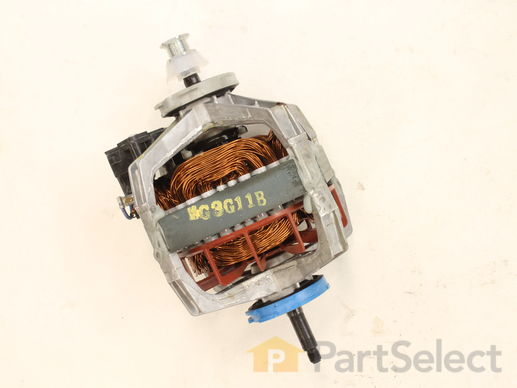
This motor fits most Whirlpool incorporated dryer brands before 1996. NOTE: Pulley is NOT available separately.
Replacing your Kenmore Dryer Drive Motor with Pulley

Customer Repair Stories
had to replace the motor
-
charles from parker, CO
-
Difficulty Level:A Bit Difficult
-
Total Repair Time:More than 2 hours
-
Tools:Nutdriver, Screw drivers
Make humming noise when pressing start button. Would not start
-
James from Moscow, IA
-
Difficulty Level:Easy
-
Total Repair Time:30 - 60 mins
-
Tools:Nutdriver, Screw drivers
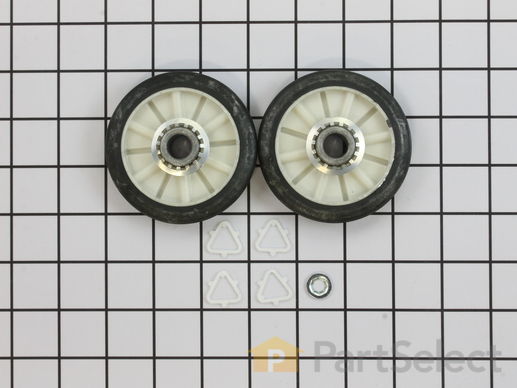
The drum support roller kit allows the dryer to tumble properly by supporting the drum cylinder. The kit includes two drum rollers, four tri-rings, and one palnut (or retaining washer). The kit does not include a belt or idler pulley and rollers are not sold individually. The drum support roller kit may need to be replaced if the dryer is noisy or will not tumble. The tools needed to complete this repair are a putty knife, Phillips screw driver, and a 5/16 nut driver. This is an OEM part sourced directly from the manufacturer.
Replacing your Kenmore Dryer Rear Drum Support Roller Kit

Customer Repair Stories
Loud rumble noise while drum was turning
-
Marcia from CAmden, NY
-
Difficulty Level:Easy
-
Total Repair Time:30 - 60 mins
-
Tools:Pliers, Screw drivers, Wrench set
Replacing worn drum support rollers and shafts.
1 Remove power.
2 Open the lint filter cover and remove the 2 Phillip screws.
3 Pry the front of the top cover up to separate the cover from the plastic clips that secure to the top front panel.
4 Remove the 2 nut screws securing the top of the ... Read more front panel to each side cover.
5 Pull front panel out slightly to detach wiring from the cover switch.
6 Pull front panel straight up and set aside.
7 Remove drum belt from tensioner and motor pulley under the drum.
8 Remove drum by pulling it toward the front between the 2 sides.
9 Locate the 2 support rollers and their mounting shafts. Change the shafts at this point if they are worn. (Mine were OK)
10 Remove the support bracket from the shaft if present.
11 Remove the plastic triangular retainer from the shaft and slide the old wheel off of the shaft.
12 Clean the shaft from any bearing debris.
13 Replace the rollers and retainers.
14 Insert drum through the front side panels making sure the seal on the rear of the drum is centered around the opening and not folded inside the opening.
15 Place the belt on the drum and thread the belt through the tensioner and around the motor pulley.
16 Position the front cover on the lower clips on each of the sides.
17 Re-attach the 2 wires for the cover switch.
18 Pull the drum up so the opening on the drum and front cover align.
19 Screw together the side panels to the front panel using the 2 hex headed screws.
20 Check for binds by rotating the drum several times by hand.
21 Press the front of the top panel down toward the front panel to engage the plastic clips attaching the top to the front. Watch for the lint filter housing alignment as you push the top panel down.
22 Replace the 2 screws to attach the lint filter to the top cover.
23 Plug in machine and test.
Good luck, It s not as bad as it sounds.
-
Gary from Canton, CT
-
Difficulty Level:Easy
-
Total Repair Time:15 - 30 mins
-
Tools:Nutdriver, Pliers, Screw drivers


