Models > WETLV27HW1

WETLV27HW1 Whirlpool Washer Dryer Combo - Overview

Sections of the WETLV27HW1

[Viewing 9 of 9]
Keep searches simple, eg. "belt" or "pump".
Dryer Thermal Fuse – Part Number: WP3392519
Dryer Thermal Fuse
★★★★★
★★★★★
(355)
PartSelect #: PS11741460
Manufacturer #: WP3392519
The Dryer Thermal Fuse (Thermal Cutoff, Temperature Fuse) is a 2 by ½ inch, white, plastic safety mechanism that stops the flow of electricity to the motor circuit when a dryer overheats. If the fuse ...
$19.63
  In Stock
Multi Rib Belt - 92-1/4" – Part Number: 341241
Multi Rib Belt - 92-1/4"
★★★★★
★★★★★
(377)
PartSelect #: PS346995
Manufacturer #: 341241
This dryer drum belt (Whirlpool Dryer Belt, Drive Belt) has four ridges, three grooves and is 1/4" wide, and 92 1/4 inches in length. It comes in black and is made of rubber. The belt transfers the ro...
$17.19
  In Stock
Agitator Directional Cogs – Part Number: 80040
Agitator Directional Cogs
★★★★★
★★★★★
(356)
PartSelect #: PS388034
Manufacturer #: 80040
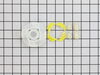
This kit is used for replacing the agitator directional cogs (Agitator Dogs, Agitator Repair Kit, Washer Agitator Dogs, Agitator Dog Ears). The agitator is what creates the thrusting motion in your wa...
$4.39
  In Stock
Dryer Cycling Thermostat – Part Number: WP3387134
Dryer Cycling Thermostat
★★★★★
★★★★★
(96)
PartSelect #: PS11741405
Manufacturer #: WP3387134
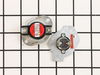
This thermostat (Dryer Operating Thermostat, Dryer Cycling Thermostat, Cycling Thermostat, Dryer Thermostat) is used to maintain a temperature of 155 degrees in the dryer drum. The internal bias heate...
$27.97
  In Stock
Maintenance Kit – Part Number: 4392065
Maintenance Kit
★★★★★
★★★★★
(306)
PartSelect #: PS373087
Manufacturer #: 4392065
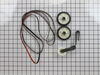
The drum support roller kit (Dryer Repair Kit) allows the dryer to tumble properly by supporting the drum cylinder. The idler pulley provides the tension required for a multi-ribbed belt. The belt att...
$37.48
  In Stock
Idler Pulley – Part Number: 279640
Idler Pulley
★★★★★
★★★★★
(117)
PartSelect #: PS334244
Manufacturer #: 279640
This Idler Pulley includes the tri-ring and gasket and everything included here is manufacturer-certified. This part maintains correct tension on the drive belt in order to spin the drum properly. If ...
$26.95
  In Stock
Dryer Drum Support Roller – Part Number: WPW10314173
Dryer Drum Support Roller
★★★★★
★★★★★
(38)
PartSelect #: PS11752609
Manufacturer #: WPW10314173
This drum support roller is sold individually. Most dryers require two. The tri-rings are included. This is a drum support roller for a dryer. It is a genuine replacement part. The part includes the d...
$22.69
  In Stock
Thermal Cut-Off Kit – Part Number: 279769
Thermal Cut-Off Kit
★★★★★
★★★★★
(61)
PartSelect #: PS334278
Manufacturer #: 279769
This kit includes one high limit thermostat with a limit of 250 degrees Fahrenheit, and one thermal cut-off fuse with a limit of 360 degrees Fahrenheit. The thermostat and fuse help prevent the dryer from overheating.
$28.85
  In Stock
Roller Support Tri-Ring – Part Number: WPW10512946
Roller Support Tri-Ring
★★★★★
★★★★★
(5)
PartSelect #: PS11755850
Manufacturer #: WPW10512946
If you notice that your dryer is noisy or will not tumble, you may need to replace the tri ring. This part is triangular, and is less than an inch in size. Tri rings can be found both on the idler pul...
$13.42
  In Stock
Agitator Cam Kit – Part Number: 285809
Agitator Cam Kit
★★★★★
★★★★★
(50)
PartSelect #: PS334648
Manufacturer #: 285809
This kit included the cam, 4 dogs and bearing.
$10.04
  In Stock
Seal, Inner Cap – Part Number: WPW10072840
Seal, Inner Cap
★★★★★
★★★★★
(11)
PartSelect #: PS11748108
Manufacturer #: WPW10072840
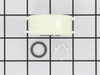
This is an inner cap seal, but may also be known as an O-ring, and it is a part for your washing machine. Some symptoms replacing this part will fix include: leaking from your appliance, uncontrollabl...
$11.10
  In Stock
Heating Element Connection Wire Kit – Part Number: 279457
Heating Element Connection Wire Kit
★★★★★
★★★★★
(3)
PartSelect #: PS334206
Manufacturer #: 279457
This kit is used for electric clothes dryers, and it comes with a yellow wire nut.
$11.06
  In Stock

Questions And Answers for WETLV27HW1

Be the first to ask our experts a question about this model!

Common Symptoms of the WETLV27HW1

[Viewing 22 of 22]
Will not agitate
Fixed by
these parts
Fixing Fixing Fixing
Show All
Noisy
Fixed by
these parts
Fixing Fixing Fixing
Show All
Too hot
Fixed by
these parts
Fixing Fixing Fixing
Show All
Drum Not Spinning
Fixed by
these parts
Fixing Fixing Fixing
Show All
Not Heating
Fixed by
these parts
Fixing Fixing Fixing
Show All
Leaking
Fixed by
these parts
Fixing Fixing Fixing
Show All
Door won’t close
Fixed by
these parts
Fixing Fixing Fixing
Show All
Spins slowly
Fixed by
these parts
Fixing Fixing Fixing
Show All
Does not dispense fabric softener or detergent
Fixed by
these parts
Fixing Fixing Fixing
Show All
Won’t Start
Fixed by
these parts
Fixing
Show All
Spinning Issues
Fixed by
these parts
Fixing Fixing Fixing
Show All
Marks left on clothes
Fixed by
these parts
Fixing Fixing Fixing
Show All
Heat stays on after drum has stopped
Fixed by
these parts
Fixing Fixing Fixing
Show All
Will Not Start
Fixed by
these parts
Fixing Fixing Fixing
Show All
Shaking and Moving
Fixed by
these parts
Fixing
Show All
Touchpad does not respond
Fixed by
these parts
Fixing Fixing
Show All
Will not drain
Fixed by
these parts
Fixing Fixing
Show All
Lid or door won’t close
Fixed by
these parts
Fixing Fixing
Show All
Door Pops Open
Fixed by
these parts
Fixing
Show All
Not cleaning dishes properly
Fixed by
these parts
Fixing
Show All
Burning smell
Fixed by
these parts
Fixing
Show All
Locking Issues
Fixed by
these parts
Fixing
Show All
Keep searches simple. Use keywords, e.g. "leaking", "pump", "broken" or "fit".
Dryer was working, but no heat.
First I unplugged the dryer, then removed the back panel, this exposed most all of the wiring and I could see the heater coils.
Not knowing what the problem was I started looking at the coils and could not see any broken parts.
So then checked the thermal fuse for continuity I removed the two wires from it with a small pair of needle nose pliers, it was held in place by two screws, once they were removed the fuse came out easily, I checked continuity with a volt meter placing the meter on X1 Ohms and could not get a reading.
I replaced with a new one and put it all back together the way I took it apart.
Then I plugged it in and it worked first time, I now have warm dry clothes.
Parts Used:
Dryer Thermal Fuse
  • ANTHONY from CHESHIRE, CT
  • Difficulty Level:
    Easy
  • Total Repair Time:
    15 - 30 mins
  • Tools:
    Nutdriver, Pliers, Screw drivers
2965 of 3338 people found this instruction helpful.
Was this instruction helpful to you?
Thank you for voting!
washer wouldn't agitate
First pry off the cap of the agitator. Then using a socket remove the bolt that holds the plastic cup in place. Remove this cup by prying it loose from the two tabs that hold it in place. Once this cup is removed you can get to the broken cogs.
Slip the new cogs into the underside of the cup, and slide the cup back down in the agitator housing using the slots on the side for a guide. (You may want to remove the entire agitator and assemble everything upside down, then flip it all back over to mount, so the cogs don't fall out).
Tighten the bolt, snap the cap back in place on top of the agitator and your'e done. Easy repair.
Parts Used:
Agitator Directional Cogs
  • mike from Kent, WA
  • Difficulty Level:
    Easy
  • Total Repair Time:
    15 - 30 mins
  • Tools:
    Screw drivers, Socket set
931 of 1007 people found this instruction helpful.
Was this instruction helpful to you?
Thank you for voting!
No heat but would run otherwise
Cleaning the lint out of the whole machine took quite a bit of time--it was everywhere. Underneath the lint trap was a collection that ultimately ruined the thermal fuse where it restricted the air flow considerably.

Ascertaining the problem was the most time consuming part.

The actual repair was quite simple and didn't take but 15-20 minutes.
Parts Used:
Dryer Thermal Fuse
  • Dana from Grassvally, CA
  • Difficulty Level:
    A Bit Difficult
  • Total Repair Time:
    More than 2 hours
  • Tools:
    Screw drivers
875 of 947 people found this instruction helpful.
Was this instruction helpful to you?
Thank you for voting!