Parts That Fix Whirlpool Dryer WED9200SQ0 Door won’t close
Door won’t close is a commonly reported symptom for the WED9200SQ0 Whirlpool Dryer, and we have put together a full guide on how to fix this. This advice is based on feedback from people who own this exact appliance. We have listed the most common parts for your WED9200SQ0 Whirlpool Dryer that will fix Door won’t close. We have included repair instructions, and helpful step-by-step video tutorials. If you are experiencing this issue, not to worry, DIYers just like you have fixed this, and shared their experience to help you!
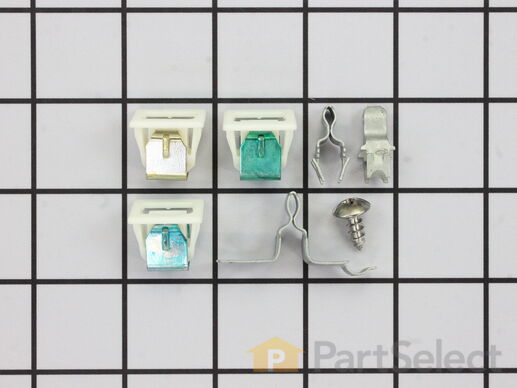
This part replaces your appliances latch (Door Latch Kit, Door Catch, Dryer Door Latch Kit). On your appliance you will find both a strike and a catch. The strike is mounted on the body of the dryer, while the catch is mounted on the dryer door. These two parts work together to keep your dryer door closed. The catch holds the door strike to keep the door closed during the drying cycle. If the door does not latch closed, you won’t be able to start a drying cycle. If this part is malfunctioning, you may not be able to open or close your door. In some instances, it may seem like your door is closing, but if it is not latching properly you won’t be able to start your drying cycle. You should replace this part as soon as it’s malfunctioning. Your dryer may run even though the latch is malfunctioning, but it is unsafe if the dryer continues to run while the door is open. This replacement part features 1 door latch kit which includes 2 strikes, 3 catches, and a set of instructions. This model is constructed of plastic and metal, and comes in white/silver.
Replacing your Kenmore Dryer Door Catch Kit

Customer Repair Stories
Door wouldn't latch.
-
Melody from North Las Vegas, NV
-
Difficulty Level:Really Easy
-
Total Repair Time:Less than 15 mins
Door Catch part had fallen out,/ was missing
-
Terri from Saint Augustine, FL
-
Difficulty Level:Really Easy
-
Total Repair Time:Less than 15 mins
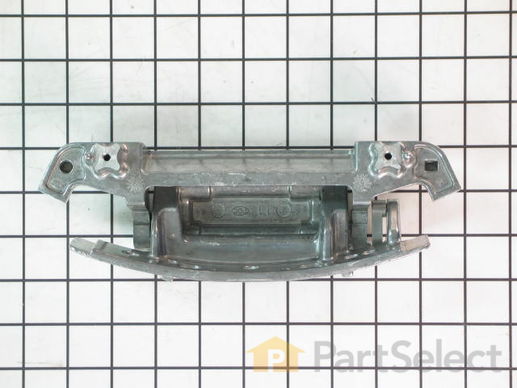
This door hinge is used to hold your door on your dryer in place. Most dryers require two and they are sold individually.
Replacing your Whirlpool Dryer Door Hinge

Customer Repair Stories
part of door hinge was worn and allowed door to sag
Removed all screws on door EXCEPT the ones with star heads.
Separated two parts of door and undid screws holding hinge in place.
Removed hinge and replaced with new hinge.
Put two faces of door back together and installed door back on dryer.
To be honest a ... Read more nd explain, I had previously taken apart the door and removed the star screws which allowed the other pieces of the door holding the window to fall apart.
After some difficulty, I was able to put the seal back on and re-install the metal window holders which is why I said it only took 15 minutes after the part arrived and why I accented NOT removing the star screws.
There were a couple of other screws which probably didn't need removing but they didn't cause any problem with the installation.
After putting the door back on, I had to manually twist the door a small amount because it didn't want to keep the button depressed which kept the motor running which turns the basket and heats the clothes.
The door had been causing some trouble for a couple years and we had obviously closed the door with a little extra force when it ''caught'' on the door frame causing it to bend a small amount.
It only took one adjustment and worked fine after that.
-
Barry from ALLEN, MI
-
Difficulty Level:Easy
-
Total Repair Time:Less than 15 mins
-
Tools:Screw drivers
Door would not stay shut
-
Jennifer from Davenport, IA
-
Difficulty Level:Easy
-
Total Repair Time:Less than 15 mins
-
Tools:Screw drivers
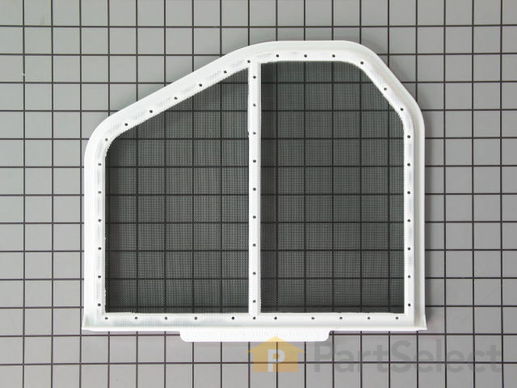
The filter collects lint during the drying cycle. This filter is 12 1/2 inches wide and 10 1/2 inches deep. Replacing the lint filter is an easy repair which requires no tools. When replacing the lint filter, check the filter slot for a buildup of lint, which can be a fire hazard. Continue to check often to make sure the filter and slot are both cleared of lint.
Replacing your Kenmore Dryer Lint Filter

Customer Repair Stories
Felt gasket on lint filter loose...
-
Catherine from Atascadero, CA
-
Difficulty Level:Really Easy
-
Total Repair Time:Less than 15 mins
felt strip came off lint screen
-
JEFFREY from FALL RIVER, MA
-
Difficulty Level:Really Easy
-
Total Repair Time:Less than 15 mins


