


Models
>
TPG21JRYDWW
TPG21JRYDWW General Electric Refrigerator - Overview
Sections of the TPG21JRYDWW
[Viewing 6 of 6]


Keep searches simple, eg. "belt" or "pump".

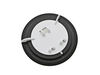
Dispenser Door Assembly or Flapper
PartSelect #: PS964304
Manufacturer #: WR17X11653
This “Dispenser Door Assembly” (Door Recess Assembly, Ice Door Assembly, Dispenser Door, Refrigerator Dispenser Ice Chute Door Kit, Dispenser Door Flap, Ice Chute Door, Flapper) keeps the room air fro...
$15.58
In Stock

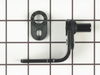
Bottom Hinge Assembly
PartSelect #: PS290199
Manufacturer #: WR13X10020
Comes with both cam risers. This hinge kit is suitable for the bottom of either the freezer door or the refrigerator door of some refrigerators.
$47.33
In Stock

Union Connector - 5/16 Inch to 5/16 Inch
PartSelect #: PS758446
Manufacturer #: WR02X11330
Quick connector for plastic water line - 5/16" to 5/16"
$9.03
In Stock

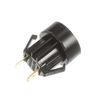
Light Switch
PartSelect #: PS8758429
Manufacturer #: WR23X10725
The interior light of your refrigerator is controlled by a switch that is activated when the door is opened and closed. If your refrigerator light will not turn on, there could be an issue with the sw...
$8.56
In Stock

Hinge Cam Riser
PartSelect #: PS284596
Manufacturer #: WR02X10140
This part helps with the closing of the door and helps keep it in position.
$11.59
In Stock

Plastic Tubing - 5/16 Inch
PartSelect #: PS292878
Manufacturer #: WR17X2891
This part is the replacement water line for your refrigerator. It is a long plastic tube, which is 5/16 of an inch in diameter. If your refrigerator is leaking, or will not dispense water or ice, you ...
$24.89
In Stock

Package of 12 Screws
PartSelect #: PS312573
Manufacturer #: WZ4X244D
This is a package of twelve Phillips-head screws. They can be used as replacement screws in refrigerators, ice makers, or freezers. Be sure to check that your appliance model is compatible with these ...
No Longer Available

Door Hinge Shim
PartSelect #: PS298522
Manufacturer #: WR2X7491
This is the replacement door hinge shim, or riser cam shim for your refrigerator. It is made of metal and is approximately 2 inches in length, and 1 inch in width. Your refrigerator will have a door h...
$16.87
On Order

Defrost Thermostat
PartSelect #: PS303471
Manufacturer #: WR50X122
This clip on refrigerator defrost thermostat clips on to your refrigerator's evaporator. It will cut out at 60 degrees Fahrenheit and kick back in when the temperature drops to 32 degrees Fahrenheit.
$51.25
In Stock

Actuator Pad
PartSelect #: PS299261
Manufacturer #: WR2X8702
Note: This part is now ONLY available in black.
No Longer Available


Ice Dispensing Drive Cup
PartSelect #: PS297895
Manufacturer #: WR2X4550
Found at the end of the auger in the ice container - replace when the icemaker doesn't dispense ice.
$25.98
In Stock
Questions And Answers for TPG21JRYDWW
We're sorry, but our Q&A experts are temporarily unavailable.
Please check back later if you still haven't found the answer you need.
Common Symptoms of the TPG21JRYDWW
[Viewing 17 of 17]Leaking
Fixed by
these parts
these parts

Show All
Light not working
Fixed by
these parts
these parts

Show All
Door won’t open or close
Fixed by
these parts
these parts
Show All
Not dispensing water
Fixed by
these parts
these parts
Show All
Door Sweating
Fixed by
these parts
these parts
Show All
Ice maker won’t dispense ice
Fixed by
these parts
these parts
Show All
Fridge too warm
Fixed by
these parts
these parts

Show All
Frost buildup
Fixed by
these parts
these parts
Show All
Freezer section too warm
Fixed by
these parts
these parts
Show All
Noisy
Fixed by
these parts
these parts

Show All
Freezer not defrosting
Fixed by
these parts
these parts
Show All
Ice maker not making ice
Fixed by
these parts
these parts

Show All
Fridge runs too long
Fixed by
these parts
these parts
Show All
Clicking sound
Fixed by
these parts
these parts
Show All
Freezer too cold
Fixed by
these parts
these parts
Show All
Ice maker dispenses too little ice
Fixed by
these parts
these parts
Show All
Ice maker dispenses too much ice
Fixed by
these parts
these parts
Show All


Keep searches simple. Use keywords, e.g. "leaking", "pump", "broken" or "fit".
Internal water lines brittle, cracked, leaking
First of all, the larger white plastic tubes in this thing are 5/16" OD, which no plumbing store seems to stock. At the lower left rear end there are 2 tubes, one for water and one for ice, that are doomed to fail being in proximity of a heat source - they essentially get cooked to the point of becoming brittle and cracking. The smaller
... Read more
tube and union can be easily found, but do yourself a favor if the larger one cracks and order the plastic tube and water tube union here, and just cut off the brittle part and amend the old tube using the union.
Read less
Parts Used:
-
Marty from West Bloomfield, MI
-
Difficulty Level:Easy
-
Total Repair Time:30 - 60 mins
-
Tools:Nutdriver, Wrench (Adjustable)
118 of 136 people
found this instruction helpful.
Was this instruction helpful to you?
Thank you for voting!
Sticking Light Switch
I applied some tips learned by reading other reviews. So before I started I grabbed my trusty vise grip pliers and a small screw driver. I locked onto the switch actuator, the part that the refrigerator door pushes in, with the vise grips and pulled on it just hard enough to get the screw driver inserted in the right side to push in the c
... Read more
atch clip so the switch could be pulled out further each time the catch clip was depressed to the next detent. Then I used the screw driver on the left site to encourage the switch past the detents on the left and very quickly the switch was out of the mount. The wires from the refrigerator pulled out with the old switch. I unplugged the old switch from the wires and plugged in the new switch and shoved the new switch back into the mount, wiggled it a couple of times to make sure it was secure and the job was done. Once I applied the vise gripes at first, the whole job took less than a minute.
Read less
Parts Used:
-
Jonathan from Lilburn, GA
-
Difficulty Level:Really Easy
-
Total Repair Time:Less than 15 mins
-
Tools:Pliers, Screw drivers
117 of 145 people
found this instruction helpful.
Was this instruction helpful to you?
Thank you for voting!
My wife said, "the refrigerator door won't close".
Our refrigerator is a double door unit with ice and water in the left door. The right door was the one with the problem. It was 5:15 AM when the problem occured. I could see that the door was out of alighnment and had dropped down - preventing it from closing. I lifted the door and closed it. I wrote down the model number and found a
... Read more
detailed drawing of the appliance on the web site "partselect.com". When the hing earrived I compared it to the broken one. I removed all the food stored on the door, put several pieces of wood under the door to shim it to the same height as the adjacent door. I then removed two bolts from the refrigerator with a 1/4" socket set. I put the shim from the old hing aside for later. I removed two bolts from the door with the same socket -Note a metal tab had to be bent silghtly so the wrench could go on the head of the bolt- I removed the plastic cam and made note of its orientation and that of the shim above it on the door. I put the shim and new cam in place on the door and installed the 2 bolts. I inserted the pin of the new hing into the hole in the cam (I had just mounted) on the door. I put the shim (the one put aside earlyer) behind the hing and replaced the two bolts. I held the shim and hing up against the door as I tightened the two bolts. When I was satisfied that the bolts were tight I removed the wooden blocks that were holding the door up so the door was supported by the new bottom hing assembly. The door now opperates perfectly and the refrigerator was not taken out of service for the repair. Total time including cleanup was a little over 15 minutes.
Read less
Parts Used:
-
Gregory from Zephyrhills, FL
-
Difficulty Level:Really Easy
-
Total Repair Time:15 - 30 mins
-
Tools:Socket set
54 of 58 people
found this instruction helpful.
Was this instruction helpful to you?
Thank you for voting!