


Models
>
TGB557CES2
TGB557CES2 Tappan Wall Oven - Overview
Sections of the TGB557CES2
[Viewing 6 of 6]


Keep searches simple, eg. "belt" or "pump".

Light Bulb
PartSelect #: PS12751166
Manufacturer #: 316538904
This OEM 40 watt appliance light bulb is used for some ranges, refrigerators, freezers, and microwaves. Simply locate the existing bulb, unscrew it from its socket, and replace with new light bulb. If...
$19.73
In Stock

LENS
PartSelect #: PS16218465
Manufacturer #: 5304524341
The Frigidaire light bulb lens covers the interior light bulb in an oven. No tools are necessary to replace this item. After unplugging the appliance, slide off the wire bracket to remove the existing...
$10.90
In Stock

Broiler Pan Grate Insert
PartSelect #: PS9864838
Manufacturer #: 5304494997
This OEM broiler pan and grate insert are cooking accessories used in your oven to broil food. The pan catches drippings and prevents them from falling into the appliance, while the grate insert ensur...
$68.24
In Stock


Door Switch
PartSelect #: PS3633434
Manufacturer #: 318394803
The door lock switch, or simply door switch, is used in ranges and ovens. The switch activates signals to the oven control board about the state of the door lock. If the light in the oven is not turni...
$42.78
In Stock


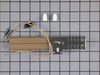
Flat Glow Bar Igniter
PartSelect #: PS444179
Manufacturer #: 318177710
This flat glow bar igniter is designed for gas ovens. The function of the part is to ignite the gas to light the oven burner. If your gas igniter does not glow, or if it glows but will not light, you ...
$146.60
In Stock

Push Button Shaft
PartSelect #: PS438116
Manufacturer #: 316080600
This clock/timer push button shaft is less than an inch long.
No Longer Available

Light Lens Retainer Clip
PartSelect #: PS470510
Manufacturer #: 5304400195
This is a light lens retainer clip and it is used in conjunction with the oven on your range. This retainer clip secures the light lens to the oven cavity. The part is made entirely of metal, and it i...
No Longer Available

Flat Style Oven Igniter - Broiler
PartSelect #: PS470131
Manufacturer #: 5303935068
This flat style gas oven igniter comes with a bracket and wires. Its amperage range is between 3.2 and 3.6 amps.
$197.35
In Stock


Questions And Answers for TGB557CES2
We're sorry, but our Q&A experts are temporarily unavailable.
Please check back later if you still haven't found the answer you need.
Common Symptoms of the TGB557CES2
[Viewing 1 of 1]


Keep searches simple. Use keywords, e.g. "leaking", "pump", "broken" or "fit".
Oven Door Light Switches Wrecked by Heat from Oven
Pull old switches out with pliers and replugged new switches. On main oven, plug casing was melted (wife left broiler on with oven door closed) so had to break apart old casing and individually plug the the wires into new switch and amazingly, it worked! Just gotta keep the door open when broiling.............
Parts Used:
-
Gregory from Croton-on-Hudson, NY
-
Difficulty Level:Easy
-
Total Repair Time:15 - 30 mins
-
Tools:Pliers
12 of 17 people
found this instruction helpful.
Was this instruction helpful to you?
Thank you for voting!
Broiler igniter not glowing
1) Turn off the gas and disconnect the power
2) Remove oven door. There requires that you remove the two square drive (SD) bolts on the inside, partially close the door and lift it off the hinges.
3) Remove the grills.
4) At the back remove the rear shield (aluminum panel held by 2 SD sheet metal screws ... Read more .
5) this exposes the broiler igniter and its two wires. If its been replaced in past, there should be two porcelain screw-on wire connectors. Undo the connectors by turning them counter-clockwise. With a volt-ohmmeter, measure the resistance across the igniter. If its open circuited, its broken. If not, then its in the circuit board, and this help stop here. If this is the original igniter, it ends in a plastic connector. Disconnect by pulling it apart from its mating plug and again, check the continuity of the igniter. If its defective, reconnect the connector and cut each wire on the igniter side. Strip back about 1/2 inch of insulation on each lead.
6) inside the oven, using the SD driver, remove the 4 screw securing the broiler burner from the roof of the oven. The burner can now be removed, pulling the burner away from the gas jet on the right.
7) The igniter is now exposed and can be remove by removing the two SD drive screws.
8) Replace with the new igniter, being careful not to touch the black element, and feeding the wires though the rear oven wall.
9)Reverse the above dissembly procedure.
10) Broil the sausages.
Read less
Parts Used:
-
Steven from Silver Spring, MD
-
Difficulty Level:Easy
-
Total Repair Time:1- 2 hours
-
Tools:Nutdriver
11 of 16 people
found this instruction helpful.
Was this instruction helpful to you?
Thank you for voting!
Oven light bulb went dark; it needed replacing
-
Lise from CEDAR GROVE, NJ
-
Difficulty Level:Very Easy
-
Total Repair Time:Less than 15 mins
9 of 14 people
found this instruction helpful.
Was this instruction helpful to you?
Thank you for voting!