Models > SDE4606AYW > Symptoms > Marks left on clothes

Parts That Fix Maytag Dryer SDE4606AYW Marks left on clothes

Marks left on clothes is a commonly reported symptom for the SDE4606AYW Maytag Dryer, and we have put together a full guide on how to fix this. This advice is based on feedback from people who own this exact appliance. We have listed the most common parts for your SDE4606AYW Maytag Dryer that will fix Marks left on clothes. We have included repair instructions, and helpful step-by-step video tutorials. If you are experiencing this issue, not to worry, DIYers just like you have fixed this, and shared their experience to help you!

Fixes Symptom 57% of time
★★★★★
★★★★★
9 Reviews

Rated by 21 customers 


Easy 

1- 2 hours 

Ratings submitted by customers like you who bought this part.   

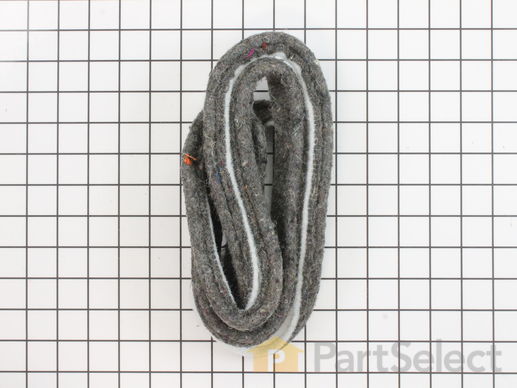
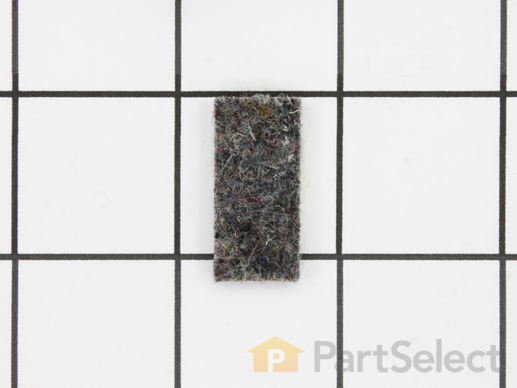
This cylinder felt seal is used in dryers and is located between the back of the drum and the rear dryer panel. If your dryer is experiencing any of these symptoms, replacing the felt seal could solve your problem: squealing or banging noise, clothes are getting stuck between tub and felt pad, takes too long to dry, not heating enough or not heat at all, or does not tumble. The tools needed for this installation are a 5/16 nut driver and a putty knife. Make sure to unplug the dryer from the power source before beginning this project. Refer to the manual provided by the manufacturer for further instructions.

$ 48.55
  In Stock
PartSelect Number PS11741917
Manufacturer Part Number WP37001132

Replacing your Speed Queen Dryer Cylinder Felt Seal

Replacing your Cylinder Felt Seal

Customer Repair Stories

Worn Felt Seal

remove bottom two screws on lower front panel, remove panel. remove two screws on lower portion of door panel, pull bottom panel towards yourself to release pins at the top. Disconnect wiring for light and door switch (make sure to note what wires go where. Complete removal of front door panel. Remove 4 screws holding cylinder frame in place, lift to remove. remove remnants of old felt seal, use rotary tool to remove excess glue, etc. apply glue (used rubberized gorilla super glue), apply felt seal - allow glue to set up. reinstall in reverse direction from removal. Be sure to use glue as there are no clips or other retaining pieces for the new felt and it will not hold in place. overall pretty easy.
  • robert from hillsborough, NC
  • Difficulty Level:
    Easy
  • Total Repair Time:
    15 - 30 mins
  • Tools:
    Nutdriver, Screw drivers
3 of 5 people found this instruction helpful.
Was this instruction helpful to you?
Thank you for voting!

Cylinder Seal came out

Early in the life of my dryer, the Cylinder Seal came out. For the past two years I put off buying the part. When it came in, I p[opped the top of the dryer, removed the two screws holding on the front panel, and pulled the Cylinder of the back wall of the dryer. I then placed the seal in the right spot, glued it down and reassembled. About Fifteen minutes of work and a cheap part, and now my dryer dries a l;oad of clothes in an hour instead of three.
  • Marcia from Hammond, LA
  • Difficulty Level:
    Easy
  • Total Repair Time:
    Less than 15 mins
  • Tools:
    Pliers
4 of 6 people found this instruction helpful.
Was this instruction helpful to you?
Thank you for voting!
Fixes Symptom 16% of time
★★★★★
★★★★★
10 Reviews

Rated by 50 customers 


Easy 

30 - 60 mins 

Ratings submitted by customers like you who bought this part.   

If your dryer is noisy, will not tumble, or is leaving marks on your clothes, you may need to replace the drum glide. The drum glide is installed on the front bulkhead either at the top or the bottom, regardless of the brand of dryer. To gain access to the drum glide, you will have to open the cabinet on the dryer. This drum glide is sold individually but it is important to note that they should be replaced in pairs. Before beginning this repair, it is important to disconnect the dryer from the power source. The tools required for this repair are a putty knife and a 5/16 nut driver.

$ 14.17
  In Stock
PartSelect Number PS11741931
Manufacturer Part Number WP37001298

Replacing your Amana Dryer Drum Glide

Replacing your Drum Glide

Customer Repair Stories

Drum glides worn out

Took front faia off , took off fan duct, then took old drum glides off and put on the new ones. Make sure you buy two, when you order them they only come in single size lot.
  • Arthur from lebanon, ME
  • Difficulty Level:
    Really Easy
  • Total Repair Time:
    Less than 15 mins
  • Tools:
    Screw drivers, Socket set
0 of 1 people found this instruction helpful.
Was this instruction helpful to you?
Thank you for voting!

drum glide worn out

i watched the video that you provided and the repair went just as show. the video was a great to have.
  • dave from sparta, MI
  • Difficulty Level:
    Easy
  • Total Repair Time:
    30 - 60 mins
  • Tools:
    Nutdriver, Screw drivers
1 of 2 people found this instruction helpful.
Was this instruction helpful to you?
Thank you for voting!
Fixes Symptom 10% of time
★★★★★
★★★★★
2 Reviews

Rated by 14 customers 


Easy 

30 - 60 mins 

Ratings submitted by customers like you who bought this part.   

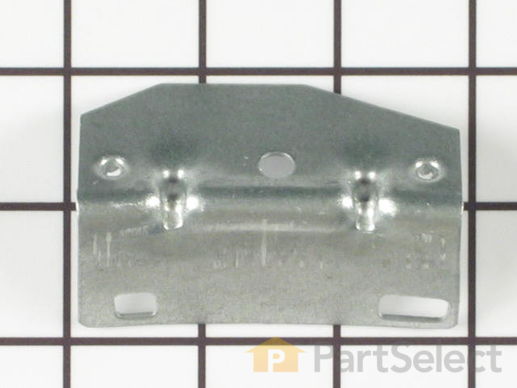
These brackets support each side of the tub. Order quantity needed.

$ 60.73
  In Stock
PartSelect Number PS11741912
Manufacturer Part Number WP37001036

Replacing your Amana Dryer Cylinder Glide Bracket

Replacing your Cylinder Glide Bracket

Customer Repair Stories

Dryer was making metal to metal grinding noise

Before tearing down unit the video on this site is very usefull. After removing tub noticed cylinder glides were worn out and tub had been rubbing glide bracket. Checked rollers on rear of tub and they seemed fine. The belt tension roller seemed stiff. One glide bracket was worn nearly thru. Replaced tension roller, glides and one glide bracket. Since I had unit pulled down replaced belt. Cleaned unit out good, re-assembled and wife happy. If you had tools and parts in hand you could do job in an hour.
  • Jimmy from Stonewall, LA
  • Difficulty Level:
    Easy
  • Total Repair Time:
    30 - 60 mins
  • Tools:
    Nutdriver, Pliers, Screw drivers
Was this instruction helpful to you?
Thank you for voting!

the glide brackets cut right thru.

The repair would have went much better if the pads came with the two new brackets I bought. I had to use the old one after having the whole dryer apart. You should be more specific that they were not included.
  • Carol from Nokomis, FL
  • Difficulty Level:
    Easy
  • Total Repair Time:
    30 - 60 mins
  • Tools:
    Wrench set
1 person found this instruction helpful.
Was this instruction helpful to you?
Thank you for voting!
Fixes Symptom 8% of time
★★★★★
★★★★★
23 Reviews

Rated by 35 customers 


Really Easy 

15 - 30 mins 

Ratings submitted by customers like you who bought this part.   

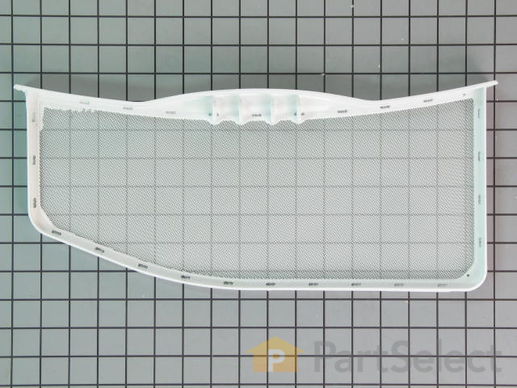
Note: This part no longer comes with the felt seal. This filter collects lint as it passes through the dryer vent.

$ 73.42
  In Stock
PartSelect Number PS11741919
Manufacturer Part Number WP37001142

Replacing your Amana Dryer Lint Filter

Replacing your Lint Filter

Customer Repair Stories

Broken lint filter

Picked up the box off of my back porch and carried it in the house. Opened up the box, took the filter out of the box and unwrapped it. Walked into the laundry room opened up the dryer door and gently slid the filter into the filter holder.... BAM!! It was done!!
  • Andrew from Cadillac, MI
  • Difficulty Level:
    Really Easy
  • Total Repair Time:
    Less than 15 mins
175 of 181 people found this instruction helpful.
Was this instruction helpful to you?
Thank you for voting!

Filter Lint Was Broken

Took it out of the box and put it in the dryer. I could not find this part anywhere else but on this website. The item was delivered the next day to my surprise.
  • Mirsada from Yorktown Heights, NY
  • Difficulty Level:
    Really Easy
  • Total Repair Time:
    Less than 15 mins
378 of 380 people found this instruction helpful.
Was this instruction helpful to you?
Thank you for voting!
Fixes Symptom 5% of time
★★★★★
★★★★★
3 Reviews

Rated by 18 customers 


Easy 

30 - 60 mins 

Ratings submitted by customers like you who bought this part.   

This dryer drum glide pad is an inch long. It is made of a felt material and is used for gas and electric clothes dryers. The dryer drum glide provides a soft surface for the front of the drum glide and allows the drum to move effortlessly. If you notice that your dryer is making loud squeaking noises, it might be due to the drum glide pad being worn down or torn apart. Make sure to unplug your dryer before performing this repair. To access this part, you will need to open up the top of the dryer. The front panel and the bulk head will also need to come off.

$ 8.00
  In Stock
PartSelect Number PS11742773
Manufacturer Part Number WP500121

Replacing your Amana Dryer Single Drum Glide Felt Pad

Replacing your Single Drum Glide Felt Pad
Fixes Symptom 5% of time
★★★★★
★★★★★
1 Review

Rated by 25 customers 


Easy 

30 - 60 mins 

Ratings submitted by customers like you who bought this part.   

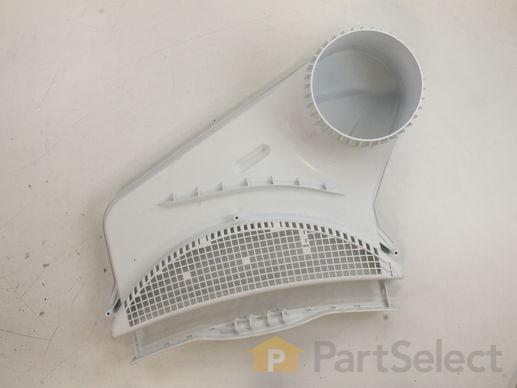
This part includes the upper and lower air duct assembly and lint screen.

  No Longer Available
PartSelect Number PS2039494
Manufacturer Part Number 37001141

Replacing your Amana Dryer Lint Duct Assembly

Replacing your Lint Duct Assembly

Customer Repair Stories

broken plastic vent

I am not mechanical so if I can do it so can. UNPLUG THE DRYER FIRST!There are two bolts on the back of the dryer that connect the control panel and the dryer itself remove these and take out the brackets that are held by these two bolts, I used a socket, lift up and peek in to the front top you will see two screws that hold the other side of the top of the dryer lower the back side and move to the front of the dryer now that the back bolts are removed. Take a large screwdriver and place a dishrag or handkerchief so the flat side is inserted where these screws are located{preventing scratches}pry upward it will seperate the top of the dryer from the front of the dryer move over to the next screw and repeat now the top is loose and can be slid backwards until there is room for you to see down in front of the dryer, notice there are three wires that connect for the light on the right hand side, take the time to write down there color and in what order they are located as you will have to remove these now inside the front panel from the top about a third of the way are two bolts, one on the left and one on the right use the socket to remove these now pull the front panel to you and lift up, the front panel will now come off set aside. remove the three screws that attach the plastic vent from inside the dryer,pull out plastic vent, vacuum out dust and lint install new plastic vent install the three screws from inside the dryer drum and reverse the process you are finished!
  • joe from Beacon Falls, CT
  • Difficulty Level:
    A Bit Difficult
  • Total Repair Time:
    1- 2 hours
  • Tools:
    Screw drivers, Socket set
9 of 11 people found this instruction helpful.
Was this instruction helpful to you?
Thank you for voting!

lint collector plastic holder broken

Un plug the dryer ***
Pulled the top portion of the dryer off
Used socket to undue two nuts to remove the front panel and unhooked the wires.
unscrewed 3 screws and took out the air duct assembly. Cleaned the dryer of all lint and replaced the air duct with a new one.
Reverse the process.
  • Todd from Wappingers Falls, NY
  • Difficulty Level:
    Really Easy
  • Total Repair Time:
    15 - 30 mins
  • Tools:
    Screw drivers, Socket set
27 of 32 people found this instruction helpful.
Was this instruction helpful to you?
Thank you for voting!