Models > SDE3606AYW > Symptoms > Noisy

Parts That Fix Maytag Dryer SDE3606AYW Noisy

Noisy is a commonly reported symptom for the SDE3606AYW Maytag Dryer, and we have put together a full guide on how to fix this. This advice is based on feedback from people who own this exact appliance. We have listed the most common parts for your SDE3606AYW Maytag Dryer that will fix Noisy. We have included repair instructions, and helpful step-by-step video tutorials. If you are experiencing this issue, not to worry, DIYers just like you have fixed this, and shared their experience to help you!

Fixes Symptom 24% of time
★★★★★
★★★★★
13 Reviews

Rated by 83 customers 


Easy 

1- 2 hours 

Ratings submitted by customers like you who bought this part.   

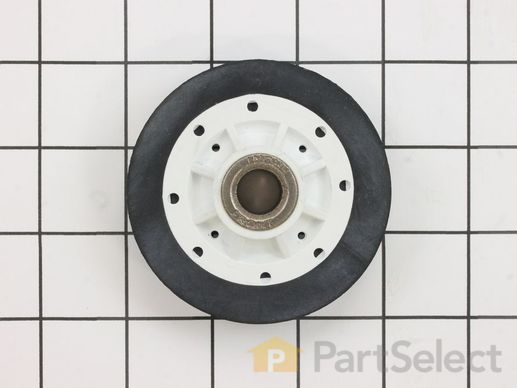
This drum support roller is used for square-ported model clothes dryers. This part is sold individually; however, rollers tend to wear at the same rate, so it is suggested that both should be replaced at the same time. It has a metallic bearing in its center. The drum support roller holds the drum in place while it rotates on the support wheels. You may have a faulty or damaged roller if your dryer will not start or tumble, takes too long to dry clothes, or starts making loud noises. Customers have ranked this repair as easy and should take 15-30 minutes to complete.

$ 20.95
  In Stock
PartSelect Number PS11741913
Manufacturer Part Number WP37001042

Replacing your Amana Dryer Drum Support Roller

Replacing your Drum Support Roller

Customer Repair Stories

very noisey dryer

Open bottom panel and observed back left drum roller wheel wobbling and obviously making the loud rumbling banging sound. Search goggle for Amana model part -- found partsellect.com, and read the list of other DIYs:

Take off the lower and upper front panels (two screws
each);

Remove the front drum glide holder (four screws. Careful
here because of the two wires to be removed for
door open off switch;

Pulling drum forward only enough so the bad roller wheel
would come off shaft after removing shaft snap ring
keeper;

Grease new roller hole and old shaft then place the
new wheel roller on shaft;

Replace all items back after cleaning lent off.

Note: Snap ring was a bit tricky (need snap ring pliers)--make sure it is clipped back all the way on the shaft after new wheel is installed. Also, I thought it was a good idea to put something underneath the dryer drum to support it while it was slightly pulled out -- a block of wood, etc. I found a spot remover plastic bottle that wedged up to support the dryer drum enough to take pressure off the belt during wheel replacement.
  • Mike from El Granada, CA
  • Difficulty Level:
    A Bit Difficult
  • Total Repair Time:
    30 - 60 mins
  • Tools:
    Nutdriver, Pliers
8 of 9 people found this instruction helpful.
Was this instruction helpful to you?
Thank you for voting!

Support Roller removal and Installation

First I turned off the gas supply line. Then unplug the dryer. Remove bottom front cover by removing the 2 screws (1 at each side) at the bottom. Next remove the 2 screws (1 at each side) located at bottom of front door panel. Pull front panel away from dryer and pull down slightly. This will disconnect the entire front panel(with door) from dryer. Carefull because there is a switch located at the top right corner of the panel on the inside. This will not allow you to remove the door yet. On some scratch paper, sketch the switch and correct color wire positions. Remove wires at connections. Pull the drum toward front dryer carefully. This dislodges it from the back of the dryer. No need to remove it from dryer. This way the belt still remains in place. From inside drum, use a pair of snap ring pliers to remove the snap ring from the support roller shaft located on left side of drum, below where the drum was sitting prior to pulling it forward to dislodge it from inside rear of dryer.
Remove old wheel , place some grease on inside of new support roller and some on the shaft. Install new roller and replace snap ring. Slide drum back in place inside the dryer at the rear. Hand rotate the drum to ensure it is properly installed. Reconnect the switch wires to the front panel. Slide panel up into place so that the clips (at top of panel) lock into place(square holes in top cover plate of dryer). Have the door open when doing this because you have to seat the front of the drum into the front cover. Reinstall the 2 screws. Test spin the drum again by hand. If it feels right, it's correctly seated.
Reinstall bottom front cover. While everything is apart, you may want to use a vacuum cleaner to clean the inside of your dryer. Perfect time to do this. Plug dryer back in and open gas supply line. Test the dryer. Should be nice and quiet again.
This fix is for the left side support roller only. There is a support roller on the right side also. In my case I only needed to fix the left side support roller. The inner diameter of the roller was badly worn and needed to be replaced. You may want to purchase the support roller shaft at the same time. I didn't and will need to do this repair again. I only purchased the support roller and when I removed it, I noticed the shaft is badly worn also. In my case, temporary fix until the shaft is ordered and then I'll do this again.
  • Fred from Chicago, IL
  • Difficulty Level:
    A Bit Difficult
  • Total Repair Time:
    30 - 60 mins
  • Tools:
    Socket set
142 of 206 people found this instruction helpful.
Was this instruction helpful to you?
Thank you for voting!
Fixes Symptom 17% of time
★★★★★
★★★★★
103 Reviews

Rated by 115 customers 


Easy 

1- 2 hours 

Ratings submitted by customers like you who bought this part.   

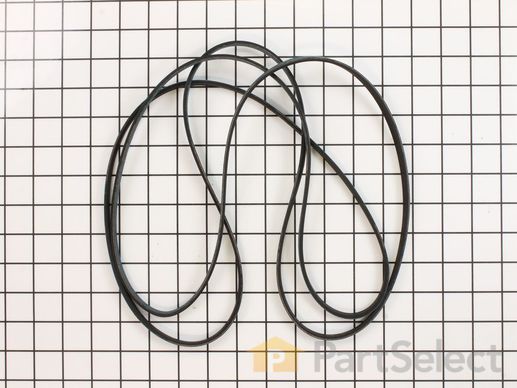
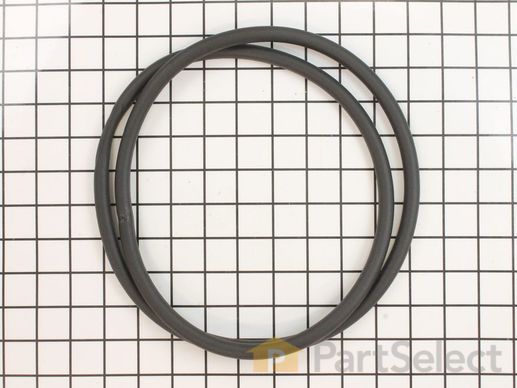
This dryer drum drive belt attaches to the motor pully and works the drum as the motor rotates. The belt has a length of 93- 3/6 inches, and wraps all the way around the dryer drum, around a tension pulley, and then around the drive motor pully. Replacing the rib belt could solve symptoms such as a screeching noise when the dryer tumbles, a broken belt (dryer will not tumble if its broken), no heat or not enough heat, or the dryer will not start. The tools needed for this repair are a nut driver and a putty knife. Remember to unplug the dryer before installing the part and protect your hands by wearing gloves.

$ 9.44
  In Stock
PartSelect Number PS11742271
Manufacturer Part Number WP40111201

Replacing your Amana Dryer Multi Rib Belt

Replacing your Multi Rib Belt

Customer Repair Stories

Original belt finally gave way.....(15yrs old)

Simply remove the front panel screws(2) at the bottom of the dryer. Pull bottom of panel outward until it swings free of the top(taking care not to pull the wires out). Rotate out of the way and remove the two left side screws holding the drum plate and snake the belt around the flange. Reinstall those screws and remove the same ones on the right side. Snake the belt behind that flange and reinstall screws. Then all you have to do is run the belt around the motor sheave and the idler pully and your done. Reinstall the front panel.
  • Garrett from Racine, WI
  • Difficulty Level:
    Easy
  • Total Repair Time:
    15 - 30 mins
  • Tools:
    Nutdriver
24 of 25 people found this instruction helpful.
Was this instruction helpful to you?
Thank you for voting!

Replace drive belt

Remove front panel, lint basket, motor mounts,exhaust hood, front drum brackets. Then slip serpentine belt around drum, pressure w/ tension idler pulley and slip around drive motor spindle. Replace all parts in reverse order (a two person job).
Vacuumed inside of dryer (full of lint.)
  • Robert from Skokie, IL
  • Difficulty Level:
    Difficult
  • Total Repair Time:
    1- 2 hours
  • Tools:
    Nutdriver
304 of 354 people found this instruction helpful.
Was this instruction helpful to you?
Thank you for voting!
Fixes Symptom 16% of time
★★★★★
★★★★★
20 Reviews

Rated by 68 customers 


Easy 

1- 2 hours 

Ratings submitted by customers like you who bought this part.   

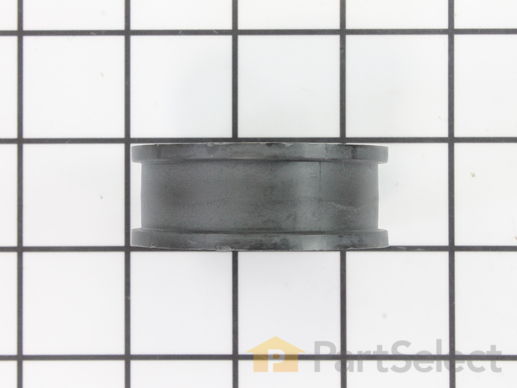
The idler pulley wheel helps the belt to rotate the drum in your dryer. If your dryer will not start, will not tumble, or is noisy during operation, the idler pulley wheel may need to be replaced. This part is located beneath the drum of the dryer, so the drum will need to be removed before you can access the idler pulley wheel. It is also recommended to remove the blower housing and motor from the dryer itself, for easier access to the idler pulley wheel. It is connected by a set of two 5/16 screws. This two-inch-wide idler pulley wheel is beige or black in color and is made of plastic. This pulley wheel comes with its own metallic bearing in its center. Be sure to shut off power to the dryer before beginning this repair.

$ 22.32
  In Stock
PartSelect Number PS11757553
Manufacturer Part Number WPY54414

Replacing your Amana Dryer Idler Pulley Wheel with Bearing

Replacing your Idler Pulley Wheel with Bearing

Customer Repair Stories

dryer stoped working

At first i thought i had to buy new dryer, because i did not know what to do.I said, i never done this kind of repair before, well i put everything apart and notice that the idler pulley was worn out, then i said this is something that i can fix it if i get the part. I made several calls and couldn't find it. so went in internet and found it with you.
  • Roman from Gaithersburg, MD
  • Difficulty Level:
    Easy
  • Total Repair Time:
    30 - 60 mins
  • Tools:
    Screw drivers, Socket set, Wrench (Adjustable)
4 of 5 people found this instruction helpful.
Was this instruction helpful to you?
Thank you for voting!

Dryer drum stopped spinning

Dryer drum stopped but all other elements seemed functional; couldn't afford new dryer. Unplugged appliance & moved it to my garage (more room to move about). Undid base plate w/tools and found belt slack - identified broken idler pully wheel as part to fix. Went online & found part-select, located part & was way happy: $7.00 part + $7.00 shipping; got part 3 days later. Removed broken pully wheel (take off lock-washer, put wheel on, reinstall lock washer). Cleaned out venting elements (huge lint-ball & some sand in blower intake area). Re-attahced base. Back on-line to see "replace dryer belt" instruction sequence; opened lid of machine (while verticle) and positioned belt properly. Located access port (sealed) at base, knocked out the circular metal plate so I could reach in & thread the dryer belt back around motor & idler pulley wheel. Did test spin (manually) to make sure belt properly threaded, in place. Move appliance back to proper location, plugged in & hooked up venting to outside; ran test & SUCCESS!!!! It even seemed to dry better because of the now cleaned venting area. Labor cost = $0, Part cost < $15.00, Time (actual work) bit over 3 hours total.
  • Leif from Brighton, CO
  • Difficulty Level:
    Difficult
  • Total Repair Time:
    More than 2 hours
  • Tools:
    Pliers, Socket set
15 of 16 people found this instruction helpful.
Was this instruction helpful to you?
Thank you for voting!
Fixes Symptom 12% of time
★★★★★
★★★★★
10 Reviews

Rated by 50 customers 


Easy 

30 - 60 mins 

Ratings submitted by customers like you who bought this part.   

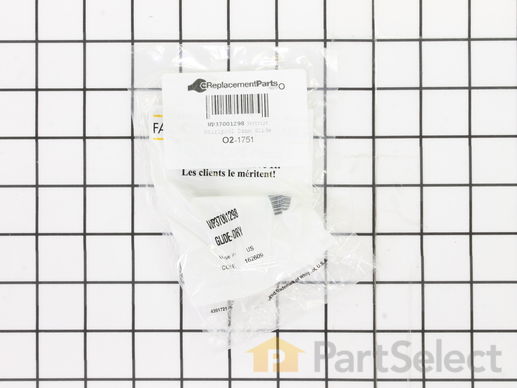
If your dryer is noisy, will not tumble, or is leaving marks on your clothes, you may need to replace the drum glide. The drum glide is installed on the front bulkhead either at the top or the bottom, regardless of the brand of dryer. To gain access to the drum glide, you will have to open the cabinet on the dryer. This drum glide is sold individually but it is important to note that they should be replaced in pairs. Before beginning this repair, it is important to disconnect the dryer from the power source. The tools required for this repair are a putty knife and a 5/16 nut driver.

$ 14.17
  In Stock
PartSelect Number PS11741931
Manufacturer Part Number WP37001298

Replacing your Amana Dryer Drum Glide

Replacing your Drum Glide

Customer Repair Stories

Drum glides worn out

Took front faia off , took off fan duct, then took old drum glides off and put on the new ones. Make sure you buy two, when you order them they only come in single size lot.
  • Arthur from lebanon, ME
  • Difficulty Level:
    Really Easy
  • Total Repair Time:
    Less than 15 mins
  • Tools:
    Screw drivers, Socket set
0 of 1 people found this instruction helpful.
Was this instruction helpful to you?
Thank you for voting!

drum glide worn out

i watched the video that you provided and the repair went just as show. the video was a great to have.
  • dave from sparta, MI
  • Difficulty Level:
    Easy
  • Total Repair Time:
    30 - 60 mins
  • Tools:
    Nutdriver, Screw drivers
1 of 2 people found this instruction helpful.
Was this instruction helpful to you?
Thank you for voting!
Fixes Symptom 5% of time
★★★★★
★★★★★
2 Reviews

Rated by 37 customers 


Easy 

1- 2 hours 

Ratings submitted by customers like you who bought this part.   

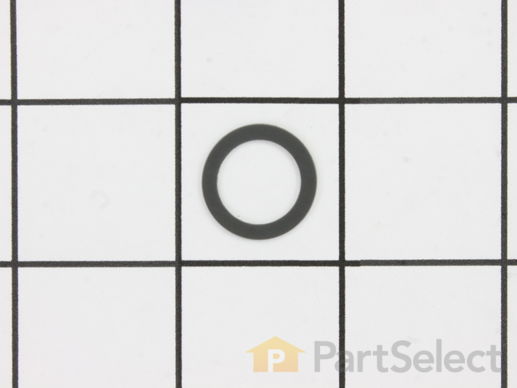
This genuine OEM washer has a 3/4 inch outside diameter. This thrust washer can be used on most makes and models of dryers. A complete list of compatible dryers is available below. The washer is found on dryers around the drum support rollers and idler pulleys, and helps prevent the rollers and pulleys from bumping up against the brackets they are installed on. Your thrust washer could be defective if you notice your dryer wont tumble, rotate, or turn; or there is a load squealing or whining noise when the dryer tumbles. The repair is a relatively easy job. You will require a putty knife, 5/16 inch nut driver, and E-Ring pliers. Remember to disconnect the power to your dryer before you begin the repair.

$ 7.95
  In Stock
PartSelect Number PS11740482
Manufacturer Part Number WP233520

Replacing your Amana Dryer Thrust Washer

Replacing your Thrust Washer

Customer Repair Stories

Clanging of dryer when rolling

Followed video on PartsSelect website, they made it real easy.
  • John from Bel Air, MD
  • Difficulty Level:
    Easy
  • Total Repair Time:
    15 - 30 mins
  • Tools:
    Nutdriver, Screw drivers
1 person found this instruction helpful.
Was this instruction helpful to you?
Thank you for voting!

belt was cracking and dryer was somewhat noisy

I used your great video for pointers as to what to do. I took off the front, raised the top, vacuumed the whole thing up, that took quite a while. Took out the drum. Did more cleaning. Then took off the old retaining rings with retaining ring pliers, took off the old drum rollers and support. Replaced with new roller supports, washer, roller, washer and retaining rings. Then I replaced the belt. Tested it and turned the wrong way and it came off. Replaced and tested it again and I don't know why but it came off. Replaced the belt again, tested fine. Then I replaced the felt pads and glides, they were worn. I ended up asking my husband to help hold the drum so I could get the front back on. Replaced front and door. Tried the dryer. Works great AND very, very little noise. Note: when taking the wiring off the light and the door switch, I took photo's of those places with my cell phone and had them to look at to make sure the wiring was correct.
  • Melody from Silverton, CO
  • Difficulty Level:
    Easy
  • Total Repair Time:
    More than 2 hours
  • Tools:
    Nutdriver, Screw drivers
3 of 5 people found this instruction helpful.
Was this instruction helpful to you?
Thank you for voting!
Fixes Symptom 4% of time
★★★★★
★★★★★
1 Review

Rated by 32 customers 


Easy 

1- 2 hours 

Ratings submitted by customers like you who bought this part.   

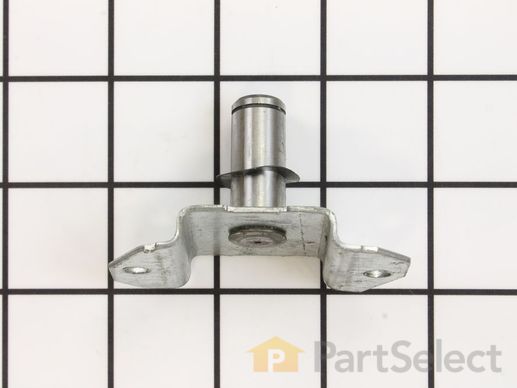
This drum support roller bracket and shaft assembly is a little over two inches long. It is made of metal.

$ 52.82
  In Stock
PartSelect Number PS11742273
Manufacturer Part Number WP40113601

Replacing your Amana Dryer Drum Support Roller and Shaft Assembly

Replacing your Drum Support Roller and Shaft Assembly

Customer Repair Stories

Squealing Noise, Intermittent

Solution: assy, idler lever (#37001287) the trick was to remove the top cover as there are no exposed screws 1. Insert a putting knife in the middle of the gap between the top cover and the front panel. Slide the putty knife to the left and then right. When you hit something, it is a clip. Use the putty knife to depress the 2 locking clips. Lift up the top cover. 2. Remove the front panel ( 2 screws, on each side and some electrical spade connectors) 3. Remove the blower duct (3 screws from inside the drum) 4. Remove the blower panel (9-screws). Set aside. 5. Remove belt tension from idler-assy 6. Disconnect motor harness connector from motor. 7. Rotate blower assembly counter-clockwise to remove from dryer. 8. Replace idler assy.
  • Mario from Spartanburg, SC
  • Difficulty Level:
    Easy
  • Total Repair Time:
    30 - 60 mins
  • Tools:
    Screw drivers
19 of 632 people found this instruction helpful.
Was this instruction helpful to you?
Thank you for voting!
Fixes Symptom 4% of time
★★★★★
★★★★★
9 Reviews

Rated by 21 customers 


Easy 

1- 2 hours 

Ratings submitted by customers like you who bought this part.   

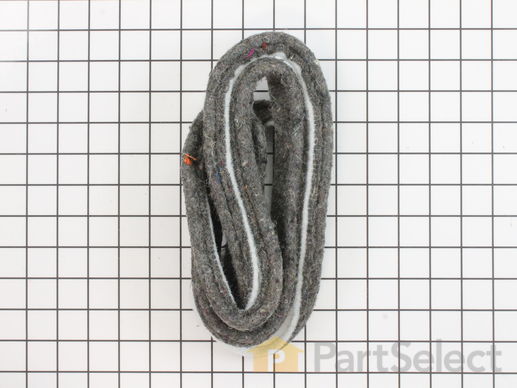
This cylinder felt seal is used in dryers and is located between the back of the drum and the rear dryer panel. If your dryer is experiencing any of these symptoms, replacing the felt seal could solve your problem: squealing or banging noise, clothes are getting stuck between tub and felt pad, takes too long to dry, not heating enough or not heat at all, or does not tumble. The tools needed for this installation are a 5/16 nut driver and a putty knife. Make sure to unplug the dryer from the power source before beginning this project. Refer to the manual provided by the manufacturer for further instructions.

$ 48.55
  In Stock
PartSelect Number PS11741917
Manufacturer Part Number WP37001132

Replacing your Speed Queen Dryer Cylinder Felt Seal

Replacing your Cylinder Felt Seal

Customer Repair Stories

Worn Felt Seal

remove bottom two screws on lower front panel, remove panel. remove two screws on lower portion of door panel, pull bottom panel towards yourself to release pins at the top. Disconnect wiring for light and door switch (make sure to note what wires go where. Complete removal of front door panel. Remove 4 screws holding cylinder frame in place, lift to remove. remove remnants of old felt seal, use rotary tool to remove excess glue, etc. apply glue (used rubberized gorilla super glue), apply felt seal - allow glue to set up. reinstall in reverse direction from removal. Be sure to use glue as there are no clips or other retaining pieces for the new felt and it will not hold in place. overall pretty easy.
  • robert from hillsborough, NC
  • Difficulty Level:
    Easy
  • Total Repair Time:
    15 - 30 mins
  • Tools:
    Nutdriver, Screw drivers
3 of 5 people found this instruction helpful.
Was this instruction helpful to you?
Thank you for voting!

Cylinder Seal came out

Early in the life of my dryer, the Cylinder Seal came out. For the past two years I put off buying the part. When it came in, I p[opped the top of the dryer, removed the two screws holding on the front panel, and pulled the Cylinder of the back wall of the dryer. I then placed the seal in the right spot, glued it down and reassembled. About Fifteen minutes of work and a cheap part, and now my dryer dries a l;oad of clothes in an hour instead of three.
  • Marcia from Hammond, LA
  • Difficulty Level:
    Easy
  • Total Repair Time:
    Less than 15 mins
  • Tools:
    Pliers
4 of 6 people found this instruction helpful.
Was this instruction helpful to you?
Thank you for voting!
Fixes Symptom 3% of time

Rated by 35 customers 


Easy 

1- 2 hours 

Ratings submitted by customers like you who bought this part.   

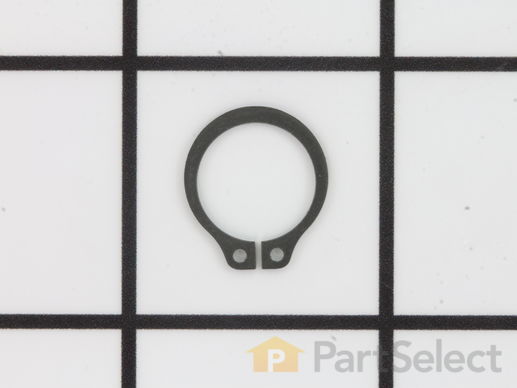
The metal retaining ring, which is under an inch long, holds the rear wheels on the axels of the dryer. The main reason why it would need to replaced is if the retaining ring has sprung out of place or is damaged. Some the symptoms could be that your dryer does not tumble, it makes a loud buzzing noise, or if it pumps, but will not spin. The tools needed for this project are a putty knife, 5/16 nut driver, and snap ring pliers. Refer to the installation video and diagram for further instructions and guidance. Customers ranked this replacement project as easy.

$ 13.58
  In Stock
PartSelect Number PS11740487
Manufacturer Part Number WP23748

Replacing your Amana Dryer Retaining Ring

Replacing your Retaining Ring
Fixes Symptom 3% of time
★★★★★
★★★★★
3 Reviews

Rated by 18 customers 


Easy 

30 - 60 mins 

Ratings submitted by customers like you who bought this part.   

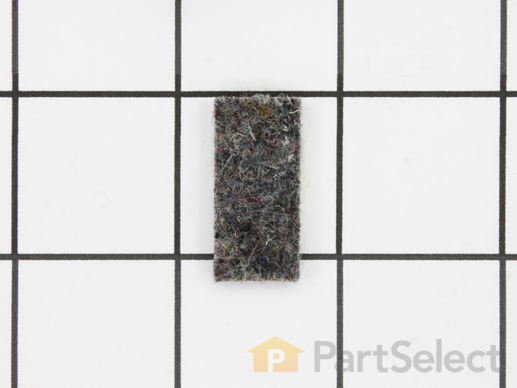
This dryer drum glide pad is an inch long. It is made of a felt material and is used for gas and electric clothes dryers. The dryer drum glide provides a soft surface for the front of the drum glide and allows the drum to move effortlessly. If you notice that your dryer is making loud squeaking noises, it might be due to the drum glide pad being worn down or torn apart. Make sure to unplug your dryer before performing this repair. To access this part, you will need to open up the top of the dryer. The front panel and the bulk head will also need to come off.

$ 8.00
  In Stock
PartSelect Number PS11742773
Manufacturer Part Number WP500121

Replacing your Amana Dryer Single Drum Glide Felt Pad

Replacing your Single Drum Glide Felt Pad
Fixes Symptom 3% of time
★★★★★
★★★★★
2 Reviews

Rated by 14 customers 


Easy 

30 - 60 mins 

Ratings submitted by customers like you who bought this part.   

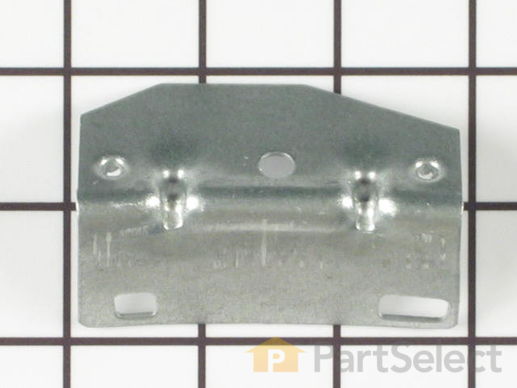
These brackets support each side of the tub. Order quantity needed.

$ 60.73
  In Stock
PartSelect Number PS11741912
Manufacturer Part Number WP37001036

Replacing your Amana Dryer Cylinder Glide Bracket

Replacing your Cylinder Glide Bracket

Customer Repair Stories

Dryer was making metal to metal grinding noise

Before tearing down unit the video on this site is very usefull. After removing tub noticed cylinder glides were worn out and tub had been rubbing glide bracket. Checked rollers on rear of tub and they seemed fine. The belt tension roller seemed stiff. One glide bracket was worn nearly thru. Replaced tension roller, glides and one glide bracket. Since I had unit pulled down replaced belt. Cleaned unit out good, re-assembled and wife happy. If you had tools and parts in hand you could do job in an hour.
  • Jimmy from Stonewall, LA
  • Difficulty Level:
    Easy
  • Total Repair Time:
    30 - 60 mins
  • Tools:
    Nutdriver, Pliers, Screw drivers
Was this instruction helpful to you?
Thank you for voting!

the glide brackets cut right thru.

The repair would have went much better if the pads came with the two new brackets I bought. I had to use the old one after having the whole dryer apart. You should be more specific that they were not included.
  • Carol from Nokomis, FL
  • Difficulty Level:
    Easy
  • Total Repair Time:
    30 - 60 mins
  • Tools:
    Wrench set
1 person found this instruction helpful.
Was this instruction helpful to you?
Thank you for voting!
Fixes Symptom 3% of time
★★★★★
★★★★★
9 Reviews

Rated by 17 customers 


Easy 

1- 2 hours 

Ratings submitted by customers like you who bought this part.   

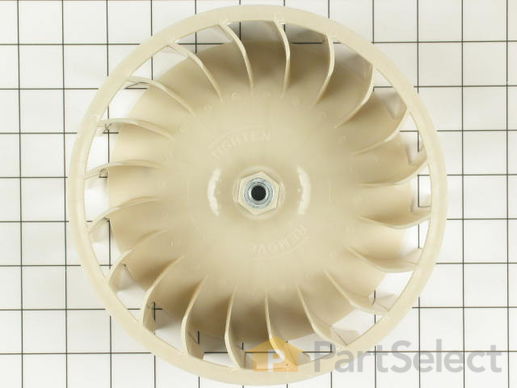
If your dryer is noisy, will not tumble, or is not producing enough heat, you may need to replace the blower wheel. This part is white in color, and is made of plastic. This part is approximately 8 inches in diameter. The blower wheel is located near the bottom of your dryer cabinet. To access it for this repair, you will need to remove both the front panel and the front bulkhead assembly. Before you begin this repair, be sure to disconnect the power source to the dryer. To complete this repair, you will need a 5/16 inch nut driver, a 1/4 inch nut driver, a pair of locking pliers and a 7/8 socket with a short extension and a ratchet.

$ 64.27
  In Stock
PartSelect Number PS2052494
Manufacturer Part Number 56000

Replacing your Amana Dryer Blower Wheel

Replacing your Blower Wheel

Customer Repair Stories

The insert-molded nut stripped from the wheel

Because the wheel had stopped and the shaft kept turning (junk from child's pocket got in there), the nut stripped itself away from the wheel causing low RPM and low air movement (lazy flame, vibration and clothes not drying)

I had to use a screwdriver to break the wheel away from the center nut and remove the fan. I then removed the air fan housing (3 bolt behind the fan wheel). I used a small pair of vise grips to hold the motor shaft staionary while I used a pair of channel lock pliers to remove the nut that was molded into the fan from the motor shaft. It was harder to get the nut started then I would have thought.

Once complete, I put the fan housing back on and threaded the new wheel on easily. The motor has external fins on it which turn with the shaft-I held one lightly while I threaded the fan on to keep the shaft from turning. Tighten just slightly more than hand tight-don't go crazy-it's threaded to stay tight with rotation. Works great and very quiet now.
  • Ted from Grayslake, IL
  • Difficulty Level:
    Really Easy
  • Total Repair Time:
    30 - 60 mins
  • Tools:
    Pliers, Screw drivers
18 of 21 people found this instruction helpful.
Was this instruction helpful to you?
Thank you for voting!

Blower fan cracked

Unplug the power cord from the unit. Remove the lower front panel; then the upper front panel including the door (unplug wire to door switch). Then remove the cover on the fan housing. Need to block the motor from turning; I used a stick to jamb the front of the motor; then unscrew the old blower fan and screw on the new one. Then replace the cover and put front panels back on.
  • Rick from Birch Run, MI
  • Difficulty Level:
    A Bit Difficult
  • Total Repair Time:
    30 - 60 mins
  • Tools:
    Nutdriver, Socket set
44 of 54 people found this instruction helpful.
Was this instruction helpful to you?
Thank you for voting!
Fixes Symptom 2% of time

Rated by 15 customers 


Easy 

1- 2 hours 

Ratings submitted by customers like you who bought this part.   

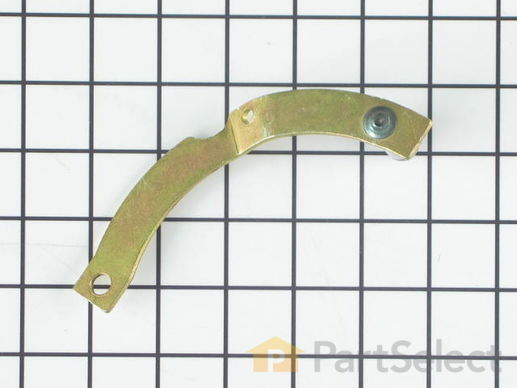
This arm is what attaches to the idler pulley wheel.

$ 37.89
  In Stock
PartSelect Number PS11741920
Manufacturer Part Number WP37001144
Fixes Symptom 1% of time
★★★★★
★★★★★
1 Review

Rated by 9 customers 


Easy 

1- 2 hours 

Ratings submitted by customers like you who bought this part.   

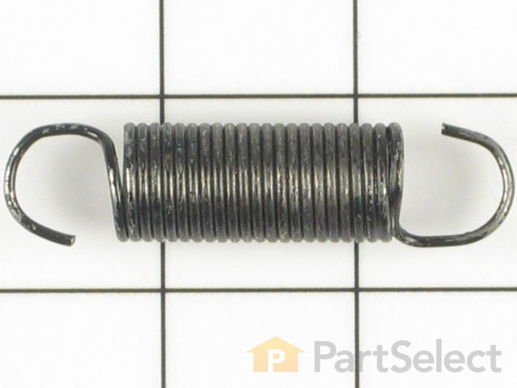
At just two and a half inches, this metal spring fits onto the arm of the idler pulley assembly of gas and electric clothes dryers.

$ 51.53
  In Stock
PartSelect Number PS11742854
Manufacturer Part Number WP56076
Fixes Symptom 1% of time
★★★★★
★★★★★
9 Reviews

Rated by 18 customers 


Easy 

1- 2 hours 

Ratings submitted by customers like you who bought this part.   

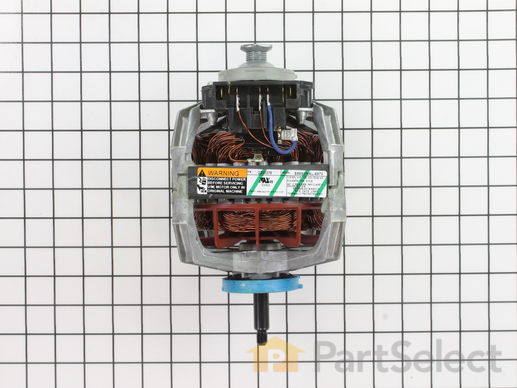
This 1/4 horsepower gas or electric clothes dryer motor carries 120 volts, 60 Hz, and 5.5 amps. It also performs 1725 revolutions per minute. This motor is used for some gas and some electric clothes dryers.

$ 144.04
  In Stock
PartSelect Number PS11739459
Manufacturer Part Number WP2200376

Customer Repair Stories

motor pulley went bad

First unplugged unit .2nd took off front cover and removed bottom screws and that allows it to open up and lean back.3rd pryed the motor lock down springs by applying pressure down and out . forth used vise grips to hold motor shaft, while using the 7/8 socket to loosen the blower fan.Last go through steps to put back together.
  • Brian from Sedalia, MO
  • Difficulty Level:
    Easy
  • Total Repair Time:
    15 - 30 mins
  • Tools:
    Nutdriver, Pliers, Screw drivers, Socket set
54 of 67 people found this instruction helpful.
Was this instruction helpful to you?
Thank you for voting!

Dryer would make humming noise and stop running as Motor would overheat.

This was much easier than I expected. I pulled the front covers, released the belt (just move tentioner pulley with fingers to release belt), removed the drum to access the motor. The motor was easy to remove. I loosened then nut in the fan assy using my channel locks (because I did not have a socket that big and then removed the wire harness clip to prepare the motor for removal. The two mounting clips were the tricky part as the fit over a metal ear on each side locked by the spring tension of the clips. It looks like a special tool my be available but I simply used my big straitslot and heavy downward pressure to remove and install. This repair can be completed by anyone with very basic mechanical skills and impress the spouse.
  • Bryan from Everett, WA
  • Difficulty Level:
    Easy
  • Total Repair Time:
    30 - 60 mins
  • Tools:
    Nutdriver, Pliers, Screw drivers, Socket set, Wrench set
65 of 82 people found this instruction helpful.
Was this instruction helpful to you?
Thank you for voting!
Fixes Symptom less than 1% of time
★★★★★
★★★★★
23 Reviews

Rated by 35 customers 


Really Easy 

15 - 30 mins 

Ratings submitted by customers like you who bought this part.   

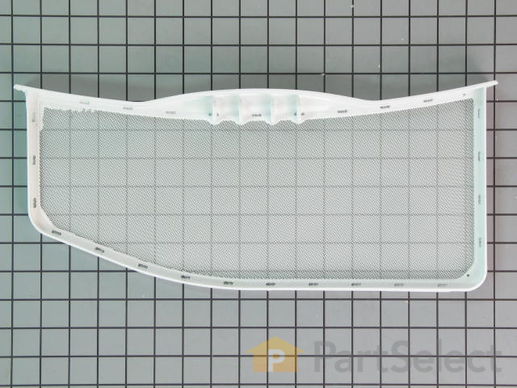
Note: This part no longer comes with the felt seal. This filter collects lint as it passes through the dryer vent.

$ 73.42
  In Stock
PartSelect Number PS11741919
Manufacturer Part Number WP37001142

Replacing your Amana Dryer Lint Filter

Replacing your Lint Filter

Customer Repair Stories

Broken lint filter

Picked up the box off of my back porch and carried it in the house. Opened up the box, took the filter out of the box and unwrapped it. Walked into the laundry room opened up the dryer door and gently slid the filter into the filter holder.... BAM!! It was done!!
  • Andrew from Cadillac, MI
  • Difficulty Level:
    Really Easy
  • Total Repair Time:
    Less than 15 mins
175 of 181 people found this instruction helpful.
Was this instruction helpful to you?
Thank you for voting!

Filter Lint Was Broken

Took it out of the box and put it in the dryer. I could not find this part anywhere else but on this website. The item was delivered the next day to my surprise.
  • Mirsada from Yorktown Heights, NY
  • Difficulty Level:
    Really Easy
  • Total Repair Time:
    Less than 15 mins
378 of 380 people found this instruction helpful.
Was this instruction helpful to you?
Thank you for voting!
Fixes Symptom less than 1% of time

  No Longer Available
PartSelect Number PS17173830
Manufacturer Part Number 511969
Fixes Symptom less than 1% of time

Rated by 3 customers 


Easy 

1- 2 hours 

Ratings submitted by customers like you who bought this part.   

  No Longer Available
PartSelect Number PS2045876
Manufacturer Part Number 500824
Fixes Symptom less than 1% of time
★★★★★
★★★★★
2 Reviews

Rated by 4 customers 


Easy 

More than 2 hours 

Ratings submitted by customers like you who bought this part.   

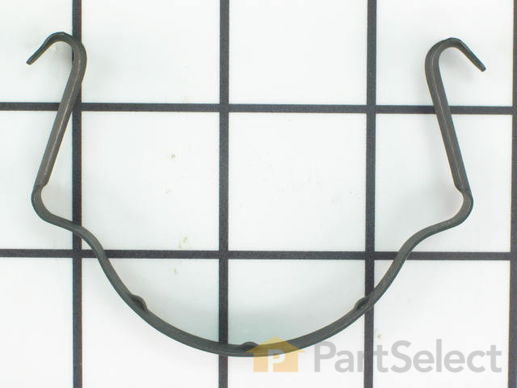
This clamp is used to secure the drive motor.

$ 11.13
  In Stock
PartSelect Number PS11743369
Manufacturer Part Number WP660658

Customer Repair Stories

Dryer drum wouldn't turn and motor would shut off

First I was told by the maytag repair man that the motor was shot and it would be 467 dollars to repair. Since I didn't have that kind of money I decided to take it apart to see if I could replace the motor myself. Once I had it apart I saw the part that held the motor in place was broken off and the motor was out of place causing it too shut itself off. Once I figured it all out it took about 2 minutes to replace the less than 6 dollar part! Thanks partSelect!!!
  • Cynthia M from Westfield, MA
  • Difficulty Level:
    Easy
  • Total Repair Time:
    More than 2 hours
  • Tools:
    Screw drivers
2 of 3 people found this instruction helpful.
Was this instruction helpful to you?
Thank you for voting!
Fixes Symptom less than 1% of time
★★★★★
★★★★★
19 Reviews

Rated by 27 customers 


Really Easy 

15 - 30 mins 

Ratings submitted by customers like you who bought this part.   

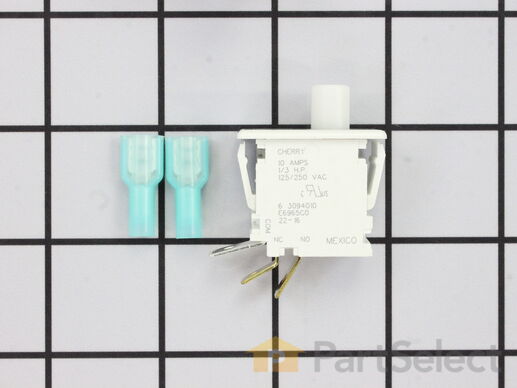
This part replaces two terminal switches in a dryer and prevents the dryer from running when the door is open. This includes two connectors. If your dryer will not shut off, start, or does not tumble, replacing the door switch can solve this appliance problem. The tools needed for replacement are a screw driver and wire strippers. Make sure to attach the two wires to the right two poles of the new switch, to do this you can check the resistance of the switch. Unplug the dryer before installing this part, also refer to the diagram provided by the manufacturer.

$ 29.94
  In Stock
PartSelect Number PS1964648
Manufacturer Part Number W10169313

Replacing your Maytag Dryer Door Switch Kit

Replacing your Door Switch Kit

Customer Repair Stories

Switch did not turn off dryer when door opened

Switch can be removed from outside of dryer and your video described the repair as having to work from inside dryer. But since wires were still attached to old switch, it could be popped out and wires switched. Since there were three wires on new switch to allow it to turn on and off a circuit, it was useful to check the resistance of the switch compressed or released to be certain I was attaching the two wires to the right two poles of the new switch. But that all required only a couple of minutes. Thank you.
  • paul from madison, CT
  • Difficulty Level:
    Really Easy
  • Total Repair Time:
    Less than 15 mins
13 of 17 people found this instruction helpful.
Was this instruction helpful to you?
Thank you for voting!

Switch sticking in on position

FIRST unplug dryer from electrical source, CAUTION, the top of this dryer does not open with clips, do not pry on top to open! On the front of the dryer look under the lower panel, and find two screws, one on the left side, and one on the right, remove these screws, and pull slightly down on panel to remove. Behind this panel find two screws holding the door panel, one on the left, and one on the right, remove the left, and support the door panel while removing the right side. Gently pull the bottom of door panel outward, and the clips on top of door panel will unhinge from top, carefully rotate left side of door panel to floor, and note the wire connections on switch, and orientation of switch, then unplug wires, and move door panel to a comfortable working positon. Door must be open to remove switch, then depress the two plastic retaining keepers on each side of switch, and push switch through toward door. Replace with new switch, reconnect the wires, and reassymble in reverse order. Remember, door assymbly must be inserted in dryer top at an angle, and then bottom rotated downward, and bottom panel nylon guildes inserted into door panel bottom.
  • Don from Jacksonville, FL
  • Difficulty Level:
    Really Easy
  • Total Repair Time:
    15 - 30 mins
  • Tools:
    Nutdriver
99 of 133 people found this instruction helpful.
Was this instruction helpful to you?
Thank you for voting!
Fixes Symptom less than 1% of time

Rated by 2 customers 


Really Easy 

30 - 60 mins 

Ratings submitted by customers like you who bought this part.   

  No Longer Available
PartSelect Number PS11731344
Manufacturer Part Number W10856845
Fixes Symptom less than 1% of time
★★★★★
★★★★★
1 Review

Rated by 25 customers 


Easy 

30 - 60 mins 

Ratings submitted by customers like you who bought this part.   

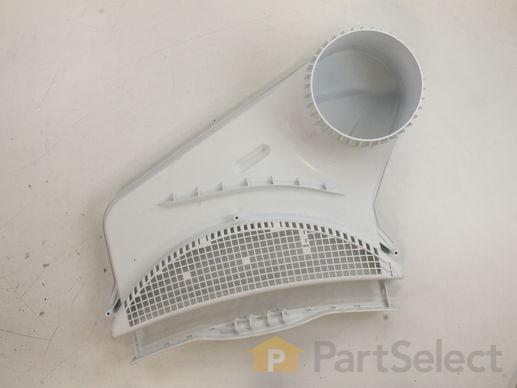
This part includes the upper and lower air duct assembly and lint screen.

  No Longer Available
PartSelect Number PS2039494
Manufacturer Part Number 37001141

Replacing your Amana Dryer Lint Duct Assembly

Replacing your Lint Duct Assembly

Customer Repair Stories

broken plastic vent

I am not mechanical so if I can do it so can. UNPLUG THE DRYER FIRST!There are two bolts on the back of the dryer that connect the control panel and the dryer itself remove these and take out the brackets that are held by these two bolts, I used a socket, lift up and peek in to the front top you will see two screws that hold the other side of the top of the dryer lower the back side and move to the front of the dryer now that the back bolts are removed. Take a large screwdriver and place a dishrag or handkerchief so the flat side is inserted where these screws are located{preventing scratches}pry upward it will seperate the top of the dryer from the front of the dryer move over to the next screw and repeat now the top is loose and can be slid backwards until there is room for you to see down in front of the dryer, notice there are three wires that connect for the light on the right hand side, take the time to write down there color and in what order they are located as you will have to remove these now inside the front panel from the top about a third of the way are two bolts, one on the left and one on the right use the socket to remove these now pull the front panel to you and lift up, the front panel will now come off set aside. remove the three screws that attach the plastic vent from inside the dryer,pull out plastic vent, vacuum out dust and lint install new plastic vent install the three screws from inside the dryer drum and reverse the process you are finished!
  • joe from Beacon Falls, CT
  • Difficulty Level:
    A Bit Difficult
  • Total Repair Time:
    1- 2 hours
  • Tools:
    Screw drivers, Socket set
9 of 11 people found this instruction helpful.
Was this instruction helpful to you?
Thank you for voting!

lint collector plastic holder broken

Un plug the dryer ***
Pulled the top portion of the dryer off
Used socket to undue two nuts to remove the front panel and unhooked the wires.
unscrewed 3 screws and took out the air duct assembly. Cleaned the dryer of all lint and replaced the air duct with a new one.
Reverse the process.
  • Todd from Wappingers Falls, NY
  • Difficulty Level:
    Really Easy
  • Total Repair Time:
    15 - 30 mins
  • Tools:
    Screw drivers, Socket set
27 of 32 people found this instruction helpful.
Was this instruction helpful to you?
Thank you for voting!