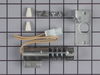
The surface burner plug-in block kit features a newer-style terminal block. This kit is designed for use with ranges and cooktops. This terminal block is how the coil element on your stove connects to...
$13.42
In Stock
Order within the next 11 hrs and your part ships today!
This round style gas oven igniter, or also known as a broil or bake igniter, has an amperage range between 2.5 and 3.0. It glows white hot to ignite the gas for the oven. The igniter does this by attr...
$51.37
In Stock
Order within the next 11 hrs and your part ships today!
This temperature sensor is used with self cleaning ovens. Its 1000 ohm resistance increases with temperature. This sensor has male leads and comes with ceramic wire nuts.
This 10-32-inch hex nut works with multiple appliances in your home as a fastener. This specific model is sold individually. Hex nuts usually have 6 even sides and together they are used with bolts an...
$8.04
In Stock
Order within the next 11 hrs and your part ships today!
Two screws remove the front of the sensor (put a pan under the sensor to catch the screws), One nut removes the rear cover to access the rear of the sensor. Separating the two halves of wiring harness takes a little dexterity. BIG TIP! Tie a string to the back of the sensor wire and pull the sensor out from the front making sure the strin
... Read moreg still shows thru the back. If you don't you have a 15 minute job trying to fish the wires at an angle thru the insulation (a very frustrating task). Untie the string from the old and tie it securely to the new. Pull the string from the back and Voila! your new sensor can be plugged in or wirer nutted to the old connection on the back of the stove. Replace the nut and the two screws and you're done!
After looking on the website for advice I walked throught the simple steps of disassembling the front, removing the drum, removed the back, disconnected the wire harness. Then removed the blower housing in the back. The blower, mounted on the back side of the motor was very tight. I used a pipe wrench wedged in place and help by my 10
... Read moreyear old Grand-daughter while I used an adjustable wrench to turn the shaft on the front of the motor. Spun the blower off, removed the two clips holding the motor. Then reversed the process when I received the new motor. Care should be taken to avoid damaging the blower fan if a lot of pressure is required.
First I removed the oven racks. Then I loosened the two screws in the back of the oven floor and figured out how to remove it. Then I loosened the two screws at the front of the diverter and, with some pushing and pulling and twisting, was able to get that to come out, too. Then I tried lighting the oven and noticed that the igniter wa
... Read mores not glowing. When I saw that the upper (broiler) burner was working fine, I hoped that the problem was the lower igniter itself. I checked the wires and they seemed fine. I saw that two bolts held the igniter onto its bracket, so with a socket wrench (which size I got right on the first guess!) I removed those bolts and the igniter came loose. I found the connecter for the wires when I removed the drawer under the oven and was able to pull it apart easily. The igniter came out completely. There was nothing unusual about it, but I decided to take a chance and order a new one, hoping that replacing it would solve the problem. I put the rest of the oven together and waited. About three days later the part arrived (it was sent on a holiday; FedEx is soooo much better than USPS). I retraced the steps of taking the oven apart, put the two bolts into the new igniter to attach it to the bracket, and went back underneath behind the drawer to connect the wires. Then came the moment of truth: I tried turing on the oven. I held the button down to keep the light off, and after a few seconds I saw it: IT GLOWED!! It worked!! After yelling a satisfying "YEAH!!," I turned it off, put back the drawer, the diverter (more pulling and pushing and twisting), and the oven floor. Now it's all working perfectly and it took a very short time to fix. And a little luck that the problem was with such a simple part.