


Models
>
RU38B*C1
RU38B*C1 General Electric Cooktop - Overview
Sections of the RU38B*C1
[Viewing 1 of 1]
Keep searches simple, eg. "belt" or "pump".

Trim Ring - 8 Inch
PartSelect #: PS244479
Manufacturer #: WB31X5014
This 8 inch high rise burner trim ring is intended for use with detached style low rise tilt lock surface mount burners on ranges.
$11.96
In Stock

INFINITE HEAT SWITCH KIT
PartSelect #: PS16216966
Manufacturer #: WB21X36771
The infinite switch controls the stove top surface burner. This switch will work with most of the electrical range models with coil burner elements.
$51.36
In Stock

Drip Bowl - 6"
PartSelect #: PS244466
Manufacturer #: WB31X5010
This six inch chrome drip bowl is intended for use with looped terminal style surface mount burner element units.
$14.77
In Stock

Drip Bowl - 8 Inch
PartSelect #: PS244470
Manufacturer #: WB31X5011
Sold individually.
$17.90
In Stock

8 Inch Surface Burner Element
PartSelect #: PS244001
Manufacturer #: WB30X219
This part fits most ranges where a ceramic terminal block is used.
$71.31
In Stock

Terminal Block Assembly
PartSelect #: PS232617
Manufacturer #: WB17X5051
This ceramic terminal block kit includes one ceramic block and terminal assembly with mounting bracket. Terminal blocks generally provide an easy solution for connecting individual wires.
No Longer Available


Center Piece - 8 Inch Burner
PartSelect #: PS244823
Manufacturer #: WB32X51
This part it is used to cover the center of the coil burner. Sold
individually.
No Longer Available

Hi-Rise Surface Burner Kit - 8" - 2750W
PartSelect #: PS244044
Manufacturer #: WB30X346
No Longer Available

Questions And Answers for RU38B*C1
We're sorry, but our Q&A experts are temporarily unavailable.
Please check back later if you still haven't found the answer you need.
Common Symptoms of the RU38B*C1
[Viewing 1 of 1]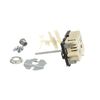


Keep searches simple. Use keywords, e.g. "leaking", "pump", "broken" or "fit".
Large burner would operate on high setting only.
1. Removed the back panel.
2. Disconnected the wires from the old switch while connecting wires to the new switch one at a time.
3. Installed the new switch and broke off the excess metal on the post which fits into the burner knob on front of the range.
4. Replaced the burner knob and replaced the back panel.
2. Disconnected the wires from the old switch while connecting wires to the new switch one at a time.
3. Installed the new switch and broke off the excess metal on the post which fits into the burner knob on front of the range.
4. Replaced the burner knob and replaced the back panel.
Parts Used:
-
Ernest from Bellevue, NE
-
Difficulty Level:Really Easy
-
Total Repair Time:15 - 30 mins
-
Tools:Pliers, Socket set
21 of 25 people
found this instruction helpful.
Was this instruction helpful to you?
Thank you for voting!
Two burners kept cuttin out.
On Friday, the day after Thanksgiving, I placed an order for two replacement burners, four new pans, and two receptacle ASM's for my 30+ year old GE stove. I didn't know the exact model number, but because of your very informative website, I was able to look at the parts and find what I needed.
Much to my amazement, the parts ... Read more arrived the next day (24 hours after ordering!). I didn't pay for overnight or weekend delivery. You quickly fulfilled the order and shipped it the same day. It really was a great surprise to see the parts so quickly.
To top it off, the installation was so simple that my 3 and 5 year olds helped out (after disconnecting the power first!) the installation was so straight forward, that my 5 year old unscrewed the nut that held the receptacle in place while the 3 year old unwrapped the new pans. All I needed was a Phillips head screw driver and a open ended wrench to complete the job. I replaced all the parts and had a stove that looked brand new (and worked) within 10 minutes.
After 5 years of fighting a stove the intermittently worked, worrying about where to get parts, and wondering if I needed to purchase a new stove, it is all over. My wife is happy, I am happy, and my kids are happy that they had a fun Saturday project to help dad with. If I only knew about PartSelect 5 years ago, we would have been cooking worry free, knowing the stove is actually heating up.
The procedure was simple! Here is what I did:
1.) disconnected the power by lifting up the lever under the stove that held the power cable.
2.) Removed the burners by simply pulling them out of the socket, and removed the drip pans.
3.) used a wrench set to remove the screw holding the ceramic terminal block in place
4.) removed the wires from the back of the terminal block with a Phillips head screw driver. On one of the burners, the terminal block assembly was so damaged, I used the pliers to break the ceramic and then held onto the receiving terminal to loosen the screw.
5.) connected the new terminal block. I made sure by simply screwing on the wires. I made sure I clipped in the new plastic covering that protected the screws.
6.) re-attached the terminal assembly block to the stove top. BE CAREFUL so as to not over-tighten, you can strip the screw
7.) installed the new drip pans.
8.) re-connected the power by simply plugging in the main power and re-camping the quick-disconnect.
9.) Checked the stove to make sure everything worked.
10.) Cooked dinner!
Read less
Parts Used:
-
Robert from Chesterfield, MO
-
Difficulty Level:Easy
-
Total Repair Time:Less than 15 mins
-
Tools:Pliers, Screw drivers, Wrench set
13 of 18 people
found this instruction helpful.
Was this instruction helpful to you?
Thank you for voting!
Swicth Stem Broken
Disconnect power. . . Remove control panel, pull wire connectors,[note location] remove old switch, install new, install wires, snip stem to length, set knob . . . Turn on power - works. [Note this is a live part even when not connected]
Parts Used:
-
FRANK from COPAKE, NY
-
Difficulty Level:Easy
-
Total Repair Time:30 - 60 mins
-
Tools:Screw drivers
8 of 12 people
found this instruction helpful.
Was this instruction helpful to you?
Thank you for voting!