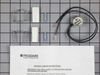
This OEM 40 watt appliance light bulb is used for some ranges, refrigerators, freezers, and microwaves. Simply locate the existing bulb, unscrew it from its socket, and replace with new light bulb. If...
$19.73
In Stock
Order within the next 4 hrs and your part ships today!
This limiter thermostat cuts out when the temperature inside your refrigerator reaches 55 degrees Fahrenheit and kicks back in when the internal temperature drops to 20 degrees Fahrenheit. If you disc...
$22.68
In Stock
Order within the next 4 hrs and your part ships today!
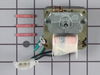
The evaporator fan motor kit is specifically made for your refrigerator to run the evaporator fan in your refrigerator. It is mounted on the center hub and has three lead wire terminals; its shaft has...
$101.85
In Stock
Order within the next 4 hrs and your part ships today!
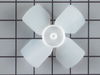
This evaporator fan blade is a genuine OEM part that is sourced directly from the manufacturer. The evaporator fan blade circulates air through the refrigerator to control the amount of cold air goes ...
$47.83
In Stock
Order within the next 4 hrs and your part ships today!
This defrost timer is designed for use in your refrigerator. The defrost timer acts as a clock, that switches the refrigerator from the freezing cycle to the defrost cycle and back. If your refrigerat...
$32.54
In Stock
Order within the next 4 hrs and your part ships today!
The ice cube tray is made of plastic, is white in color, and is sold individually. This is a part for your freezer. The ice cube tray is sturdy but flexible to allow you to easily release the ice once...
$7.75
In Stock
Order within the next 4 hrs and your part ships today!
1. Removed the 7 nuts using the nut driver from the freezer back panel inside the freezer. 2. Remove the back panel. The evaporator motor and fan are located above the coils. 3. Unplug the wiring harness. 4. Remove the two gold mounting screws holding the motor and fan in place. 5. Remove the motor and fan including th
... Read moree brackets. 6. Install the new motor and fan onto the mounting bracket. 6a. Attach the green ground to the mounting bracket. 7. Screw the two gold screws back into the freezer. 8. Attach the new wiring harness. Note, the old harness had a mounting hole/space for it to connect to the wiring harness of the freezer. The new motor's harness was not long enough for this, so it is connected freely to the freezer harness. 9. Use the hair dryer to melt any ice that may have formed on the coils and hole where the fan goes. 10. Turn the freezer on to see if the fan turns on. 11. Reinstall the back panel. All done!
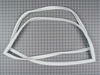
I pulled off the old door gasket which came off really easy. I was hoping the new one would go on as easy as just popping it in place but it didnt work. I had to remove the inside door panel. The gasket wouldnt lay entirely flat in the inside groove so I used a bead of RTV around the entire circumference which helped to hold it in place w
... Read morehile reattaching the panel back onto the door. The screws fit on the under side of the magnetic portion of the gasket. In order to access the screw holes the gasket has to be lifted which sometimes causes the gasket to pull from the lip on the back side of the panel making the RTV get everywhere. After every screw was in place and lightly tightened the panel had to be adjusted to allow for the proper closing of the door. This was the worst part, fortunatly the screws left a slight indentation of where they were before I removed them so it gave me a nice reference. The hinge part of the new gasket requires a lubricant so it wont bind up when the door is closed. I didnt know about this until my order arrived and a part number was recommended for the type of lube. I just used Vasolene and it works fine. The pin bearing was really easy. Just unload the contents from the door, mine was the freezer door. I popped off the cap covering the screws and removed the screws while holding the door so it wouldnt drop on the floor. Once off I used a flat head screwdriver to pry out the old one and a light tap of a hammer to replace it with the new. I put it all together the way it came off. Now my fridge runs much less and the freezer door doesnt sag.
The fan motor all but caught the inside of the freezer on fire . Had to remove then clean, and I mean clean the walls of the freezer . Then had to pry out the old fan without breaking anything . Replacement of new fan was quick and easy because all the parts that I needed were in the bag