


Models
>
RS27D011
RS27D011 Refrigerator - Overview
Models starting with RS27D011
Click on the best match to narrow your results.
Keep searches simple, eg. "belt" or "pump".

Refrigerator Door Switch
PartSelect #: PS12728638
Manufacturer #: W11384469
Door switch turns the light off when you close the door.
$38.48
In Stock

Ice Dispenser Solenoid and Door Kit
PartSelect #: PS2003478
Manufacturer #: 12001991
In addition to the solenoid (115V), this kit also comes with a door strike and an ice door assembly. Please be advised the spring and roll pin are not included with this kit.
$158.73
In Stock

Door Switch
PartSelect #: PS12731166
Manufacturer #: W11396033
This light switch may also be known as a refrigerator door switch or a light switch kit, and is compatible with your refrigerator. The function of the refrigerator door switch is to turn on the light ...
$27.65
In Stock

Screw
PartSelect #: PS12349731
Manufacturer #: W11233072
This is a multi-use and multi-appliance screw. It can be used on a microwave, refrigerator, range/oven, air conditioner, dehumidifier, washer, or dryer. The measurements of this screw are 8 x 1/2 inch...
$20.79
In Stock

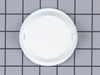
Ice Door Assembly
PartSelect #: PS11743244
Manufacturer #: WP61005883
This ice door assembly is a little over three inches in diameter. It is all white in color and it is made entirely of plastic.
$17.69
In Stock

Lower Hinge Pin
PartSelect #: PS2058840
Manufacturer #: 61003174
This lower hinge pin is almost two inches long. It is made entirely of plastic and it is all black in color.
No Longer Available

Water Fill Cup and Bearing
PartSelect #: PS11743318
Manufacturer #: WP628356
This refrigerator ice maker fill cup dispenses the water into the ice cube mold during the fill cycle. Replacing the water fill cup is a possible solution if you notice that the ice maker is leaking, ...
$40.40
In Stock

Limit Switch - 2 Terminal
PartSelect #: PS2060868
Manufacturer #: 61005520
This limit switch is located in the ice/water dispenser section. The switch pictured here is black, though this type of switch is also available in white.
No Longer Available

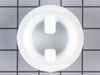
Actuator Pad
PartSelect #: PS2059931
Manufacturer #: 61004441
Once a glass is pressed against the actuator pad it will cause the dispenser to deliver ice or water.
No Longer Available

Natural Door Closer
PartSelect #: PS2059251
Manufacturer #: 61003647
This part is the replacement natural door closer for your refrigerator. It is black in color and is approximately 3 inches by 2 inches in size. The natural door closer allows your refrigerator door to...
$18.09
In Stock


ARM-SHUT
PartSelect #: PS12712096
Manufacturer #: W11342242
This ice level arm, also known as an ice shutoff arm, is designed to detect the level of ice within the ice bin of your ice maker or refrigerator and turn it off when enough ice has been made. When th...
$46.15
In Stock
Common Symptoms of models starting with RS27D011
[Viewing 13 of 13]Light not working
Fixed by
these parts
these parts


Show All
Leaking
Fixed by
these parts
these parts


Show All
Not dispensing water
Fixed by
these parts
these parts


Show All
Ice maker not making ice
Fixed by
these parts
these parts

Show All
Door won’t open or close
Fixed by
these parts
these parts


Show All
Ice maker won’t dispense ice
Fixed by
these parts
these parts
Show All
Ice maker dispenses too much ice
Fixed by
these parts
these parts
Show All
Noisy
Fixed by
these parts
these parts

Show All
Fridge too warm
Fixed by
these parts
these parts

Show All
Door Sweating
Fixed by
these parts
these parts
Show All
Fridge too cold
Fixed by
these parts
these parts

Show All
Freezer not defrosting
Fixed by
these parts
these parts
Show All
Freezer section too warm
Fixed by
these parts
these parts
Show All


Keep searches simple. Use keywords, e.g. "leaking", "pump", "broken" or "fit".
Ice Dispenser "round chute" broken side tab, ice/water fountain not working
I could see that a tab was broken from the round chute that opens for ice dispensing and closes to seal off freezer ice chute when not in use. With the tab broken, the round door would not shut to seal the freezer chute and dispensing water would spatter everywhere. I looked for just the round door part, but is only sold in the "Ice disp
... Read more
enser solenoid and door kit" I only had to use the round chute/flap from the kit. The instructions were easy to follow and I had the fridge back working in about 10 minutes. It took me longer to find the right star headed screwdriver that I needed to remove the Maytag star screws (5) total. Because I didn't have to replace the solenoid or the spring mechanism, this was especially easy, and now I have those parts on hand if one day I need them!!
Read less
Parts Used:
-
Scott from Walker, LA
-
Difficulty Level:Really Easy
-
Total Repair Time:Less than 15 mins
119 of 129 people
found this instruction helpful.
Was this instruction helpful to you?
Thank you for voting!
The Bearing Cup Assembly was broken and ice would jamb against it during the ice making cycle.
I removed the ice maker from the refrigerator, by removing one screw on the underside bracket and loosening the two screws at the top side, then lifting the ice maker off the loosened screws. I then unplugged the electrical harness that supplies power from the refrigerator to the ice maker. I then disassembled the ice maker by removing
... Read more
the front cover which is snapped in place, then removing two recessed screws at the front. I removed the broken part, I then reassembled the ice maker with the new part. I replaced the two recessed screws at the front and snapped on the cover. Then I reinstalled the ice maker in the refrigator by plugging in the harness, slipping the ice maker over the loosened screws in the refrigerator and replacing the screw that was removed from the underside bracket. Tightening all the screws completed the project.
Read less
Parts Used:

-
David from Chester, CA
-
Difficulty Level:Really Easy
-
Total Repair Time:Less than 15 mins
-
Tools:Nutdriver, Screw drivers
107 of 133 people
found this instruction helpful.
Was this instruction helpful to you?
Thank you for voting!
Ice maker and water dispenser would stick on. Would have to oprn door to stop flow of water or ice
I replaced the actuator switch and rubber pad with the switch actuator.
I had attempted to repair previously without replacing the pad but the problem continued. I put up with the problem for a long time waiting for the opportunity to get to the appliance parts store but their hours are hard to deal with and work myself. I was able ... Read more to find the part easily with the on-line catalog and parts diagram and ordering was no hassle at all. Shipping was extremely fast.
I remove the front panel by removing the drip tray and the 2 screws at the bottom. Then gently lift up on the front cover assembly (careful with the connector to the circuit board at the top) it slides over 2 screw heads at the top. Remove all the screws that secure the dispenser to the fridge, one screw is hidden on the right side (as you face the front. Work the dispenser out and careful of the water tube coming from the top - it stays in place. The wire connector must be unplugged from the left side in order to remove the assembly and not actuate the dispenser while working (a good idea to unplug the fridge). A small phillips screw holds the switch in place and the actuator fits over with the slots fitting over lugs on the assembly. Reinstall as you removed - be careful to be sure all wires go back into the proper location and "tracks" to keep them out of the way and avoid pinching (if the actuator will not go back flush in its location check the wires to the switch).
Plug all wires bach in and don't forget the harness to the top of the circuit board on the front panel.
Plug back in and check your work.
Important to replace the actuator pad - its "elasticity" is the return mechanism for the switch actuator. Probably the issue I had after replacing the switch and still suffering the same problem.
Good Luck!
Read less
Parts Used:


-
David from Springdale, OH
-
Difficulty Level:Easy
-
Total Repair Time:15 - 30 mins
-
Tools:Screw drivers
90 of 98 people
found this instruction helpful.
Was this instruction helpful to you?
Thank you for voting!