


Models
>
RGB530BEA2AD
RGB530BEA2AD Hotpoint Range - Overview
Sections of the RGB530BEA2AD
[Viewing 4 of 4]


Keep searches simple, eg. "belt" or "pump".

Door Handle End Cap
PartSelect #: PS256613
Manufacturer #: WB7X7183
This oven door handle end cap is used on both the left and right hand sides. Sold individually.
$27.09
In Stock

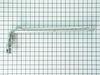
Oven Rack
PartSelect #: PS6447646
Manufacturer #: WB48T10095
The oven rack is sold individually. It is chrome in color and measures approximately 24 inches wide by 17-1/2 inches deep. The rack is used to hold cookware in the oven and slides back and forth for e...
$67.42
In Stock

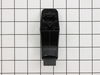
Door Bumper - Black
PartSelect #: PS241365
Manufacturer #: WB2K15
Sold individually.
$13.92
In Stock

Light Bulb - 40W
PartSelect #: PS217532
Manufacturer #: 40A15
This 40-Watt light bulb is sold individually and is a genuine OEM replacement option for your home appliances. It is specially designed to withstand extreme temperatures, so this bulb is compatible wi...
$11.02
In Stock

Surface Burner Spark Electrode
PartSelect #: PS231276
Manufacturer #: WB13K18
This part helps your burner ignite and produce flame.
$41.95
In Stock

Oven Thermostat
PartSelect #: PS235170
Manufacturer #: WB20K8
This part establishes and maintains the internal temperature of the oven cavity.
$228.39
On Order

Ignitor Mounting Screw
PartSelect #: PS234519
Manufacturer #: WB1X1293
Sold Individually.
$9.64
In Stock

Door Handle
PartSelect #: PS231857
Manufacturer #: WB15K5076
This is the replacement door handle for your range. It is made of black plastic and measures approximately 22 inches by 1 inch. The door handle connects to the range door and allows you to open and cl...
$48.96
In Stock

RECEPTACLE PUSH-IN
PartSelect #: PS752188
Manufacturer #: WB08T10026
This part is the replacement light socket for your oven. The oven light socket provides power to the light, and at the same time holds the light bulb in place.
$8.54
In Stock


Screw
PartSelect #: PS283515
Manufacturer #: WR01X10065
Size: 10-32 GXTT FLP .595
Sold individually.
$8.06
In Stock

Burner Spark Module - 120V 60Hz
PartSelect #: PS231281
Manufacturer #: WB13K25
This part sends enough current to the igniter to create a spark to the bottom of the burner cap.
No Longer Available
Questions And Answers for RGB530BEA2AD
We're sorry, but our Q&A experts are temporarily unavailable.
Please check back later if you still haven't found the answer you need.
Common Symptoms of the RGB530BEA2AD
[Viewing 6 of 6]Will Not Start
Fixed by
these parts
these parts


Show All
Gas igniter glows, but will not light
Fixed by
these parts
these parts

Show All
Oven is too hot
Fixed by
these parts
these parts
Show All
Little to no heat when baking
Fixed by
these parts
these parts

Show All
Door won’t close
Fixed by
these parts
these parts
Show All
Oven not heating evenly
Fixed by
these parts
these parts

Show All


Keep searches simple. Use keywords, e.g. "leaking", "pump", "broken" or "fit".
The oven stayed on after the switch was turned off
Check the switch with an ohm meter, 0 resistance in the closed position = a bad switch. I went to the web site found the part. ordered it next day it shows up. Removed the pot grids and all control knobs for the burners and oven lifted the top of the stove up, and off. I removed face plate behind the control knobs 3 screws, I removed the
... Read more
2 screws holding the oven switch. opened the oven and un cliped the thermostat wire from the back wall. Uncoiled new wire feed under the burner shield to the back of the unit and back down the old hole cliped in the new wire. put the 2 screws into the new switch and re-assembled the rest in the reverse order i took it off . all this while watching my 11 month old grandaughter.
Read less
Parts Used:
-
robin from Merrill, WI
-
Difficulty Level:Easy
-
Total Repair Time:30 - 60 mins
-
Tools:Nutdriver, Screw drivers
93 of 114 people
found this instruction helpful.
Was this instruction helpful to you?
Thank you for voting!
Top four burners on oven would not light without using match
Really simple..Opened the top of the oven and followed the four wires hooked to the igniters on the burners to the back of the oven. Unscrewed top section in back of oven. Found spark module screwed to uppper back of oven on right side. Used a nutdriver to take a few screws out of upper back of oven. Unscrewed spark module from oven. Ther
... Read more
e are six wires - four to the burners and two to the power supply....Wires are attached by connectors so didn't have to do anything but pull the connectors off the old spark module one at a time and push them onto the new spark module matching postion of each wire. Screwed spark module back onto back of oven. Screwed back section of oven back onto rear of oven, and that was it. Works perfectly. Saved more than $100 for service call and whatever elevated price they'd charge me for the spark module.
Read less
Parts Used:
-
David from Logansport, IN
-
Difficulty Level:Really Easy
-
Total Repair Time:15 - 30 mins
-
Tools:Nutdriver
62 of 77 people
found this instruction helpful.
Was this instruction helpful to you?
Thank you for voting!
The end caps broke on my oven door handle.
1st I opened the oven door and removed the 2 screws that hold the outside and inside of the door together. With the door separated I removed the 2 screws that hold the end caps in place, then removed the old end caps. I put the new end caps on the oven door handle, aligned the holes for the end cap screws and reinstalled the screws,then
... Read more
reinstalled the oven door screws,closed the oven door and started cooking.
Read less
Parts Used:
-
Harry from Thomasville, GA
-
Difficulty Level:Easy
-
Total Repair Time:15 - 30 mins
-
Tools:Screw drivers
45 of 46 people
found this instruction helpful.
Was this instruction helpful to you?
Thank you for voting!