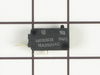
The secondary door switch is a simple on/off mechanism that stops the microwave from operating when the door is open (normally opened). The switch monitors the door latch position, and communicates w...
$45.34
In Stock
Order within the next 4 hrs and your part ships today!
Noted on partselect.com that someone else with this problem, found it to be secondary door switch. There are three door switches in this model, but online info noted that one of the three might feel "soft" (in my case, one switch clicked in a rather "jiggly" way, the other two were strong decisive clicks.) To access the door switches on
... Read more this model was the only difficult part. First use a torx bit to remove the two torx screws below the latches inside the microwave. This frees the latching part inside, that holds the door switches, which you will remove after you take off the control panel. The top grill has to come off before you can remove the door panel. Remove the screws above the grill, on the microwave top cover, The grill on this model is covered with a panel that moves out when it vents. After removing the two top screws, the covered grill vent slides left to remove. Be careful, as the sliding tabs are plastic. Wiggle and jiggle it, to slip it off. Below the removed grill, is a small metal grill with one screw in lower center. Remove that screw, and wiggle that out. You'll then see the one screw that holds on the control panel. Remove this screw, and lift the control panel up to remove. Again, go slowly and gently, as the bottom tabs holding the control panel in, are also plastic and easily broken. Lay the control panel on something, (I used the coffee maker) and pull out the wire bundles tucked on the left, that are attached to the latching panel. Wiggle the latching panel gently to lift it up off of it's plastic tabs and pull it out towards you, so you can see the three door switches. Each switch (part number WB24X829) has a little black switch on it. Feel each switch with either your finger, or a screwdriver to see which one doesn't "click" strongly. The weak one is the one you will replace. The door switches are fitted into a tab, and plugged into their wires. Remove the defective switch, pull out the wires, and replace it with the new switch, plugging back the wires, and slipping it back into it's plastic tabs. Then put everything back together in reverse order. The entire job took me fifteen minutes EXCEPT for figuring out how to slide off the upper grill, which I have told you. A repairman would have cost $150, the part was $18. AND, there's a good chance, the other two switches will get "used up" in the next year or so as well, so I'll be ready next time. Thank you, Partselect, why work all day, to make money, only to give it to somebody else, for fifteen minutes of work. All I needed was the knowledge.
To get to the switches you need to remove the metal cover/housing of the microwave, by first removing several screws that hold it in place, and then sliding the cover towards the back of the unit. You'll find the switches in some plastic holders above the door-open button, and it's its easy to see how the mechanism engages/disengages the
... Read moreswitches when the door is opened and closed.
If it is not obvious which switch is bad, in our case the bad switch felt "soft" when we pressed the switch button with our fingers. A good switch has a firm "click" when pressed.
The switches are easy to replace - pop out the old switch (no tools required) and pull off the electrical connectors. Then pop in the new switch and reattach the connectors.
A great place to start is to reveiw the posting from "Marla From Arlington TX" posted on 8-3-09. It provides an excellent description of the process that you will need to follow. The only additional thing that I would add is to check the contacts on the switches. In my case I found that all three of the switches had a small build-up of
... Read more corrosion. I used sandpaper to clean the contacts. Because none of the switches had a "soft" click to them, it was hard to identify the bad one. I basically picked the worse looking one and then cleaned the contacts of the other two. I'm not sure if I actually even had a bad switch or if they all just needed cleaning. Whatever the case, it worked. I would suggest checking the contacts first. You may get away with not having to replace any of the switches. And in my case what makes me think that it may have just simply been dirty contacts is that the heating mechanism would engage every now and then. It wasn't dead 100 percent of the time. It's worth a try anyway.