Models > PSS26MSWASS > Symptoms > Leaking

Parts That Fix General Electric Refrigerator PSS26MSWASS Leaking

Leaking is a commonly reported symptom for the PSS26MSWASS General Electric Refrigerator, and we have put together a full guide on how to fix this. This advice is based on feedback from people who own this exact appliance. We have listed the most common parts for your PSS26MSWASS General Electric Refrigerator that will fix Leaking. We have included repair instructions, and helpful step-by-step video tutorials. If you are experiencing this issue, not to worry, DIYers just like you have fixed this, and shared their experience to help you!

Fixes Symptom 33% of time
★★★★★
★★★★★
10 Reviews

Rated by 30 customers 


Easy 

30 - 60 mins 

Ratings submitted by customers like you who bought this part.   

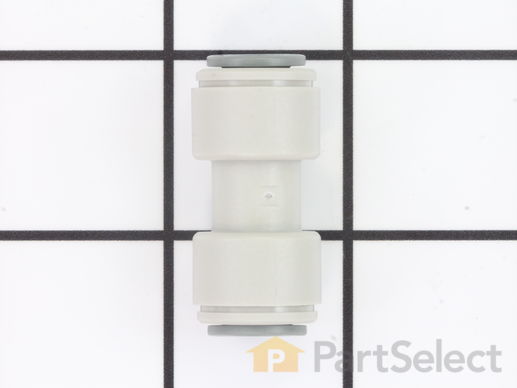
Quick connector for plastic water line - 5/16" to 5/16"

$ 9.03
  In Stock
PartSelect Number PS758446
Manufacturer Part Number WR02X11330

Replacing your General Electric Refrigerator Union Connector - 5/16 Inch to 5/16 Inch

Replacing your Union Connector - 5/16 Inch to 5/16 Inch

Customer Repair Stories

Moving the refrigerator into my new (very old) house we had to remove the doors which resulted in a crimped hose and union

Remove lower front panel, disconnect damaged union from water hose under freezer door, replace with new union, tighten and reattach front panel. No more water coming from under the unit. Ice maker and dispenser features returned to working order!
  • Laura from Manchester, NH
  • Difficulty Level:
    Really Easy
  • Total Repair Time:
    15 - 30 mins
  • Tools:
    Screw drivers
16 of 28 people found this instruction helpful.
Was this instruction helpful to you?
Thank you for voting!

My 13 yr grandson assisted me on this

We couldn't get the other connector loose from one end of the tubing so he said just cut it and so we did and attached the connector. I now have water again in my fridge and took the sticky note down "don't use the water" as it had leaked for a year...... Thanks!
  • Sherry from Auburn Hills, MI
  • Difficulty Level:
    Really Easy
  • Total Repair Time:
    Less than 15 mins
15 of 17 people found this instruction helpful.
Was this instruction helpful to you?
Thank you for voting!
Fixes Symptom 25% of time
★★★★★
★★★★★
45 Reviews

Rated by 21 customers 


Easy 

30 - 60 mins 

Ratings submitted by customers like you who bought this part.   

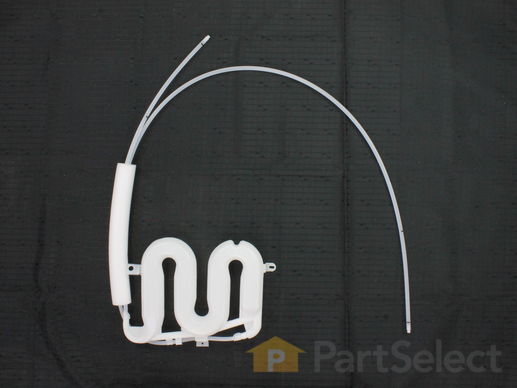
This tank stores water until the water actuator is activated and water is requested.

$ 45.87
  In Stock
PartSelect Number PS783769
Manufacturer Part Number WR17X11440

Replacing your General Electric Refrigerator Water Tank Assembly

Replacing your Water Tank Assembly

Customer Repair Stories

Cold water reservoir tank was cracked and spraying the interior of the fridge

Symptom was water running out of bottom of fridge. Found water pooled up under bottom drawer. Removed (3) drawers and found water was "spraying" from the reservoir tank at back of fridge. Unboxed the new "tank" and confirmed it was the right one by holding it up to the one still in the fridge. Pulled fridge from the wall; removed the rear bottom cover panel on the back using the nutdriver. Removed the solenoid assy by taking that single hex screw out. Push down on the blue circular flange where tube supply enters solenoid, and release the tubing from the solenoid. Remove front bottom cover with phillips screwdriver. Located 2nd tubing connector below freezer (under the unit) and used the same procedure to release that tube from the coupling. Removed screws from tank on inside of fridge, after removing several shelves that were in front of it. Pulled the tubing from the old unit up and out. Discard. Got new unit and fed tubes through the hole the others came out of (back right corner of fridge) MAKE SURE THE NEW TUBES HAVE THEIR "stoppers" IN PLACE. You don't want to contaminate the new tubes with insulation or other debris. Make sure the "o" ring that seals the tubes on the inside of the fridge (supplied with new unit)and the styrofoam insulation stays in place to keep air from leaking through the holes the tubes go through. Installation of the (2) tubes is simple, simply push them into the connector on the solenoid, and the coupler under the freezer. You'll need to feed the longer tube from the back to the front left corner where this coupler is. After making the connection, I bolted the solenoid unit back to the fridge (only 1 screw) and then tested the unit to see there were no leaks before I buttoned everything up. NO LEAKS!! Put the front bottom grill back on with the (2) phillips screws, and the back bottom cover back on with the hex screws removed near the beginning. Probably took longer to write this than it did to make the repair.
  • Thomas from Waynesboro, VA
  • Difficulty Level:
    Easy
  • Total Repair Time:
    15 - 30 mins
  • Tools:
    Nutdriver, Screw drivers
41 of 49 people found this instruction helpful.
Was this instruction helpful to you?
Thank you for voting!

Small leak on water tank behind vegetable crisper

1. Turn-off water
2. Removed drawers and bottom three shelfs
3. Remove screw inside refrige that is holding the water tank in place
4. Remove bottom front grate on fridge (2 screws) and disconnect water line from quick disconnect (residual water will run out of line)
5. Remove bottom cover on back of fridge
6. Disconnect water line from quick disconnect on bottom left side when looking from the back of the fridge (residual water will run out of line)
7. Remove water tank from inside of fridge
8. Install new water tank - install screw that hold water tank in position
9. Route lines through hole and to the two locations you removed the old ones
10. Install both lines by pushing them all the way in the quick disconnects. Pull on them to make sure they are secure.
11. Turn on water and look for leaks
12. Reinstall bottom front grate (2 screws)
13. Reinstall back cover (5 or 6 screws)
14. Install shelfs and drawers inside fridge
  • Matt from RPV, CA
  • Difficulty Level:
    Easy
  • Total Repair Time:
    30 - 60 mins
  • Tools:
    Screw drivers
115 of 130 people found this instruction helpful.
Was this instruction helpful to you?
Thank you for voting!
Fixes Symptom 18% of time

Rated by 16 customers 


Easy 

30 - 60 mins 

Ratings submitted by customers like you who bought this part.   

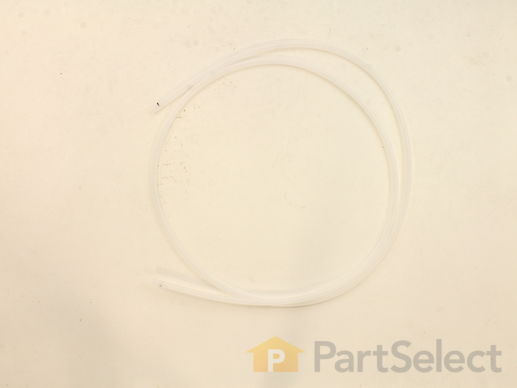
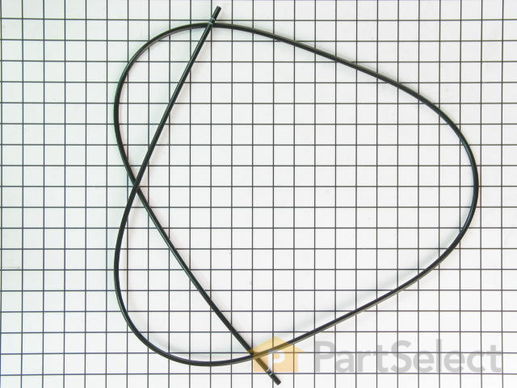
This part is the replacement water line for your refrigerator. It is a long plastic tube, which is 5/16 of an inch in diameter. If your refrigerator is leaking, or will not dispense water or ice, you may have a damaged water line. When you replace the water line, you may want to pick up a new water tube union as well. You can use a utility knife to cut the old water line where it is damaged, and use the union to attach the new water line to the old one. This tubing is sold individually and is an OEM part.

$ 24.89
  In Stock
PartSelect Number PS292878
Manufacturer Part Number WR17X2891

Replacing your General Electric Refrigerator Plastic Tubing - 5/16 Inch

Replacing your Plastic Tubing - 5/16 Inch
Fixes Symptom 6% of time
★★★★★
★★★★★
5 Reviews

Rated by 9 customers 


Really Easy 

15 - 30 mins 

Ratings submitted by customers like you who bought this part.   

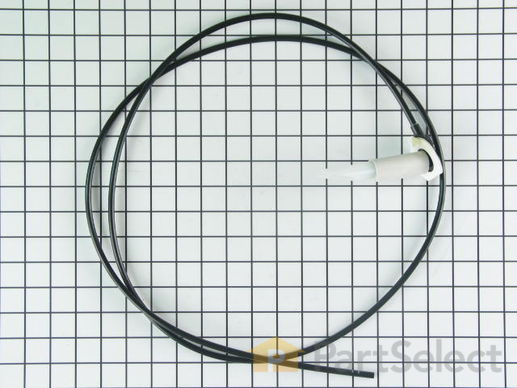
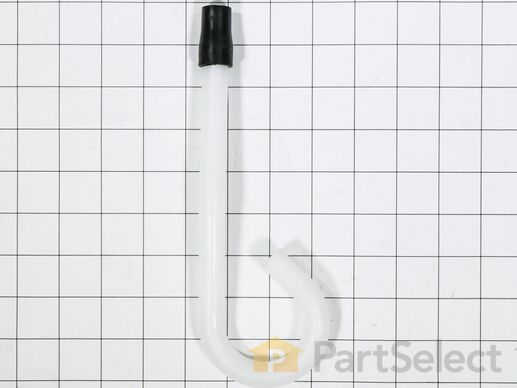
This is a replacement fill tube and grommet assembly for your refrigerator. This part acts your water line to your ice maker. If you’re noticing water in the back of the refrigerator or any kind of leak, or if your ice bucket isn’t filling up with as much ice, you may need to change out the fill tube and grommet assembly. When you purchase this part, you get the water line, as well as the fill tube and grommet. This is an OEM part sourced directly from the manufacturer.

$ 25.04
  In Stock
PartSelect Number PS292253
Manufacturer Part Number WR17X11168

Customer Repair Stories

water leaking from grommet tube assembly at back of fridge

After thawing out freezer pushed water supply tube out from inside freezer diconneted the supply line from the valve assembly by pushing in the bushing with my finger and inserting the new line. Sadly that wasn't the problem!For anyone with the same symptoms of ice building up on your ice maker, to the point where it clogged the water supply line and started leaking from the grommet assembly. The problem is the valve not closing when the ice maker does not need any water. so I ordered a new valve and hopefully that will fix my problem.
  • Carlos from Whittier, CA
  • Difficulty Level:
    Really Easy
  • Total Repair Time:
    Less than 15 mins
  • Tools:
    Nutdriver
22 of 30 people found this instruction helpful.
Was this instruction helpful to you?
Thank you for voting!

Tube feeding ice maker leaking.

Moved refrigerator out from wall. On the back of the refrigerator at the bottom there is a metal plate. Removed this plate with a socket wrench to expose where the end of the tube pluged in. The grommet securing the tube, white on my unit, had to be pushed up to release the old tube. I pushed the new tube into where the old one was and it self secured the tube. The other end of the grommet I pushed through the hole feeding the ice maker,first pushing out the broked part with a screwdriver,and securing that end with the attached sticky tape already attached to the grommet. I cleaned the area around the hole with alcohol before attaching the grommet.Replaced metal plate and done. No leaks.
  • Richard from The Villages, FL
  • Difficulty Level:
    Easy
  • Total Repair Time:
    30 - 60 mins
  • Tools:
    Screw drivers, Socket set
23 of 31 people found this instruction helpful.
Was this instruction helpful to you?
Thank you for voting!
Fixes Symptom 5% of time
★★★★★
★★★★★
87 Reviews

Rated by 72 customers 


Easy 

30 - 60 mins 

Ratings submitted by customers like you who bought this part.   

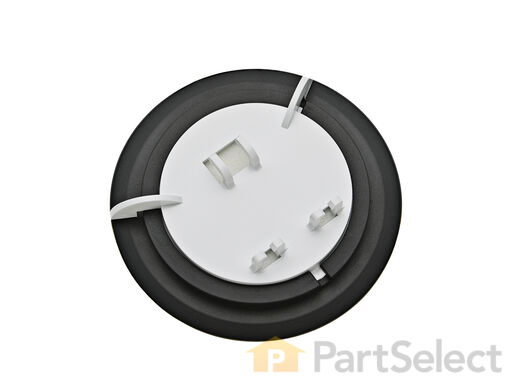
This “Dispenser Door Assembly” (Door Recess Assembly, Ice Door Assembly, Dispenser Door, Refrigerator Dispenser Ice Chute Door Kit, Dispenser Door Flap, Ice Chute Door, Flapper) keeps the room air from infiltrating the freezer. Once the lever is pressed, the door flap opens and allows the ice to dispense into your container. If your door flapper is broken, it could allow outside air to enter the freezer and alter the inside temperature. You may notice frost buildup surrounding the dispenser area. The door flap can disconnect from the dispenser lever, or the tabs that hold it in place may break. Frequent use may distort the sealing face and cause air leaks and frost buildup. This part mounts in the ice dispenser, and measures approximately 3.25 inches in diameter. It is constructed of plastic and rubber, and comes in white/black. This part is sold individually.

$ 15.58
  In Stock
PartSelect Number PS964304
Manufacturer Part Number WR17X11653

Replacing your General Electric Refrigerator Dispenser Door Assembly or Flapper

Replacing your Dispenser Door Assembly or Flapper

Customer Repair Stories

Flapper not sealing. Frost buildup on inside of freezer door

Followed previous instructions from a previous post. Inserted small screwdriver in the 2 outer holes up under the face plate to remove it then removed 4 screws holding the inner assembly which allowed access to the flapper assembly. Replaced it and reassembled everything. Problem solved
  • D from ZELLWOOD, FL
  • Difficulty Level:
    Easy
  • Total Repair Time:
    15 - 30 mins
  • Tools:
    Screw drivers
15 of 16 people found this instruction helpful.
Was this instruction helpful to you?
Thank you for voting!

This seems to be a design problem because I have to replace this part about every other year since we bought it. I tried to talk to GE but all they want to do is send a service man out to replace the part for about 100.00, But I do it for around 15.00. I just think they should find out why the rubbe

The repair is easy, just pop the grill off around the ice and water door, then there are 4 screwws to take out so the touch pad can be moved out of the way to unsnap the old door assm. and snap in the new one and wait about a year and a hald to order another one!!!!!
  • Jeff from Columbia City, IN
  • Difficulty Level:
    Really Easy
  • Total Repair Time:
    Less than 15 mins
  • Tools:
    Screw drivers
26 of 35 people found this instruction helpful.
Was this instruction helpful to you?
Thank you for voting!
Fixes Symptom 3% of time
★★★★★
★★★★★
18 Reviews

Rated by 7 customers 


Really Easy 

15 - 30 mins 

Ratings submitted by customers like you who bought this part.   

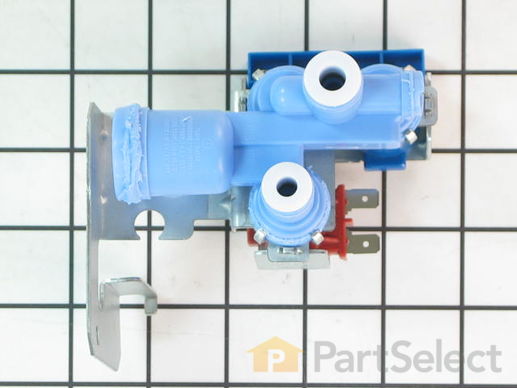
This part releases water from the supply line when it's activated.

$ 77.44
  In Stock
PartSelect Number PS1483564
Manufacturer Part Number WR57X10070

Replacing your General Electric Refrigerator Water Valve

Replacing your Water Valve

Customer Repair Stories

No ice cubes, ice down the inside back of freezer, constant buzzing noise.

Followed instructions from an existing video on this site. This site is very helpful both with regard to diagnostics and then removal/installation of the failed part.
  • Paul from Troutville, VA
  • Difficulty Level:
    Really Easy
  • Total Repair Time:
    30 - 60 mins
  • Tools:
    Nutdriver
3 of 3 people found this instruction helpful.
Was this instruction helpful to you?
Thank you for voting!

No water from the dispenser and Water leaking on floor

I searched YouTube for the problem and was quickly taken to several videos that detailed to required actions. This encouraged me to proceed, so I took the back cover off and found the water valve leaking. I then googled the make and model of the frig and found the part. The YouTube videos provided all of the details needed to determine the problem and replace the faulty part. Once the part arrived, I was able to install the new one in a few minutes. Operation returned to the water dispenser and the leak was gone. Total cost of the repair was $56 and took about 1.5 hours to remove the original part, order the replacement and install it when it came. Perfect!
  • Dennis from MARTINSBURG, WV
  • Difficulty Level:
    Really Easy
  • Total Repair Time:
    Less than 15 mins
  • Tools:
    Nutdriver, Screw drivers, Wrench (Adjustable)
6 of 9 people found this instruction helpful.
Was this instruction helpful to you?
Thank you for voting!
Fixes Symptom 2% of time
★★★★★
★★★★★
33 Reviews

Rated by 99 customers 


Easy 

30 - 60 mins 

Ratings submitted by customers like you who bought this part.   

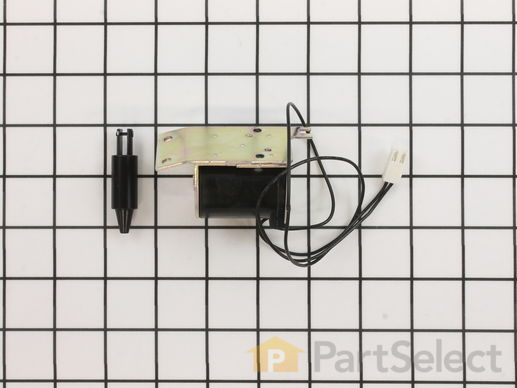
This part is a possible option when ice door won't open or shut properly or when water is not dispensing.

$ 64.74
  In Stock
PartSelect Number PS1483583
Manufacturer Part Number WR62X10055

Replacing your General Electric Refrigerator Dispenser Door Solenoid Assembly

Replacing your Dispenser Door Solenoid Assembly

Customer Repair Stories

Ice maker door not opening

Removed panel from front of freezer door by pushing up on three spring loaded screws located in the opening where the ice door opens and closes. they are about 1 inch apart on the bottom of the opening. Push up to free ice maker panel. Remove three screws from solenoid, located at the top right. Remove wire, replace with new and that is it. Fixed the problem!! Our ice maker hadn't worked for months. Be careful if you remove the round ice maker door to clean. There is a spring that located on the left side of sprocket. The spring fell off and took me a while to figure where it came from. Recieved package in three days and the job took minutes. Works great! Very easy to complete.
  • scott from lake orion, MI
  • Difficulty Level:
    Really Easy
  • Total Repair Time:
    Less than 15 mins
  • Tools:
    Nutdriver, Screw drivers
8 of 9 people found this instruction helpful.
Was this instruction helpful to you?
Thank you for voting!

Icemaker flap not closing, frosting up

Watched video, however could not get outer casing off. Under the panel are three small holes, pushed up with an Allen key, used a small screwdriver to wedge out, came out easily, followed instructions from video on removing and replacing solenoid
  • Graeme from Sarasota, FL
  • Difficulty Level:
    Easy
  • Total Repair Time:
    15 - 30 mins
  • Tools:
    Screw drivers
9 of 10 people found this instruction helpful.
Was this instruction helpful to you?
Thank you for voting!
Fixes Symptom 2% of time
★★★★★
★★★★★
1 Review

$ 24.16
  In Stock
PartSelect Number PS964278
Manufacturer Part Number WR17X11625
Fixes Symptom 1% of time
★★★★★
★★★★★
12 Reviews

Rated by 47 customers 


Easy 

30 - 60 mins 

Ratings submitted by customers like you who bought this part.   

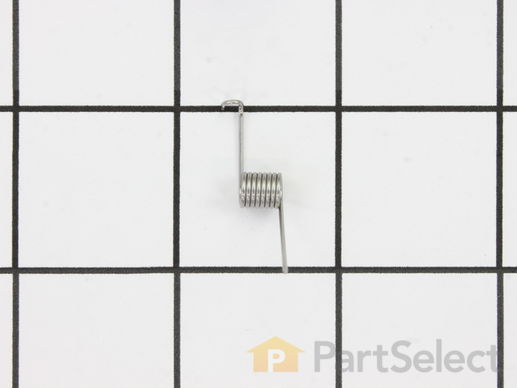
This door recess spring or dispenser lever spring in your refrigerator is used to return the ice door to the closed position or the dispenser lever to the home position once released. You will find the spring in the water dispenser assembly, behind the main control panel. If the dispenser lever is malfunctioning or the dispenser ice door is not closing, you may need to replace this door recess spring.

$ 9.17
  In Stock
PartSelect Number PS285013
Manufacturer Part Number WR02X10585

Replacing your General Electric Refrigerator Recess Door Spring

Replacing your Recess Door Spring

Customer Repair Stories

The ice cube door located on the front of the freezer (side by side freezer/refridgerator) stopped closing.

I removed the face plate (ice/water, selection panel) from the freezer door to access and remove the solenoid which was badly rusted and replaced with a new one, and a new spring too. Very simple repair for a chronic pain.
  • Todd from Milton, WI
  • Difficulty Level:
    Easy
  • Total Repair Time:
    15 - 30 mins
  • Tools:
    Screw drivers
0 of 1 people found this instruction helpful.
Was this instruction helpful to you?
Thank you for voting!

frost build up

flapper then bought the spring
  • JOHNNY from FORT WORTH, TX
  • Difficulty Level:
    Really Easy
  • Total Repair Time:
    15 - 30 mins
  • Tools:
    Pliers, Screw drivers
1 person found this instruction helpful.
Was this instruction helpful to you?
Thank you for voting!
Fixes Symptom 1% of time

Rated by 2 customers 


Really Easy 

30 - 60 mins 

Ratings submitted by customers like you who bought this part.   

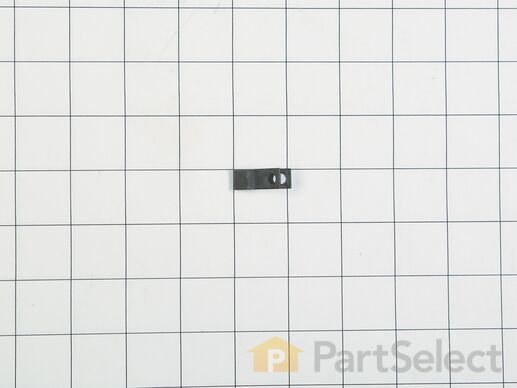
This water tubing clip, also known as a P-clamp, is usually used within refrigerators and freezers to organize the water line and tubing, but due to its versatility, this clip may also be used in other applications, like securing other cables. Made of metal and measuring approximately 1-inch in length, this clip features a hole on each side to allow you to screw it into the side of your appliance and secure the appropriate valve, tube, or cable. This clip is a genuine OEM part that is sold individually.

$ 8.06
  In Stock
PartSelect Number PS295031
Manufacturer Part Number WR1X5278
Fixes Symptom 1% of time
★★★★★
★★★★★
2 Reviews

$ 10.63
  In Stock
PartSelect Number PS758523
Manufacturer Part Number WR02X11426
Fixes Symptom 1% of time
★★★★★
★★★★★
6 Reviews

Rated by 15 customers 


Easy 

30 - 60 mins 

Ratings submitted by customers like you who bought this part.   

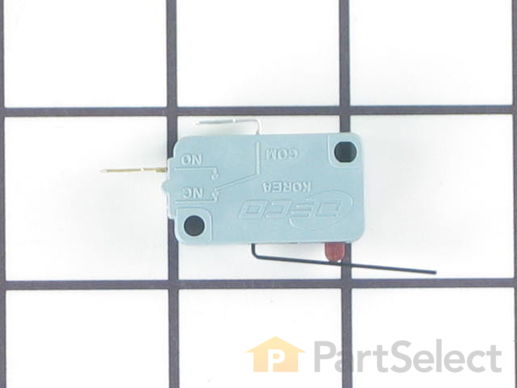
This is the replacement micro switch, or dispenser switch for your refrigerator. It is gray in color and measures approximately 1 inch by half an inch. The dispenser switch is what tells your refrigerator that it is ok to dispense ice or water. If your refrigerator is not dispensing ice or water, you may have a faulty or damaged switch. Be sure to disconnect the power to your refrigerator before you begin this repair. This switch is sold individually and is a genuine OEM replacement part sourced directly from the manufacturer.

$ 57.96
  In Stock
PartSelect Number PS8259956
Manufacturer Part Number WR23X10783

Replacing your General Electric Refrigerator Micro Switch

Replacing your Micro Switch

Customer Repair Stories

Water dispenser won't always dispense water

I followed the instructions found on this website. I removed the control panel by inserting a small Phillips screwdriver in the three holes at its bottom. I used the same screwdriver to pull the dispenser assembly down but could have used a larger one. The microswitch could be seen in the assembly at that point and was easily removed by opening the "fingers" that held it in place. I attempted to pull one of the terminals off without using a pair of needle-nosed pliers and ripped the wires right out of the terminal(I was able to find a replacement at Radio Shack). Low and behold after reinstalling the new part, it did not take care of the problem.

My problem is the water dispenser does work intermittently. When we place the glass in position and hit the lever, the lights in the control panel go off and no water is dispensed. My next guess may be the water valve or the control panel. The icemaker makes ice but I have had problems with it dispensing for nearly a year now.
  • Curtis from Corona, CA
  • Difficulty Level:
    Easy
  • Total Repair Time:
    15 - 30 mins
  • Tools:
    Pliers, Screw drivers
27 of 45 people found this instruction helpful.
Was this instruction helpful to you?
Thank you for voting!

Water dispensor would not shut off

Actually this was a two part repair of which I purchased both parts. The micro switch Pt # PS296176 and also a double outlet water valve Pt # PS304374 from Parts Select as well.

The difficult part was accessing the area to get to the micro switch.

The trim had to be removed, then the cover.

Then one unplugs the board and removed the face plate which also contains the micro switch.

Once removed the two electrical terminals had to be disconnected, the micro switch installed and terminal reconnected.

Then reverse the removal procedure.

Then on to the double outlet replacement.

Suggest watching the installation video for the replacement although it was really a straight forward repair.

Two things to remember.

1. Unplug the fridge

2. Shut off the water to the dispenser

Overall it was not bad at all.

This was my first attempt at refrigerator repair and it went well.

Good luck on yours.

John
  • John from Mason, OH
  • Difficulty Level:
    Easy
  • Total Repair Time:
    15 - 30 mins
  • Tools:
    Nutdriver, Pliers, Screw drivers, Wrench (Adjustable)
32 of 46 people found this instruction helpful.
Was this instruction helpful to you?
Thank you for voting!
Fixes Symptom 1% of time
★★★★★
★★★★★
1 Review

Rated by 33 customers 


Easy 

30 - 60 mins 

Ratings submitted by customers like you who bought this part.   

The door recess crank for your refrigerator is located inside the water dispenser assembly. To access this part, you will need to take apart the dispenser assembly. To do this, you will need a putty knife and a Phillips screwdriver. If your dispenser door will not close properly, or ice is not dispensing properly, you may have a damaged door recess crank. This part is made of white plastic and is sold individually.

$ 13.84
  In Stock
PartSelect Number PS291908
Manufacturer Part Number WR17X10706

Replacing your General Electric Refrigerator Dispenser Door Recess Crank

Replacing your Dispenser Door Recess Crank
Fixes Symptom 1% of time
★★★★★
★★★★★
9 Reviews

Rated by 2 customers 


Really Easy 

30 - 60 mins 

Ratings submitted by customers like you who bought this part.   

The water filter head holds the water filter and connects the water lines to the water filter.

$ 75.48
  In Stock
PartSelect Number PS12727274
Manufacturer Part Number WR17X22072

Customer Repair Stories

Slow water dispensing, small ice cubes

Followed the instructions in the video found online and it worked perfectly. I'm thankful for this online community and help; saved us about $200.
  • Christy from BIGELOW, AR
  • Difficulty Level:
    Really Easy
  • Total Repair Time:
    30 - 60 mins
  • Tools:
    Nutdriver, Pliers, Screw drivers, Socket set, Wrench (Adjustable)
1 person found this instruction helpful.
Was this instruction helpful to you?
Thank you for voting!

The water dispenser was very slow

I Googled G.E. refrigerator water dispenser slow
There was a UTube video where the guy described the issue I had. Plus step by step instructions on repairs. Sure enough, I had the same issue.
Repairs were simple.
Shut the water line off, removed water line , drained the water out, after loosing the water tube from the control valve, I pulled the valve out a little so I wouldn’t get water in the electrical connections. Pulled 2 screws out of the bracket where the lines go into the refrigerator. From the inside, I removed the water filter cover, removed the filter, 2 screws holding the filter head in place. Pulled lines and filter head out. The u-tube video was very good. 2 things I did different was I pulled the control valve out a little so the water wouldn’t get into the electrical connections. The other, I used a nut driver to remove and install the filter heads
  • Shirley from DUBUQUE, IA
  • Difficulty Level:
    Really Easy
  • Total Repair Time:
    30 - 60 mins
  • Tools:
    Nutdriver, Screw drivers, Wrench set
4 of 4 people found this instruction helpful.
Was this instruction helpful to you?
Thank you for voting!