This OEM 40 watt appliance light bulb is used for some ranges, refrigerators, freezers, and microwaves. Simply locate the existing bulb, unscrew it from its socket, and replace with new light bulb. If...
Oven racks can become rusted or damaged from constant use, and need to be properly maintained and cleaned to keep them working properly. If you notice that your oven rack has been damaged or rusted, t...
The Frigidaire light bulb lens covers the interior light bulb in an oven. No tools are necessary to replace this item. After unplugging the appliance, slide off the wire bracket to remove the existing...
This tempered glass is supplied by the original manufacturer and measures 20 inches by 13 inches. It is an inner door glass, designed for use in ranges/ovens and has several purposes which include pro...
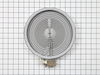
This is a six-inch radiant element with limiter. It works in conjunction with your stove top range. The purpose of this part is to heat up the cooking area that is located on top of the range, also kn...
Dual Element with Limiter -9 Inch /6 Inch - 1300W 1200W.
With this element, you can adjust the size of the burner you want to use to match your pots/pans.
The anti-tip bracket kit comes with one metal bracket and two installation screws, and is sourced directly from the genuine manufacturer. It prevents the freestanding oven, range, or stove from tippin...
This is a red indicator light lens for an oven that covers the indicator light for the surface element. The indicator light signifies when the element is on and heated. This part is sold individually....
This steel washer is also known as the range washer and is used on your oven door. The measurements for the steel washer are a three quarter inch outer diameter, and a one quarter inch inner diameter....
$11.23
In Stock
Questions And Answers for PLEF398CCD
Ask our experts a question about this model and we'll get back to you as soon as possible!
3 questions answered by our experts.
Sort by:
< Prev
1
Next >
Search filter:
Clear Filter
Your search term must have 3 or more characters.
Keep searches simple. Use keywords, e.g. "leaking", "pump", "broken" or "fit".
Sorry, we couldn't find any existing answers that matched.Try using some different or simpler keywords, or submit your new question by using the "Ask a Question" button above!
Robert
October 5, 2022
The front right element staying on and then going no and off but the dial is off? Which parts (s) could this be?
For model number PLEF398CCD
Hi Robert, thank you for reaching out. According to our research on the model, the Dual Element Control Switch appears to be faulty and you may need to replace it with part number PS2373493. If you need help placing an order, customer service is available 7 days a week. Glad to be of help!
Thought I'd placed a tray incorrectly on the stove top because of a bang type noise. Went to turn oven on & nothing happened. Fuse box wasn't tripped. Have had since 3-1-2005 without many issues. Thanks!
For model number PLEF398CCD
Hello Connie, thank you for getting in touch. Based on our understanding of the issue, we would suggest checking the oven control board, part number PS738170, to solve the problem. We hope this helps!
Hello Valerye, Thank you for your inquiry. You could have an issue with the hinges. Check both sides to see if either hinge is bent or the spring broken. If there are any signs of damage, then replace the hinges. We hope this helps and if you need help placing an order, customer service is open 7 days a week. Please feel free to give us a call. We look forward to hearing from you!
Turned off power, took back off stove removed old probe. I had to splice wires since new probe ends did not match up. the instructions were to splice the wires. I had the breaker off for about 3 hours. this is not in the instructions, but being a widow, I had to ask a few people why it would not come on after I connected the wir
... Read morees. After waiting, I turned the breaker on and my range came back on.
First we removed two screws under the rim of the range top to open the lid. Lifted the lid and removed the screws from the bracket that holds the elements, Be careful with the clips that hold the element in, if you break them or bend them there aren't any more! Also note which holes they were in, they are marked according to the differ
... Read moreent sizes of elements. Disconnected the wires, needed needlenose pliers to grip them...connected new element, popped it back in place, replaced bracket, closed top ...Easy peasy!!!
Repair was quite easy, as long as you have the instructions for removing the door. The screws that hold the bottom of the door to the fixed hinge are placed into the side of the hinge assembly after removal; this holds the door at a 45 degree angle for easy removal. After that, just place the door on a flat surface and dismantle the door
... Read morefrom the inside. The inner glass is contained in a metal frame with another piece of glass; this frame comes apart easily using the clips in each side. The door assembles easily after the glass is replaced; just take your time and give yourself enough room to lay out the parts as you go. Good luck!