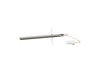
This is a range temperature sensor, used to detect the interior temperature of your oven when it is baking or cooking. If you notice your oven is baking unevenly or at inconsistent temperatures, will ...
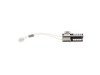
This is an oven burner igniter made for use with Samsung ovens. This oven burner igniter is designed to ignite the gas that flows into it, to produce heat. However, over time and with further frequent...
This rubber cushion is supplied by the original manufacturer and has a shaft approximately 1 inch long. The cushion acts as a layer of protection between the oven door and oven frame/cavity. It preven...
We're sorry, but our Q&A experts are temporarily unavailable.
Please check back later if you still haven't found the answer you need.
2 questions answered by our experts.
Sort by:
< Prev
1
Next >
Search filter:
Clear Filter
Your search term must have 3 or more characters.
Keep searches simple. Use keywords, e.g. "leaking", "pump", "broken" or "fit".
Sorry, we couldn't find any existing answers that matched.Try using some different or simpler keywords, or submit your new question by using the "Ask a Question" button above!
Andrea
December 20, 2022
Broiler doesn’t go on. What part do I need!
For model number NX58F5500SSAA
Hi Andrea, thank you for reaching out. You need to check the igniter, part number PS4241428, and the broil burner, part number PS4240963, to fix the issue. We hope this helps! If you need help placing an order, customer service is open 7 days a week. Thanks again for your great question.
Hi Rick, thank you for reaching out. This error code is caused by the malfunctioning of the PCB main control board. You may need to replace it with part number PS8764724, to solve the issue. We hope this solves your problem!
The Samsung stove I have has had the igniter replaced several times. It seems to wear out over a couple years time. I did the repair with a Philips #2 screw driver. Open the oven door, remove the grates. unscrew the bottom cover and expose the heat shield. Unscrew the heat shield. This exposes the burner. Unscrew the burner from the c
... Read moreenter of the plate/lower heat shield. Unscrew the burner from the front and back of the oven. Carefully lift up the burner to expose the igniter and clip. Unscrew the igniter from the burner and set the burner aside. Unclip the igniter from the power cable. If it falls below, it won't go far just reach in a lift it back up to fasten the new igniter to the power clip. Refasten to the burner with new clips and screws provided. Re-insert the burner to the gas jet that is below the bottom plate which will not be visible to you unless you place your head towards the rear of the stove and look down. Once the Jet is back into the hole of the burner, re fasten it to the middle back and front of the stove. Replace the covers and grates. Close the oven and test it. A new igniter does wonders. You can remove the stove door for a less intrusive install, but I found it unnecessary to do so and saved a step and time. I was done well under 30 minutes.
My barely 4 year old Samsung range/oven began not heating consistently. Even though it said 350, for example, we had to increase to 465 to get it to bake. Thought it was the temperature sensor. Ordered and installed new one easily. That didn't solve the problem. So, rather than throw more money at parts that may not have resolved the
... Read moreissue, I got a new Amana range. Samsung appliances go to my 'do not buy' list along with LG!
First we unplugged the oven and shut off the gas. We then began removing the two plates on the floor, inside of the oven, to reveal the pipe with the dead heating element. You remove the screws from the back of the first plate, pop it out from the front, then remove the screws from the front of the second plate and pop it out from the bac
... Read morek. The only issue we encountered was when we attempted to remove the two screws for the pipe: the front screw was stuck (possibly from old oil) and stripped easily. to fix that, we took a metal handsaw, and sawed a new cut into the screw to fit a flathead. After dealing with the screw, we removed the pipe and unplugged the old heating element. We removed the bottom drawer for extra room to assist with unplugging the heating element, and for removing the pipe from the gas line. We removed two screws with nuts that were attaching the element to the pipe, and replaced it with the new element. after reattaching the element and placing the pipe back onto the line, before we placed the plates back, we turned the oven and gas back on to test if it was working. One successful test later, we placed the plates and bottom drawer back and we were done.