Enter the code TAKE10OFF at checkout to apply your discount. Discount will be applied at checkout when the code is entered & applies to all parts. Cannot be combined with any other coupon or special offer & cannot be applied to a previously placed order. Not valid toward tax or shipping & handling. Discount has no cash value. Discount expires on May 28 at 11:59pm EST.
You've Got 10% Off Your First Order!Save 10% with code at checkout *click to copy coupon code
This door switch, also known as a safety switch, is a genuine OEM replacement part for microwaves. It is a safety mechanism that sends signals to the microwaves control system, telling it when the doo...
This is a range temperature sensor, used to detect the interior temperature of your oven when it is baking or cooking. If you notice your oven is baking unevenly or at inconsistent temperatures, will ...
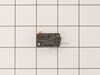
This is a high limit thermostat designed for microwaves, ranges and ovens. Made of plastic and metal, this thermostat is designed to open the electrical circuit for your appliance when it reaches a sp...
This rubber cushion is supplied by the original manufacturer and has a shaft approximately 1 inch long. The cushion acts as a layer of protection between the oven door and oven frame/cavity. It preven...
This surface element triple burner infinite switch, or regulator control, is located in the control panel of your range oven. It is responsible for turning the surface element on or off and adjusting ...
This stainless steel wire rack is a sturdy platform for baking or roasting food, making sure heat circulates evenly. It measures approximately 7/16 inches by 24 3/4 inches and is usually found inside ...
This genuine OEM left-threaded convection fan motor is responsible for spinning the fan blade, ensuring even circulation of hot air within your oven for consistent cooking. It is typically located beh...
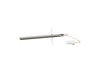
The temperature sensor, also referred to as a thermostat, probe, or thermistor sensor, is responsible for measuring the temperature inside your oven. It is a platinum-resistance sensor with a resistan...
This hexagon nut cap, also known as a nut cover cap, is a nylon-insulated cylindrical cap with left-hand threads and a 4mm thread size, for counterclockwise tightening. It is sourced from the original...
$10.56
In Stock
Questions And Answers for NE59J7750WS
Be the first to ask our experts a question about this model!
✖
Ask a Question
Ask our experts a question on this model and we'll respond as soon as we can.
This oven has two fans that counter rotate. One spins clockwise, the other counterclockwise. Because of this, the motors and the fan blades are different. The schematic shows the counter clockwise rotating fan with a right hand threaded shaft/nut on the bottom and the clockwise motor and fan with the left hand nut on the top. My range
... Read more had the motors in the exact opposite orientation, but the fan blades on the motors as shown on the schematic. The incorrect assembly at the factory (I bought new in the box, so I know this is the first repair) meant that nether fan blade was turning the correct direction. So do yourself a favor, be sure you’re buying the right motor (clockwise or counterclockwise) and be sure you put the right fan blade on the right motor. The Samsung motor ending in F is the counterclockwise motor that has the right hand threaded shaft the clockwise motor with the left hand threaded shaft ends in E.
I took off the back cover after I looked at youtube similar problems. Then removed the little thermostat and un hooked the 2 wires. I looked up the part and after is was delivered couple days later I connected the 2 wies and after putting the back cover on the oven was back to normal. Was such an easy repair and the part was only $11.
I removed the control panel with a Phillips screwdriver and unplugged the burner switch and replaced the new switch and put the control panel back in place and turned on the burner and it worked as it should.i realized that I only would have only had to remove the 4 screws on the bottom of the control panel. All I would have had to do was
... Read more just take those 4 screws out and remove the switch control knob and the two screws that held the switch in. Am very happy with the results


(0003) Samsung Wall Oven")


 Samsung – Part Number: CALL_1-800-SAMSUNG")