Models > MT4110SPB3

MT4110SPB3 Whirlpool Microwave - Overview

Sections of the MT4110SPB3

[Viewing 6 of 6]

Manuals & Care Guides for MT4110SPB3

Click to download
Keep searches simple, eg. "belt" or "pump".
Door Latch Bracket – Part Number: WP8205451
Door Latch Bracket
★★★★★
★★★★★
(21)
PartSelect #: PS11745265
Manufacturer #: WP8205451
Replace this part if the microwave door won't open.
$52.46
  In Stock
Fastener Screw – Part Number: 8169475
Fastener Screw
PartSelect #: PS389896
Manufacturer #: 8169475
Sold individually.
  No Longer Available
Door Interlock Switch Kit – Part Number: 4392027
Door Interlock Switch Kit
★★★★★
★★★★★
(3)
PartSelect #: PS373050
Manufacturer #: 4392027
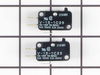
This part is a genuine manufacturer door interlock switch kit, also known as primary micro switch or microwave switch kit, for a microwave. The function of this part is to sense when the door of the m...
$85.78
  In Stock
Turntable Roller Guide – Part Number: WP8205178
Turntable Roller Guide
PartSelect #: PS11745256
Manufacturer #: WP8205178
This roller is located underneath the glass turntable. With the help of the motor, this roller helps to rotate the glass tray. This part takes the place of the coupling.
  No Longer Available
Spring – Part Number: WP4158178
Spring
PartSelect #: PS11742286
Manufacturer #: WP4158178
Door open button spring.
$10.23
  In Stock
High-Voltage Diode Wire – Part Number: WP8205489
High-Voltage Diode Wire
PartSelect #: PS11745270
Manufacturer #: WP8205489
This part allows power to go only one way.
$55.64
  In Stock
Line Fuse – Part Number: WP8183507
Line Fuse
★★★★★
★★★★★
(1)
PartSelect #: PS11745084
Manufacturer #: WP8183507
$22.42
  In Stock
MAGNETRON – Part Number: W10859575
MAGNETRON
★★★★★
★★★★★
(1)
PartSelect #: PS11731447
Manufacturer #: W10859575
This part is used to generate microwave energy/heat.
$259.57
  In Stock
SCREW – Part Number: 8169474
SCREW
PartSelect #: PS389895
Manufacturer #: 8169474
Sold individually.
$8.36
  In Stock
Glass Cooking Tray – Part Number: WP8204899
Glass Cooking Tray
PartSelect #: PS11745249
Manufacturer #: WP8204899
This tray rotates in your microwave ensuring more even temperatures.
  No Longer Available
Microwave Screw – Part Number: WP4158079
Microwave Screw
PartSelect #: PS11742285
Manufacturer #: WP4158079
This screw is for microwaves. A qualified technician should install this part if it requires accessing internal components of the microwave or microwave door. High-voltage capacitors can retain a l...
$2.85
  Special Order
SCREW – Part Number: W11245710
SCREW
PartSelect #: PS12578937
Manufacturer #: W11245710
Sold individually.
$14.09
  In Stock

Questions And Answers for MT4110SPB3

Be the first to ask our experts a question about this model!

Common Symptoms of the MT4110SPB3

[Viewing 6 of 6]
Door stuck closed
Fixed by
these parts
Fixing Fixing
Show All
Won’t turn on
Fixed by
these parts
Fixing Fixing
Show All
No heat
Fixed by
these parts
Fixing Fixing
Show All
Tray won’t turn
Fixed by
these parts
Fixing
Show All
Doesn’t shut off
Fixed by
these parts
Fixing
Show All
Door not closing properly
Fixed by
these parts
Fixing
Show All
Keep searches simple. Use keywords, e.g. "leaking", "pump", "broken" or "fit".
microwave door stuck....wont open
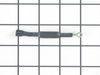
The reason the door would not open upon pressing the door opener is because the BRCKT-LATCH was broken. I discovered that after opening the microwave enclosing. The BRCKT-LATCH has two ends sticking out....each fits into a hole. One of the ends on the LATCH was broken and therefore it was not tightly fit. No upon pushing the door opener the LATCH would not function properly since it was loosely fit and hence the door would not open.
To Fix this issue:
1) Buy a new BRCKT-LATCH
2) Remove the microwave enclosing. I had to use a special screwdriver, since the screws were security protected on my microwave. After removing the case, I opened the door by manually pressing the door latch upwards (please make sure that the microwave is not connected to the electric socket before removing the enclosing).
3) pull out the old LATCH from the microwave.
4) carefully insert the new LATCH. Try not to put too much pressure when trying to fit the latch, or else the ends may snap again!!
5) Close the door and try opening it by pressing the door opener. it should work now!!
Parts Used:
Door Latch Bracket
  • Sailendra from Round Rock, TX
  • Difficulty Level:
    Really Easy
  • Total Repair Time:
    30 - 60 mins
  • Tools:
    Screw drivers
78 of 97 people found this instruction helpful.
Was this instruction helpful to you?
Thank you for voting!
Microwave worked intermittently depending on how door was closed
Remove top grille (2 screws), undo control panel (1 screw). Tilt down control panel, switches are on the left. There are actually three switches that are involved with the door, two horizontally mounted, one vertically mounted. This would be an EASY REPAIR, but it took me a while to figure out which of the three switches was bad, and also took a while to figure out that there is a plastic rod that inserts through the hole in the switch body. Once i figured this out went like a breeze. Lower horizontal switch was the bad one, but since the kit came with two switches i went ahead and replaced the upper horizontal one as well. IT appears that the horizontal switches are probably more likely to fail than the vertical switch based on the position of the switch and force angles. Works great now!
Parts Used:
Door Interlock Switch Kit
  • Robert from Bainbridge Island, WA
  • Difficulty Level:
    A Bit Difficult
  • Total Repair Time:
    30 - 60 mins
  • Tools:
    Pliers, Screw drivers
67 of 82 people found this instruction helpful.
Was this instruction helpful to you?
Thank you for voting!
loud buzzing noise
The repair went well...I am so glad that I read this info before buying a new microwave....it saved me lots of money. I did have a repair man come and look at it and he told me to buy a new one but it cost alot of money when it wasn't necessary. I did the repair and I was very proud of myself.
Three men watched a woman fix this and it was no problem...they were impressed also....
Parts Used:
MAGNETRON
  • Sandra from coto de caza, CA
  • Difficulty Level:
    Really Easy
  • Total Repair Time:
    15 - 30 mins
  • Tools:
    Screw drivers
55 of 99 people found this instruction helpful.
Was this instruction helpful to you?
Thank you for voting!