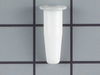
This end cap can be used for the right or left side of the refrigerator door shelf or the freezer door shelf. It is white in color, made of plastic material and measures about 2 inches high by 3 inche...
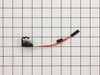
This Defrost Timer works like a clock by switching on the defrost heater circuit after a predetermined amount of compressor run time. This allows the defrost circuit to clear the evaporator of ice or ...
The door shelf end cap, or door bin support, secures the rack in a refrigerator or freezer door. Note that this fits on either the left or right hand side. If the end caps of your refrigerator or free...
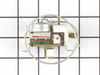
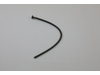
This refrigerator defrost thermostat is a genuine OEM part and is sourced directly from the manufacturer. Located on the back wall of the freezer section in the refrigerator, the defrost thermostat is...
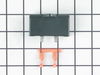
The run capacitor helps the compressor kick on and off while maintaining a constant temperature in your fridge and freezer. You may need to replace your run capacitor if your refrigerator or freezer s...
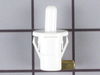
This OEM 40 watt appliance light bulb is used for some ranges, refrigerators, freezers, and microwaves. Simply locate the existing bulb, unscrew it from its socket, and replace with new light bulb. If...
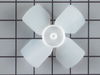
This evaporator fan blade is a genuine OEM part that is sourced directly from the manufacturer. The evaporator fan blade circulates air through the refrigerator to control the amount of cold air goes ...
My freezer would freeze up and not allow cold air to refrigerator side. First I took off bottom face plate, located the timer on left side bottom, removed the two screws and unpluged the timer. Replaced the timer with new one. Second I removed all food from freezer. Took of back of freezer wall with nut driver. Located the thermostat whic
... Read moreh was very easy to remove. Just one clip holding thermostat. Unplugged the two wires from the old thermostat and plugged in new wires. Thanks to Partselect.com, the parts were an exact match. Very easy to do. Saved my tons of money. Freezer and refer works like new.
First - I asked a person familiar in ref/freezer repair for assistance. This was the hardest issue - trying to find someone to offer "free" advise. He stated that when this problem occurs it is usually one of two things: 1) The defrost timer (underneath Refrigerator - Attached w/2 screws and plug-n connector) not functioning or 2) The de
... Read morefrost sensor (clipped-on to the coolant line (2-press-on wires) above the main coolant coil in in rear of freezer section behind panel secured w/5 1/4" hex-head screws) not properly sensing need for defrosting. The Tech. also stated that the defrost/heat coil, which surrounds the large coolant coil in the back of the freezer hardly ever goes bad unless it is the glass/clear type coil which often crack. (Mine was the black filament type element like found in an electric oven). I check the element with an ohm meter - 27 ohms of resistance which indicated it was okay). I replaced both defrost timer & defrost sensor at the same time and that fixed the problem. Parts ordered were an exact match to originals (dispite model number changes/upgrades) and everything went very well. NOTE: It is good to have the part numbers off of each original item and know what they are called before placing your order. All fixed for less than $50.00. A service call alone would be more than this. Took about 2 hours to do, due to having to defost the iced-up freezer coil w/a hair blower. Don't use sharp objects to chip away ice, let the blower do the work - Patience and a couple of towels to absorb water is important here. Hope this helps the other do-it-yourselfers.
I'm too young to die so I unpluged the refriderator first. The cold control is mounted in a plastic housing at the top of the freezer compartment that is held in place by two screws on the back side. I removed them with a nutdriver. Pull off the knob and use a screwdriver to release the control from it's bracket and pull off the 3 wire
... Read mores noteing where they go. Slide the sensing element out and remove the plastic sleeve. Stragihten the sensing element on the new control and slide on the plastic sleve. Slide the sensing element in place, push the wires onto the terminals and snap the control into the bracket. Re-install the two screws and the control knob. Plug it in and you're done. It took longer to write this than to replace the control.