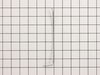
This dryer door switch is a simple on/off switch mechanism that prohibits the dryer from operating when the door is open, and operates the drum light. White in color and 6.5 inches long, this OEM swit...
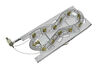
When connected to electricity the dryer heating element glows red hot and generates heat. When air is blown over it, it heats the air which is used to dry the clothes. The heating element fits inside ...
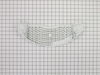
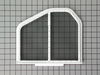
The filter collects lint during the drying cycle. This filter is 12 1/2 inches wide and 10 1/2 inches deep. Replacing the lint filter is an easy repair which requires no tools. When replacing the lint...
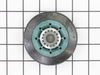
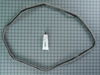
This Idler Pulley includes the tri-ring and gasket and everything included here is manufacturer-certified. This part maintains correct tension on the drive belt in order to spin the drum properly. If ...
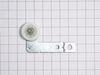
This drum support roller is sold individually. Most dryers require two. The tri-rings are included. This is a drum support roller for a dryer. It is a genuine replacement part. The part includes the d...
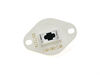
The internal-bias thermistor (Thermistor, Dryer Thermister, Dryer Thermistor) prevents the dryer from overheating by monitoring and controlling the temperature of the inside of the dryer drum. It is l...
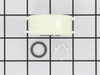
If you notice that your dryer is noisy or will not tumble, you may need to replace the tri ring. This part is triangular, and is less than an inch in size. Tri rings can be found both on the idler pul...
If your washer shakes or vibrates loudly when it reaches its max speed, check that the leveling legs are even. To ensure that the washer is firmly on the ground using all four legs, adjust the legs so...
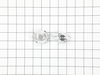
This door catch kit is designed for use in dryers. This is an authentic OEM replacement part. This catch assembly ensures the door of your appliance will close, and remain closed. It allows your appli...
The idler pulley wheel is now sold with this arm. This idler pulley is for dryers.
Idler pulley maintains correct tension on the drive belt to spin the drum.
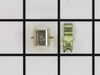
Also known as Thermal Cut-Off kit. The thermostat acts as a safety mechanism that keeps the dryer from overheating and the fuse is like a backup system - it's set to trip at a higher temperature than...
This kit is used for electric clothes dryers, and it comes with a yellow wire nut.
$11.06
In Stock
Questions And Answers for MEDX700XL0
Ask our experts a question about this model and we'll get back to you as soon as possible!
4 questions answered by our experts.
Sort by:
< Prev
1
Next >
Search filter:
Clear Filter
Your search term must have 3 or more characters.
Keep searches simple. Use keywords, e.g. "leaking", "pump", "broken" or "fit".
Sorry, we couldn't find any existing answers that matched.Try using some different or simpler keywords, or submit your new question by using the "Ask a Question" button above!
Kathy
January 7, 2020
What is the capacity of this dryer.
For model number MEDX700XL0
Hello Kathy and thank you for writing.
7.4 cu. ft. Capacity. We hope this helps. Please contact us anytime if you require further assistance.
2 people found this helpful.
Was this helpful?
Thank you for voting!
Mike
February 6, 2020
Why might this model dryer be making a high pitch squeaking noise?
For model number MEDX700XL0
Hello Mike, thank you for your question. There are a few things that could cause the unit to make a squeaking noise. We would recommend checking the rollers, roller shafts, drum felt seals and the idler pulley and wheel assembly first. I hope this helps.
Was this helpful?
Thank you for voting!
Chester
February 21, 2020
Power comes on. Where is fuse located & what part number is it?
For model number MEDX700XL0
Hello Chester.
Thank you for your question. The fuse for your model MEDX700XL0 is under part number PS11741460. It is located on the inside of the dryer, behind the back panel. It would be in the bottom right portion. We hope this helps you.
Was this helpful?
Thank you for voting!
Alan
March 10, 2022
Dryer will not turn on, just makes a click sound.
For model number MEDX700XL0
Hello Alan, thank you for writing. We have researched the model you have provided, and we would suggest the Dryer Door Switch PS11741701. If you need help placing an order, our customer service is open 7 days a week. Please feel free to give us a call. We look forward to hearing from you!
Pryed dryer top open and opened front door. . Unscrewed the 2 retaining screws. Pulled old switch from the wiring harness. Put new switch in place and replaced the retaining screws. Put new switch wire plug into the wiring harness. Before closing top, checked door switch function with dryer on. Dryer cut off when door open an
... Read mored when closed dryer started normally. . . Maint. Note instruction book should warn that letting door slam, which I did on occaision, broke the switch arm. Might save future problems.
Remove the kick plate from the bottom of the dryer by sliding a putty knife along the top edge to release the plastic clamps, one on each side about 4" in from the edges. The kick plate folds out and down. You will see the heat shield on the right, held in by one hex head screw. Remove screw and heat shield. The element is positioned in a
... Read moren open-front housing and is fastened to the left side of the housing by two hex head screws, located on the "rail" of the element and right near the two wires. Remove the hex-head screws that hold the element in place and disconnected the two wires by pulling them out by hand or with needle nose pliers. The only difficulty here is the cramped working area...I recommend a stubby socket driver for these two screws. Most of this I had to do by feel because I could not see the screw heads. Once the screws are out and the wires have been disconnected, slide the old element straight out toward you. You may need to disconnect a small plastic hose located to the left front of the element, but this hose just pulls right off. Vacume the dust & lint build-up out of the whole area, wipe out the element housing and clean up the whole underside of the dryer prior to installing the new element. Installation is reverse of removal. It also might be a good opportunity to clean out your exhaust duct and the vent to the outside. (Never use the aluminum foil-accordian-type duct.) If the exterior dryer vent has any kind of screen over it, remove it and get rid of it. Screens collect lint, lint builds up and burns out elements.


 Diagram and Parts List for Maytag Dryer")