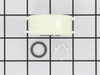
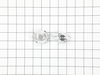
This Idler Pulley includes the tri-ring and gasket and everything included here is manufacturer-certified. This part maintains correct tension on the drive belt in order to spin the drum properly. If ...
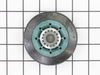
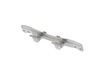
This drum support roller is sold individually. Most dryers require two. The tri-rings are included. This is a drum support roller for a dryer. It is a genuine replacement part. The part includes the d...
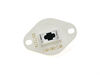
The internal-bias thermistor (Thermistor, Dryer Thermister, Dryer Thermistor) prevents the dryer from overheating by monitoring and controlling the temperature of the inside of the dryer drum. It is l...
If you notice that your dryer is noisy or will not tumble, you may need to replace the tri ring. This part is triangular, and is less than an inch in size. Tri rings can be found both on the idler pul...
If your washer shakes or vibrates loudly when it reaches its max speed, check that the leveling legs are even. To ensure that the washer is firmly on the ground using all four legs, adjust the legs so...
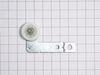
The idler pulley wheel is now sold with this arm. This idler pulley is for dryers.
Idler pulley maintains correct tension on the drive belt to spin the drum.
Also known as Thermal Cut-Off kit. The thermostat acts as a safety mechanism that keeps the dryer from overheating and the fuse is like a backup system - it's set to trip at a higher temperature than...
The 5400W, 240-volt heating element is supplied directly by the manufacturer for use in various models of dryers. It is responsible for generating the heat needed to dry your laundry effectively. It i...
This is the moisture sensor for your dryer. It helps detect the amount of moisture in your clothes during the dryer cycle. If you notice your clothes are still wet after an automatic dryer cycle is do...
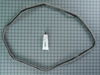
This drum seal with a silicone rubber adhesive is used in dryers. This part seals the drum to make sure air does not escape from the dryer. If your dryer is making loud noises, is not producing enough...
Ask our experts a question about this model and we'll get back to you as soon as possible!
3 questions answered by our experts.
Sort by:
< Prev
1
Next >
Search filter:
Clear Filter
Your search term must have 3 or more characters.
Keep searches simple. Use keywords, e.g. "leaking", "pump", "broken" or "fit".
Sorry, we couldn't find any existing answers that matched.Try using some different or simpler keywords, or submit your new question by using the "Ask a Question" button above!
Sharon
May 31, 2023
when you close door the light stays on. You have to push the light batten to turn off light. I will not start up. Will turn on but nothing else.
For model number MED5500FC0
Hi Sharon, thank you for reaching out. Based on the description that you have provided, we would recommend checking the door switch, part number PS12745626, to fix this issue. We hope this solves your issue!
I can not find part w10179483 anywhere. Has this part number changed? It is the circuit board to a front load dryer
For model number MED5500FC0
Hello John, thank you for reaching out. The part you are looking for is part number PS11753940. If you need help placing an order, customer service is open 7 days a week!
Hello Catherine, thank you for contacting us. Based on our research, your model was manufactured in approximately 2015. To get the exact manufacturing date, please provide us with the complete serial number. We hope this helps!
Was this helpful?
Thank you for voting!
< Prev
1
Next >
✖
Ask a Question
Ask our experts a question on this model and we'll respond as soon as we can.
I asked for advise, looked around and priced heating elements and thermostats. This was the best combo offered for the price given. It was shipped and received it very quick. Installed it and 5 minutes later, she was running like a champ!
I removed the top cover and then the back cover, released the belt tensioner and removed the drive belt. Then slid the tub out of the unit and onto the back dack. Sanded the remnents of the old seal off. Wiped the tub lip with laquer thinner and applied the "fast" drying glue supplied with the kit. Installed the seal and re-assembled the
... Read moreunit...works fine
1) Disconnected power cord from wall. 2) Disconnected vent hose from back of dryer. 3)Removed dryer rear panel. 4)Disengaged tension spring on idle wheel arm. 5) Removed worn idle wheel. 6)Installed new Idler wheel assembly. 7) Vacuumed dust from rear of dryer (optional, recommended). 8) Reinstalled rear cover, vent hose and power cord. E
... Read moreasy repair 15-30


 Diagram and Parts List for Maytag Dryer")