Models > MDE22PRBYW0

MDE22PRBYW0 Maytag Dryer - Overview

Sections of the MDE22PRBYW0

[Viewing 5 of 5]

Manuals & Care Guides for MDE22PRBYW0

Click to download
Keep searches simple, eg. "belt" or "pump".
Lint Filter – Part Number: W10120998
Lint Filter
★★★★★
★★★★★
(101)
PartSelect #: PS1491676
Manufacturer #: W10120998
The filter collects lint during the drying cycle. This filter is 12 1/2 inches wide and 10 1/2 inches deep. Replacing the lint filter is an easy repair which requires no tools. When replacing the lint...
$61.46
  In Stock
Idler Pulley – Part Number: 279640
Idler Pulley
★★★★★
★★★★★
(117)
PartSelect #: PS334244
Manufacturer #: 279640
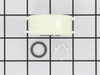
This Idler Pulley includes the tri-ring and gasket and everything included here is manufacturer-certified. This part maintains correct tension on the drive belt in order to spin the drum properly. If ...
$26.95
  In Stock
Thermostat, Internal-Bias – Part Number: WP8577274
Thermostat, Internal-Bias
★★★★★
★★★★★
(30)
PartSelect #: PS11746740
Manufacturer #: WP8577274
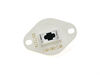
The internal-bias thermistor (Thermistor, Dryer Thermister, Dryer Thermistor) prevents the dryer from overheating by monitoring and controlling the temperature of the inside of the dryer drum. It is l...
$47.74
  In Stock
Roller Support Tri-Ring – Part Number: WPW10512946
Roller Support Tri-Ring
★★★★★
★★★★★
(5)
PartSelect #: PS11755850
Manufacturer #: WPW10512946
If you notice that your dryer is noisy or will not tumble, you may need to replace the tri ring. This part is triangular, and is less than an inch in size. Tri rings can be found both on the idler pul...
$13.42
  In Stock
Thrust Washer – Part Number: WP233520
Thrust Washer
★★★★★
★★★★★
(2)
PartSelect #: PS11740482
Manufacturer #: WP233520
This genuine OEM washer has a 3/4 inch outside diameter. This thrust washer can be used on most makes and models of dryers. A complete list of compatible dryers is available below. The washer is found...
$7.95
  In Stock
Leveling Foot – Part Number: 49621
Leveling Foot
★★★★★
★★★★★
(13)
PartSelect #: PS1609293
Manufacturer #: 49621
If your washer shakes or vibrates loudly when it reaches its max speed, check that the leveling legs are even. To ensure that the washer is firmly on the ground using all four legs, adjust the legs so...
$11.40
  In Stock
Door Catch Kit – Part Number: LA-1003
Door Catch Kit
★★★★★
★★★★★
(20)
PartSelect #: PS2162263
Manufacturer #: LA-1003
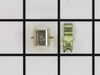
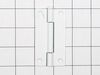
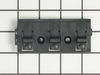
This door catch kit is designed for use in dryers. This is an authentic OEM replacement part. This catch assembly ensures the door of your appliance will close, and remain closed. It allows your appli...
$32.34
  In Stock
Heating Element Connection Wire Kit – Part Number: 279457
Heating Element Connection Wire Kit
★★★★★
★★★★★
(3)
PartSelect #: PS334206
Manufacturer #: 279457
This kit is used for electric clothes dryers, and it comes with a yellow wire nut.
$11.06
  In Stock
High Limit Thermostat and Thermal Cut-Off Kit – Part Number: 279973
High Limit Thermostat and Thermal Cut-Off Kit
★★★★★
★★★★★
(21)
PartSelect #: PS334387
Manufacturer #: 279973
Also known as Thermal Cut-Off kit. The thermostat acts as a safety mechanism that keeps the dryer from overheating and the fuse is like a backup system - it's set to trip at a higher temperature than...
$53.28
  In Stock
Screw, 8/18 x 3/8 – Part Number: WP90767
Screw, 8/18 x 3/8
★★★★★
★★★★★
(2)
PartSelect #: PS11746840
Manufacturer #: WP90767
This screw is sold individually.
$5.42
  In Stock
Dryer Drum Seal with Adhesive – Part Number: 280114
Dryer Drum Seal with Adhesive
★★★★★
★★★★★
(19)
PartSelect #: PS970088
Manufacturer #: 280114
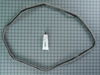
This drum seal with a silicone rubber adhesive is used in dryers. This part seals the drum to make sure air does not escape from the dryer. If your dryer is making loud noises, is not producing enough...
$47.27
  In Stock
Screw - 10-16 x 1 – Part Number: WP3387230
Screw - 10-16 x 1
★★★★★
★★★★★
(2)
PartSelect #: PS11741409
Manufacturer #: WP3387230
This screw is sold individually.
$7.95
  In Stock

Questions And Answers for MDE22PRBYW0

Be the first to ask our experts a question about this model!

Common Symptoms of the MDE22PRBYW0

[Viewing 15 of 15]
Noisy
Fixed by
these parts
Fixing Fixing Fixing
Show All
Door won’t close
Fixed by
these parts
Fixing Fixing Fixing
Show All
Too hot
Fixed by
these parts
Fixing Fixing Fixing
Show All
Not cleaning dishes properly
Fixed by
these parts
Fixing
Show All
Marks left on clothes
Fixed by
these parts
Fixing Fixing
Show All
Not Heating
Fixed by
these parts
Fixing Fixing Fixing
Show All
Leaking
Fixed by
these parts
Fixing
Show All
Will not fill with water
Fixed by
these parts
Fixing
Show All
Not draining
Fixed by
these parts
Fixing
Show All
Touchpad does not respond
Fixed by
these parts
Fixing Fixing
Show All
Drum Not Spinning
Fixed by
these parts
Fixing Fixing
Show All
Will not agitate
Fixed by
these parts
Fixing
Show All
Burning smell
Fixed by
these parts
Fixing
Show All
Won’t Start
Fixed by
these parts
Fixing
Show All
Spins slowly
Fixed by
these parts
Fixing
Show All
Keep searches simple. Use keywords, e.g. "leaking", "pump", "broken" or "fit".
felt strip came off lint screen
ordered new lint screen, removed old screen, inserted new screen.
Parts Used:
Lint Filter
  • JEFFREY from FALL RIVER, MA
  • Difficulty Level:
    Really Easy
  • Total Repair Time:
    Less than 15 mins
219 of 270 people found this instruction helpful.
Was this instruction helpful to you?
Thank you for voting!
catch mounted on door broke
The door had always opened with the wrong swing and it wasn't til I needed to repair this that I noticed you could change the swing. I changed the swing of the door and then noticed that the clip was included on both sides so i did not need to repair the catch. I still have the part so when it breaks again, I can just pop it in.
Parts Used:
Door Catch Kit
  • Paul from Mt. Pleasant, SC
  • Difficulty Level:
    Really Easy
  • Total Repair Time:
    Less than 15 mins
  • Tools:
    Screw drivers
93 of 123 people found this instruction helpful.
Was this instruction helpful to you?
Thank you for voting!
Rear tub seal failure
I removed the top cover and then the back cover, released the belt tensioner and removed the drive belt. Then slid the tub out of the unit and onto the back dack. Sanded the remnents of the old seal off. Wiped the tub lip with laquer thinner and applied the "fast" drying glue supplied with the kit. Installed the seal and re-assembled the unit...works fine
Parts Used:
Dryer Drum Seal with Adhesive
  • Jerry from Everett, WA
  • Difficulty Level:
    Easy
  • Total Repair Time:
    30 - 60 mins
  • Tools:
    Screw drivers, Socket set
66 of 84 people found this instruction helpful.
Was this instruction helpful to you?
Thank you for voting!