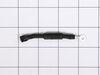
This micro-switch is designed for use in your microwave. The function of this part is to monitor the door latch position and communicate to the electronic control board whether the latch is open or cl...
The fuse-time delay may also be known as a line fuse or a microwave fuse, and it is a piece for your microwave. The function of this part is to shut off the microwave if there is a power surge, in ord...
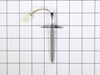
This temperature sensor, also known as a thermistor, is compatible with various makes and types of appliances. This thermistor uses electrical currents to detect the interior temperature of the applia...
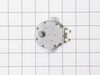
This thermostat is a temperature-sensing device that controls and maintains the desired temperature inside the oven. It is an OEM replacement part that works by monitoring the internal oven temperatur...
This 120-voltage, 20-watt halogen lamp is an authentic OEM part made for Samsung microwaves. It is a type of lightbulb that uses a mixture of halogen gas to ensure longevity and higher lighting qualit...
This vent trim measures 75.6 x 5.7 x 1.3 cm and weighs 227 g. This part is designed for use with ovens and ranges. Your appliance needs a ventilation system so it can properly circulate air. This allo...
$55.77
In Stock
Questions And Answers for LWC3063ST
Be the first to ask our experts a question about this model!
✖
Ask a Question
Ask our experts a question on this model and we'll respond as soon as we can.
Go onto youtube, such as https://www.youtube.com/watch?v=-ITkrwhDNMQ and watch similar videos for DYI. The process is very similar to other models.
Once the door is removed, place oven door on a towel or soft place so it does not scratch the door. Unscrew the screws and make sure you notice where each screw goes, so you know
... Read morethe process of where each screw goes when you re-assemble.
Once the inner cover is removed, remove the insulation, too so you don't damage it. Use Wet/Dry Shop Vac to clean the shattered glass. (WORD OF ADVICE: I did not remove the insulation and the suction of the Shop Vac removed part of the insulation, so now instead of a quick turn around repair turns into a few weeks repair, because the insulation is on back order 10-14 days from the supplier. DON"T MAKE THE SAME MISTAKE!)
Once the glass has been removed, the new inner glass is replaced, begin by re-assemble the oven door with the correct screws and attached the oven door to the range.
I want to preface this review by stating that I do some DIY from YouTube, but have no experience in electronic repair. The microwave is over the stove with the extendavent. First I unplugged the microwave, removed the vent and started to unscrew the microwave from the mount. I used a power drill to speed things up. I was able to remove
... Read morethe microwave on my own. I unscrewed the lid on the microwave and took the lid off and there is the magnetron. I opened up needle nose pliers to have each end touch the terminals of the capacitor (holds the power, Dangerous). I made sure to keep my hands on the rubber handles and avoid touching the metal part of the pliers. I used the pliers to remove the plug of the capacitor to the magnetron as well. The magnetron has 4 screws (2 top, 2 bottom). There is a magnet that can hold the screws to keep from falling but I’d still recommend a screwdriver with a magnet on the end. The magnetron has another set of wires connected by a metal bracket like a holder, not really connecting any wiring to the magnetron itself. I had to unscrew 1 screw to removed that. Adding everything back on was easy, same steps back. I plugged in the microwave and tested a cup of water before I mounted it back above the stove. Voila! I did need my wife’s help to hold the microwave on the hinge while screwing into the mount. It doesn’t take a lot of muscle for the help. $85 for the part and ~40 mins to fix a $400 microwave!
I looked up my problem on the internet and found a very helpful video. Microwave on video was different brand but the internals and methods were very much the same. The video made it simple and easy to fix. Found the replacement switch on the LG parts site and ordered. Two different switch types. One with red switch, the other green.
... Read more Part was $7.28. Saved a bundle in service costs. Here is the repair video.


 LG Range")
 LG Range")
 LG Range")
 LG Range")
 LG Range")
 LG Range")
 LG Range")
 LG Range")
 LG Range")
 LG Range")