Models > LSRE307ST

LSRE307ST ((FSTLVKG)) LG Range - Overview

Sections of the LSRE307ST

[Viewing 5 of 5]
Keep searches simple, eg. "belt" or "pump".
Thermostat – Part Number: 6930W1A003X
Thermostat
★★★★★
★★★★★
(9)
PartSelect #: PS3530468
Manufacturer #: 6930W1A003X
The range thermostat is also commonly known as a stove, oven, cooktop, or range thermal fuse. This thermostat protects your oven from excessive heating, and will shut the oven heat off if excessive he...
$20.30
  In Stock
Temperature Sensor – Part Number: EBG61305805
Temperature Sensor
★★★★★
★★★★★
(1)
PartSelect #: PS11732697
Manufacturer #: EBG61305805
This temperature sensor, also known as a thermistor, is compatible with various makes and types of appliances. This thermistor uses electrical currents to detect the interior temperature of the applia...
$87.56
  In Stock
FOOT – Part Number: 4778W1N001B
FOOT
★★★★★
★★★★★
(1)
PartSelect #: PS3635599
Manufacturer #: 4778W1N001B
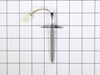
This is a genuine OEM leveling leg for various models of LG ranges. This leg is used to stabilize and support the range, and if damaged, broken, or missing, will cause your range to rock back and fort...
$18.00
  In Stock
SHELF – Part Number: MHL39256108
SHELF
★★★★★
★★★★★
(2)
PartSelect #: PS16224457
Manufacturer #: MHL39256108
$60.67
  In Stock
Window,Glass – Part Number: 4890W1N005A
Window,Glass
★★★★★
★★★★★
(2)
PartSelect #: PS3524129
Manufacturer #: 4890W1N005A
$131.96
  On Order
Radiant Heater – Part Number: 5300W1R004A
Radiant Heater
★★★★★
★★★★★
(1)
PartSelect #: PS3527756
Manufacturer #: 5300W1R004A
This radiant heater may also be known as a radiant surface element and is a part for your range. The function of this heater is to supply heat to the cooking area that is on the top of the range. This...
$109.31
  In Stock
Heater,Radiant – Part Number: 5300W1R009A
Heater,Radiant
★★★★★
★★★★★
(1)
PartSelect #: PS3527761
Manufacturer #: 5300W1R009A
$375.02
  In Stock
Heater,Radiant – Part Number: 5300W1R005A
Heater,Radiant
★★★★★
★★★★★
(1)
PartSelect #: PS3527757
Manufacturer #: 5300W1R005A
$226.20
  In Stock
Common Nut – Part Number: 1NHB0500032
Common Nut
PartSelect #: PS3517437
Manufacturer #: 1NHB0500032
$8.17
  In Stock
Bracket,Idle – Part Number: MAZ61859001
Bracket,Idle
PartSelect #: PS3534606
Manufacturer #: MAZ61859001
$23.14
  In Stock
Electronic Control Board – Part Number: EBR74632605
Electronic Control Board
PartSelect #: PS6012667
Manufacturer #: EBR74632605
$273.53
  In Stock
Bake Element – Part Number: MEE36593202
Bake Element
★★★★★
★★★★★
(1)
PartSelect #: PS3648889
Manufacturer #: MEE36593202
$167.11
  Special Order

Questions And Answers for LSRE307ST

Be the first to ask our experts a question about this model!

Common Symptoms of the LSRE307ST

[Viewing 6 of 6]
Little to no heat when baking
Fixed by
these parts
Fixing Fixing
Show All
Element will not heat
Fixed by
these parts
Fixing Fixing Fixing
Show All
Oven not heating evenly
Fixed by
these parts
Fixing Fixing
Show All
Oven is too hot
Fixed by
these parts
Fixing Fixing
Show All
Won’t turn on
Fixed by
these parts
Fixing
Show All
Door won’t open after self cleaning cycle
Fixed by
these parts
Fixing
Show All
Keep searches simple. Use keywords, e.g. "leaking", "pump", "broken" or "fit".
Replace Inner Oven glass because it shattered
Go onto youtube, such as https://www.youtube.com/watch?v=-ITkrwhDNMQ and watch similar videos for DYI. The process is very similar to other models.

Once the door is removed, place oven door on a towel or soft place so it does not scratch the door. Unscrew the screws and make sure you notice where each screw goes, so you know the process of where each screw goes when you re-assemble.

Once the inner cover is removed, remove the insulation, too so you don't damage it. Use Wet/Dry Shop Vac to clean the shattered glass. (WORD OF ADVICE: I did not remove the insulation and the suction of the Shop Vac removed part of the insulation, so now instead of a quick turn around repair turns into a few weeks repair, because the insulation is on back order 10-14 days from the supplier. DON"T MAKE THE SAME MISTAKE!)

Once the glass has been removed, the new inner glass is replaced, begin by re-assemble the oven door with the correct screws and attached the oven door to the range.

Hope this helps
Parts Used:
Window,Glass
  • Jeffrey from CERRITOS, CA
  • Difficulty Level:
    Really Easy
  • Total Repair Time:
    30 - 60 mins
  • Tools:
    Screw drivers
9 of 15 people found this instruction helpful.
Was this instruction helpful to you?
Thank you for voting!
No power to unit after self clean was ran.
Unscrewed the back panel and Sub assembly then unplugged the board and replugged and put back screws. The ribbon wires were kinda hard to put back in make sure they are in all the way. Check the therm fuse first ( $3.00 fix ) mine was good so next was to try the board.
Parts Used:
PCB Assembly,Sub
  • ROBERT from CHIPPEWA FLS, WI
  • Difficulty Level:
    Easy
  • Total Repair Time:
    30 - 60 mins
  • Tools:
    Screw drivers
1 person found this instruction helpful.
Was this instruction helpful to you?
Thank you for voting!
wouldn't turn on
simply take picture b4 you start then replace same way.

WARNING!!! MAKE SURE YOU HAVE RIGHT PART!! They are very slow to return any type of credit
Parts Used:
Heater,Radiant
  • Michael from MILWAUKEE, WI
  • Difficulty Level:
    Easy
  • Total Repair Time:
    30 - 60 mins
  • Tools:
    Screw drivers
1 person found this instruction helpful.
Was this instruction helpful to you?
Thank you for voting!