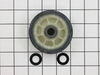
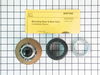
The drum support roller (Dryer Drum Support Roller, Drum Roller and Washer Assembly) holds the drum in the proper position while it spins on the support wheels. This part rotates on the roller shaft w...
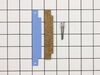
The tumbler and motor belt in your dryer allows the drum to spin during the drying cycle. At 100 inches in length, this dryer drum belt is 3/8 of an inch wide and has five ridges. The belt is black in...
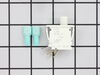
The front glide is located at the front of the dryer, the drum rides along it. If you hear a metal-on-metal noise when your dryer is running, your front glide may be worn out and require replacing. Th...
This roller shaft is also known as a support roller shaft or a drum roller axle, and is a part for your dryer. The function of this piece is to act as the axle for the drum roller; it provides a place...
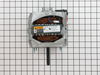
This comes with a metallic hub clamp to hold it firmly in place. The blower wheel with clamp is part of your dryer assembly. You will find this part attached to the drive motor shaft, which disperses ...
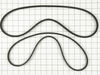
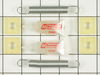
This kit includes both the drive belt and the pump belt which are both V-shaped. If your washer does not toss, spin, or drain water properly, this might be because one of these belts has worn or stret...
This lint filter is a genuine OEM replacement filter for your dryer. Replacing it is easy as it just slides in like your normal filter. Make sure to check the filter slot for excess buildup of lint, a...
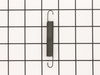
This part is a retaining ring, sometimes called a retaining clip, that holds the drum support roller onto the shaft of a dryer. It is made entirely of metal and measures less than an inch in diameter....
If you notice that your dryer is noisy or will not tumble, then you may need to replace the drum roller shaft washer. This drum roller shaft washer is just under an inch in diameter and is sold indivi...
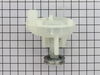
This part is commonly known to cause a leak at the top left corner of the outer tub. It fits over the injector nozzle. It is black in color and measures approximately 2 inches in length. To access thi...
This part is used to help the belt to rotate the drum. It is white and made of plastic with a metallic bearing in the center.
$19.26
In Stock
Questions And Answers for LSE9900ACL
Ask our experts a question about this model and we'll get back to you as soon as possible!
1 question answered by our experts.
Sort by:
< Prev
1
Next >
Search filter:
Clear Filter
Your search term must have 3 or more characters.
Keep searches simple. Use keywords, e.g. "leaking", "pump", "broken" or "fit".
Sorry, we couldn't find any existing answers that matched.Try using some different or simpler keywords, or submit your new question by using the "Ask a Question" button above!
Melody
May 25, 2023
First off it is an old washer/dryer combo, probably 30 yrs old. We would run the washer & the cold water was very slow & not coming in the washer. So we checked the water hoses. They had screens in them. We removed them. We checked for leakes all was good. But when I went to run the washer. It leaked really bad inside the cabinet. We removed the washer section from the combo & opened up the top. We found the injector parts. The plastic part inside the black stealth was really rusty colored. Can I wash it & could that cause the leaking. Or can the injector box be bad & the reason for the leaking?
For model number LSE9900ACL
Hello Melody, thank you for the question. According to our research, the leaking in the cabinet is due to the damaged hose. You may need to replace the outer tub hose, part number PS11738880. We hope this helps!
first, I unplug the power supply of the dryer then I removed the two screws at the bottom of the dryer then pulled out the front part of the dryer,unplugged the blue & yellow wire for the on/off switch for the door,at the back of the dryer I unscrew the pannel for the belt,disconect the belt,and I unscrew the four screws on both side of t
... Read morehe front pannel to remove the front cover of the drum. Once I removed the front cover of the drum I can now remove the drum itself to access the drum support roller. I unscrew the rollers then replace it with the new once. It was an easy job. Thank you.
Removed the front cover (screws on bottom 0f face)...removed blower cover....spring pliers to remove and install blower fan. the rest of the time was spent cleaning the inside of the shell as well as the vent. Reassembled and dryer runs better than it has for many years.
I removed the 2 phillips screws on the bottom of the front panel. Then checked around to find the belts were actually below the floor panel. I pulled the washing machine away from the wall and tilted it bacwards and found the pump belt was off the pully and the drive belt was badly damaged. I replaced the 2 belts which took no tools
... Read moreand about 3 minutes to accomplish then resecured the front panel, pushed back in place and leveled. Complete repair from diagnosis to back in operation took less than 15 minutes.


 Diagram and Parts List for Maytag Washer Dryer Combo")

 Diagram and Parts List for Maytag Washer Dryer Combo")
 Diagram and Parts List for Maytag Washer Dryer Combo")
 Diagram and Parts List for Maytag Washer Dryer Combo")
 Diagram and Parts List for Maytag Washer Dryer Combo")
 Diagram and Parts List for Maytag Washer Dryer Combo")
 Diagram and Parts List for Maytag Washer Dryer Combo")
 Diagram and Parts List for Maytag Washer Dryer Combo")
 Diagram and Parts List for Maytag Washer Dryer Combo")
 Diagram and Parts List for Maytag Washer Dryer Combo")
 Diagram and Parts List for Maytag Washer Dryer Combo")
 Diagram and Parts List for Maytag Washer Dryer Combo")
 Diagram and Parts List for Maytag Washer Dryer Combo")