


Models
>
KUDF204ESB00
KUDF204ESB00 KitchenAid Refrigerator - Overview
Sections of the KUDF204ESB00
[Viewing 7 of 7]


Keep searches simple, eg. "belt" or "pump".

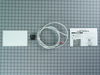
Replacement Ice Maker
PartSelect #: PS358591
Manufacturer #: 4317943
This ice maker (Complete Icemaker Assembly, Whirlpool Icemaker Kit, Ice Maker Assembly, Refrigerator Ice Maker, Icemaker) receives water from the water inlet valve, freezes it, and dispenses it into t...
$147.07
In Stock

Ice Maker Water Fill Tube Kit
PartSelect #: PS11739222
Manufacturer #: WP2196157
The icemaker water fill tube provides water to the icemaker so it can produce ice and dispense water. If you notice that your ice maker is not making or dispensing ice, or is leaking, you may need to ...
$10.14
In Stock
 – Part Number: WP2186494B")
Cap, Water Filter (Black)
PartSelect #: PS11739084
Manufacturer #: WP2186494B
This black water filter cap is located near the bottom kickplate.
$41.83
In Stock

Filter Inlet Water Tube
PartSelect #: PS886401
Manufacturer #: 8201597
As per the manufacturer, this part starts out as 1/4" tubing but ends up at 5/16".
$46.79
In Stock

Whirlpool EveryDrop6 Refrigerator Water Filter
PartSelect #: PS11722135
Manufacturer #: EDR6D1
This part is accessed from the front of the appliance in the bottom left-hand corner in top-freezer refrigerators. It is white in color and measures 1-1/8 inches deep, 2-1/8 wide and 10-1/2 inches hig...
$71.02
In Stock

SCREW
PartSelect #: PS12728594
Manufacturer #: W11380570
Sold individually. For white and almond models.
$14.15
In Stock


Water Hose Clamp
PartSelect #: PS11742726
Manufacturer #: WP488878
This water hose clamp is used in your refrigerator to support the water tube. If the tubing or hose is working, but is loose inside the unit, the clamp, which is supposed to support it in place, could...
$7.43
In Stock


Questions And Answers for KUDF204ESB00
We're sorry, but our Q&A experts are temporarily unavailable.
Please check back later if you still haven't found the answer you need.
Sort by:
- < Prev
- 1
- Next >
Search filter:
Clear Filter
Your search term must have 3 or more characters.
Keep searches simple. Use keywords, e.g. "leaking", "pump", "broken" or "fit".
Sorry, we couldn't find any existing answers that matched.Try using some different or simpler keywords, or submit your new question by using the "Ask a Question" button above!
Reginal
March 30, 2023
Location of filter and how to change it out?
For model number KUDF204ESB00
Hello Hank, thank you for getting in touch. According to our research, the water filter is located in the front base grille. To change the filter, use the following instructions:
1. Rotate the filter cap in an anticlockwise direction to a vertical direction and pull the cap and water filter out through the base grille.
2. Remove the filter cap by sliding it off the end of the old filter. The cap will slide to the left or right.
3. Do not discard the cap; it is part of the filter. Keep the cap to use with the new filter.
4. Take the new filter out of its packaging and remove the cover from the O rings.
5. Slide the filter cap on the new filter.
6. With the filter cap in the vertical position, insert the new filter into the base grille until it stops.
7. Rotate the cartridge cap clockwise to a horizontal position.
Was this helpful?
Thank you for voting!
- < Prev
- 1
- Next >
Common Symptoms of the KUDF204ESB00
[Viewing 7 of 7]Ice maker not making ice
Fixed by
these parts
these parts


Show All
Leaking
Fixed by
these parts
these parts
Show All
Ice maker won’t dispense ice
Fixed by
these parts
these parts
Show All
Not dispensing water
Fixed by
these parts
these parts
Show All
Ice maker dispenses too little ice
Fixed by
these parts
these parts
Show All
Ice maker dispenses too much ice
Fixed by
these parts
these parts
Show All
Won’t start
Fixed by
these parts
these parts
Show All

")


Keep searches simple. Use keywords, e.g. "leaking", "pump", "broken" or "fit".
Ice Maker quit working, I could manually cycle unit but then the water would overflow when unit was re-filling.
I backed out the 2 top screws about a quarter inch and then removed bottem screw with a quater inch nut driver. I then lifted Ice Maker clear of the two top screws and lowered it enough to unclip the power connection with a small screwdriver. The new Ice Maker was wired correctley for my refrigeator so all I had to do wea reconnect the
... Read more
power connection and mount new Ice Maker on the two top screws and install the bottem screw. It took e while for the new Ice Maker to start it's cycle but after it did, it worked GREAT. Part Select service was OUTSTANDING, ordered part one day and received the next. THANKS!!!!
Read less
Parts Used:
-
Max from Green Castle, IN
-
Difficulty Level:Really Easy
-
Total Repair Time:15 - 30 mins
-
Tools:Nutdriver, Screw drivers
584 of 620 people
found this instruction helpful.
Was this instruction helpful to you?
Thank you for voting!
No Ice in the Ice Maker
I am NOT a handyman, and my family laughed at me when I said I was going to fix the ice maker all by myself. I ordered a replacement ice maker. When it arrived, I opened the box and read the instructions. It seemed easy. I removed the old ice maker, with a socket set. I then took off the shut off lever from the old one and placed it
... Read more
on the new one, since the new one didn't come with it. I then put the new one in place. All the parts fit perfectly. The ice machine was making ice within an hour. My family was amazed... and I got the last laugh!
Read less
Parts Used:
-
Chris from Duluth, GA
-
Difficulty Level:Really Easy
-
Total Repair Time:Less than 15 mins
-
Tools:Socket set
195 of 224 people
found this instruction helpful.
Was this instruction helpful to you?
Thank you for voting!
Broken elbow on icemaker water fill tube.
Removed 2 screws holding water fill tube to rear of refrigerator and pulled out, matched old part with new to make sure of proper match. Guide new fill tube thru hole, making sure it is aligned with slot in ice cube tray on inside of freezer. Install new plastic line from water pump outlet to water fill tube, check for leaks, job done.
Parts Used:
-
Charles from Orland Hills, IL
-
Difficulty Level:Really Easy
-
Total Repair Time:Less than 15 mins
-
Tools:Nutdriver
130 of 141 people
found this instruction helpful.
Was this instruction helpful to you?
Thank you for voting!