


Models
>
KECX260SWH1
KECX260SWH1 KitchenAid Cooktop - Overview
Sections of the KECX260SWH1
[Viewing 4 of 4]


Manuals & Care Guides for KECX260SWH1
Click to downloadKeep searches simple, eg. "belt" or "pump".

Drip Bowl - 6 Inch
PartSelect #: PS2366565
Manufacturer #: W10196406RW
If your element will not heat, there could be an issue with your drip bowl. This chrome drip bowl is 8 inches in diameter, and fits most electric ranges. Before you replace the drip bowl, make sure th...
$10.10
In Stock

Drip Bowl - 8 Inch
PartSelect #: PS2366563
Manufacturer #: W10196405RW
This part is located beneath the element and catches any spills.
$10.88
In Stock

Surface Burner Plug-In Block Kit
PartSelect #: PS340571
Manufacturer #: 330031
The surface burner plug-in block kit features a newer-style terminal block. This kit is designed for use with ranges and cooktops. This terminal block is how the coil element on your stove connects to...
$13.42
In Stock

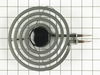
Surface Burner - 8 Inch - 2600W
PartSelect #: PS11743367
Manufacturer #: WP660533
The surface burner or element on your range provides the heat that you cook with. If your element will not heat, you may need to replace the surface burner. This surface burner is 8 inches in diameter...
$36.93
In Stock

Delta Frame Surface Unit - 6 Inch
PartSelect #: PS11757480
Manufacturer #: WPY04100165
This is a delta frame surface unit, also known as coil element, for a stove, range, or oven. It is a 6-inch surface burner with a reinforced delta frame that carries 1250 watts and 240 volts. The burn...
$50.86
In Stock

Burner Surface Element - 8 Inch
PartSelect #: PS11740818
Manufacturer #: WP3177565
This is a burner surface element and is 8 inches in diameter and 2600 watts. The burner surface element functions as a cooking area on the cooktop of the range. The purpose of this part is to supply h...
$124.97
Special Order

Screw
PartSelect #: PS11748102
Manufacturer #: WPW10068250
This screw is sold individually.
$6.08
In Stock

Gas Valve/Switch Seal Cover
PartSelect #: PS11740880
Manufacturer #: WP3188425
Part is located on top of the igniter switch that's next to the gas valve. Helps regulate gas flow and the amount of normal leakage that may occur.
$35.28
In Stock


Questions And Answers for KECX260SWH1
We're sorry, but our Q&A experts are temporarily unavailable.
Please check back later if you still haven't found the answer you need.
Common Symptoms of the KECX260SWH1
[Viewing 1 of 1]


Keep searches simple. Use keywords, e.g. "leaking", "pump", "broken" or "fit".
Drip bowls were rusty and rotting through
I simply removed the elements and replaced the drip bowls with new ones. Put the elements back in and my stove looks %1000 better!
Parts Used:
-
Michael from Kings Park, NY
-
Difficulty Level:Really Easy
-
Total Repair Time:Less than 15 mins
488 of 497 people
found this instruction helpful.
Was this instruction helpful to you?
Thank you for voting!
Just Replaced Ole Drip Bowls.
Unplugged burners. . . . . Removed old bowls and replaced with new. . . . . . Plugged burners back in. However, I do want you to know that I could not believe the promptness of your service and the courteous customer service person that assisted me with my problem in selecting the correct drip bowls. You are definitely a unique compan
... Read more
y!!!!
Read less
Parts Used:
-
Roger from Osage Beach, MO
-
Difficulty Level:Really Easy
-
Total Repair Time:Less than 15 mins
378 of 386 people
found this instruction helpful.
Was this instruction helpful to you?
Thank you for voting!
8 inch burner wouldn't come on. Wires shorted out
One screw holds the block onto the stove top. Had to clean out fitting for phillips screwdriver or screw would have stripped because it was old with lots of buildup. Even cleaned out, this screw required great force with phillips screwdriver to keep from stripping. Caution! If you strip it, you'll have to drill it out! The rest was a snap
... Read more
. Cut the old wires leading to the old block (not too close to where wires disappear into back of stove, though!). Strip insulation off both wires and attach with the connectors that came in the kit. Then push the wires into the block, and finally, attach the block back to the stove top (new screw is supplied). Restore power and everything should be fine. One problem: Roper/Whirlpool built their appliance in such a way that when the connector block shorts out, it usually takes the infinite switch with it. So I ended up having to go back and purchase that switch as well (which just so happens to cost twice to three times as much!). If you put it all back together and it still doesn't work, that's probably what happened, so go ahead and remove the knob panel and check that switch (it's right behind the control knobs on the front). You will probably find a burned connector at the back top left or the switch. Don't forget to write down which wire goes where (or just take a picture of it).
Read less
Parts Used:
-
Jonathan from Lilburn, GA
-
Difficulty Level:Easy
-
Total Repair Time:15 - 30 mins
-
Tools:Pliers, Screw drivers
60 of 71 people
found this instruction helpful.
Was this instruction helpful to you?
Thank you for voting!