This is a multi-use and multi-appliance screw. It can be used on a microwave, refrigerator, range/oven, air conditioner, dehumidifier, washer, or dryer. The measurements of this screw are 8 x 1/2 inch...
The temperature sensor measures the temperature inside the oven. If your oven is too hot, not heating evenly, is not heating enough when baking, or simply will not start, you could have a faulty tempe...
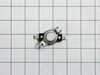
This kit contains 4 grate feet for a range. These are the feet to fit your burner grates so the burner will not scratch your cooktop. The are black in color and made of rubber. These feet are fitted w...
This 10-32-inch hex nut works with multiple appliances in your home as a fastener. This specific model is sold individually. Hex nuts usually have 6 even sides and together they are used with bolts an...
This palnut is designed for use in cooktops, ranges, wall ovens, dehumidifiers, and range hoods. The palnut is screwed onto a bolt on top of an ordinary nut, and locks the nut in place when the nut is...
$16.17
In Stock
Questions And Answers for KDRS463VSS00
Be the first to ask our experts a question about this model!
✖
Ask a Question
Ask our experts a question on this model and we'll respond as soon as we can.
This problem was driving me crazy for months. Of course, after I bought and installed the part and it still was not fixed I finally found a website that told me how to fix the clicking. The problem is that the removable head burners (#8 on the top assembly diagram) are not making good electrical contact with the base burners (#22). What I
... Read more did was grab the head burners and grind them back and forth into the base burners with the weight on the heal of my hand. Steel wool or sandpaper would work too--you just want to clean the surfaces to restore electrical contact. If you still want to know how to replace the spark module start by removing #24. This will allow the removal of #9 (after you take the knobs off). You may have to do some fiddling cause the rubber gasket is sticky. Next there are 2 obvious regular screws for #14 and 2 not so obvious star screws in the space where the burner valves are. After #14 is off there are 2 screws on the spark module to be removed and one that you can't loosen that is in a slot. You wriggle the module out of that one.
Not a repair. Just needed to replace the meat probe sensor for the programmable oven. Quick and easy purchase and very fast delivery took care of the problem. I was back in business.
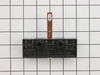
Safety first always shut breaker off at box. I unplugged stove, disconnected wires keeping in mind the color placement. Unscrewed one ground screw and removed terminal block. Attached new block with ground screw, replaced wires in correct order, re-attached plug. Then reattached safety cover. Pretty simple for d.i.y.