


Models
>
JVM3670SF001
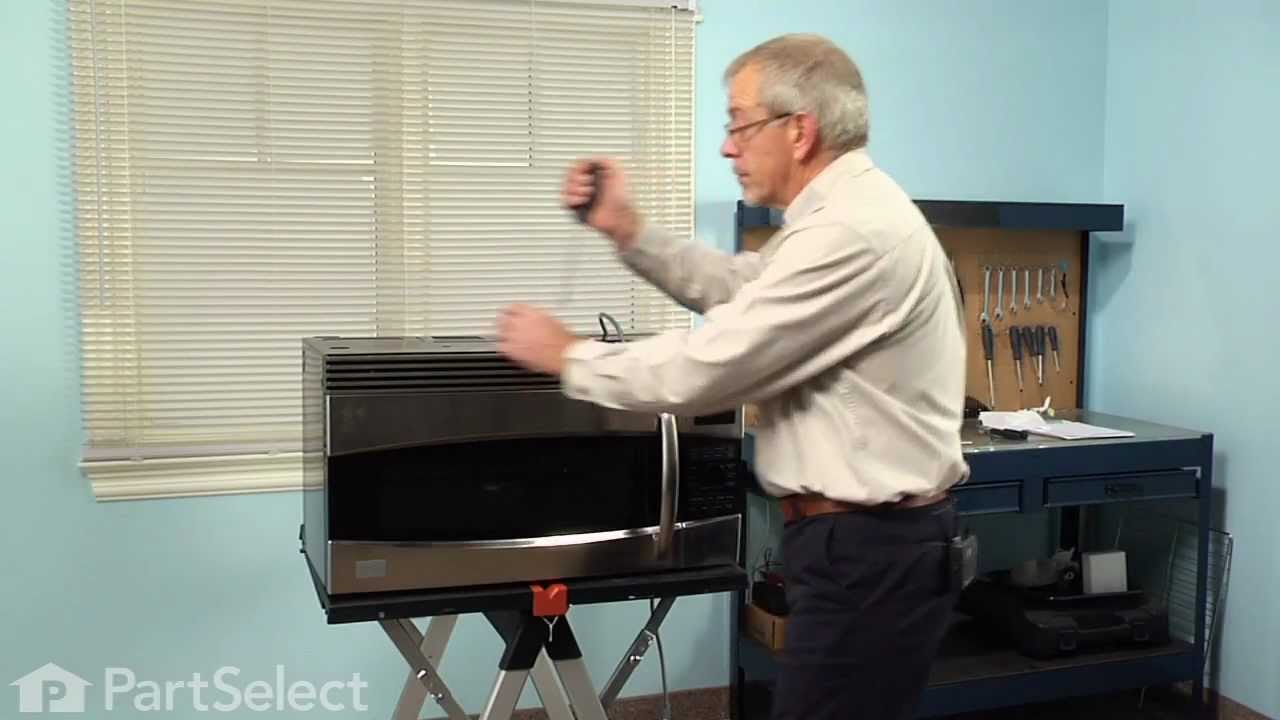
JVM3670SF001 General Electric Microwave - Overview
Sections of the JVM3670SF001
[Viewing 2 of 2]

Manuals & Care Guides for JVM3670SF001
Click to downloadKeep searches simple, eg. "belt" or "pump".

Halogen Light Bulb - 120V 20W
PartSelect #: PS2351821
Manufacturer #: WB25X10019
This light bulb is located on the inside of your microwave. The bulb is behind the top grill. It will need to be replaced when it has burnt out and no longer works. Unplug the unit before beginning th...
$22.15
In Stock

FUSE
PartSelect #: PS1481237
Manufacturer #: WB27X10928
This ceramic microwave fuse is just over an inch in length. It is white in the center, and metal on both ends. This is a 20-amp fuse, and is used to power your microwave. If the touch pad on the micro...
$10.58
In Stock

Grease Filter
PartSelect #: PS227998
Manufacturer #: WB06X10288
This metallic vent hood filter collects grease particles in the air from cooking. This part is sold individually.
$26.82
In Stock

Drive Motor
PartSelect #: PS237772
Manufacturer #: WB26X10038
This is a microwave turntable drive motor. This is a genuine OEM replacement part. It accepts a D-shaped drive shaft. The drive motor is located under the glass microwave turntable, and allows the tur...
$72.87
In Stock

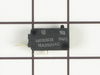
Secondary Door Switch
PartSelect #: PS237421
Manufacturer #: WB24X829
The secondary door switch is a simple on/off mechanism that stops the microwave from operating when the door is open (normally opened). The switch monitors the door latch position, and communicates w...
$45.34
In Stock

Glass Turntable Coupler
PartSelect #: PS227859
Manufacturer #: WB06X10144
This part accepts a D-shaped motor shaft.
No Longer Available

Glass Cooking Tray
PartSelect #: PS250009
Manufacturer #: WB49X10063
This tray rotates in your microwave ensuring more even temperatures and is approx.14-1/2 inches in diameter.
$95.90
In Stock

Monitor Door Switch
PartSelect #: PS237422
Manufacturer #: WB24X830
Unplug your microwave before attempting this repair. You will need to remove the grill, which is held into place by two screws at the top of the grill (open your microwave door before doing this). Rem...
$37.02
In Stock

Charcoal Filter
PartSelect #: PS224009
Manufacturer #: WB02X10733
NOTE: The charcoal filter cannot be cleaned. It must be replaced. This metallic vent hood filter collects grease particles in the air from cooking.
$62.50
In Stock


Questions And Answers for JVM3670SF001
We're sorry, but our Q&A experts are temporarily unavailable.
Please check back later if you still haven't found the answer you need.
Sort by:
- < Prev
- 1
- Next >
Search filter:
Clear Filter
Your search term must have 3 or more characters.
Keep searches simple. Use keywords, e.g. "leaking", "pump", "broken" or "fit".
Sorry, we couldn't find any existing answers that matched.Try using some different or simpler keywords, or submit your new question by using the "Ask a Question" button above!
Scott
May 17, 2023
Can you use LED bulbs in place of the halogen bulbs that are located on the bottom of the microwave that shine down on the cooktop?
For model number JVM3670SF001
Hello Scott, thank you for the question. You cannot use LED bulbs with this model. It is recommended to only use a halogen bulb, part number PS651484, with this model. We hope this helps.
1 person found this helpful.
Was this helpful?
Thank you for voting!
Related Parts:
Halogen Light Bulb


$21.69
In Stock
Anthon
February 8, 2024
How to replace interior light bulb?
For model number JVM3670SF001
Hi Anthon, Thank you for writing. We have attached a How to Video on replacing the Bulb. We hope this helps!
Was this helpful?
Thank you for voting!
Linda
May 25, 2022
Is there a light inside the microwave. If so, how do i access it? Part number? Also, the turntable doe not turn even when the turntable function is turned on.
For model number JVM3670SF001
Hello Linda, Thank you for your inquiry. There is a halogen light bulb near the upper duct inside the microwave as well as the two on the bottom. To access the upper bulb, you would need to unplug the microwave and discharge the capacitor-we have included a link to our article on how to do so, then remove the screws holding the outer cabinet on. You should be then able to access the wiring connector to the bulb and remove it. If the tray is not turning, we would recommend checking the turntable motor, and the primary and secondary door switches. You can test the parts with a multimeter. If you are unfamiliar with how a multimeter functions, we have videos available to assist you. We hope this helps and if you need help placing an order, customer service is open 7 days a week. Please feel free to give us a call. We look forward to hearing from you!

Was this helpful?
Thank you for voting!
Related Parts:
Monitor Door Switch
$37.02
In Stock
Secondary Door Switch
$45.34
In Stock
Drive Motor
$72.87
In Stock
Halogen Light Bulb
$21.69
In Stock
Additional Links:
Susan
September 20, 2022
Do own it for years
It turns on but isn’t heating
For model number JVM3670SF001
Hello Susan, thank you for your question. We have researched your model and found that the issue is probably with the Fuse, part number PS1481237. If you require assistance to place an order, please contact customer service. We hope that helps!
Was this helpful?
Thank you for voting!
Related Parts:
FUSE
$10.58
In Stock
- < Prev
- 1
- Next >
Common Symptoms of the JVM3670SF001
[Viewing 7 of 7]Won’t turn on
Fixed by
these parts
these parts


Show All
No heat
Fixed by
these parts
these parts
Show All
Tray won’t turn
Fixed by
these parts
these parts


Show All
Doesn’t shut off
Fixed by
these parts
these parts
Show All
Touchpad does not respond
Fixed by
these parts
these parts
Show All
Noisy
Fixed by
these parts
these parts

Show All
Door not closing properly
Fixed by
these parts
these parts

Show All
Keep searches simple. Use keywords, e.g. "leaking", "pump", "broken" or "fit".
Microwave completely stopped working
Turned out the issue was easily solved by replacing a single, inexpensive fuse.
First off, UNPLUG THE MICROWAVE.
The fuse is located under the plastic grill at the top of the microwave. It's held on by two screws. Once you've removed the screws and taken off the plastic grill, you go to the right side of the mic ... Read more rowave and remove another screw that holds a small metal grill in place. Removing the small metal grill is probably the toughest part of this repair. You kind of have to rock it back and forth a bit to get it to release. Once that's off, you can get to the fuse. I removed the burnt out one with a pair of needle nose pliers. I also put a small piece of cardboard under the fuse when I did this so I didn't accidentally drop it into the innards of the microwave. I did the same thing when I replaced the new fuse. I then plugged the appliance back in and made sure it worked. Once that was confirmed, I replaced both grills.
Read less
Parts Used:
-
Kim from Cliffside Park, NJ
-
Difficulty Level:Really Easy
-
Total Repair Time:15 - 30 mins
-
Tools:Screw drivers
953 of 1228 people
found this instruction helpful.
Was this instruction helpful to you?
Thank you for voting!
Dirty filter - replacement filter installed
-
Laura from Sugar Grove, IL
-
Difficulty Level:Really Easy
-
Total Repair Time:Less than 15 mins
537 of 612 people
found this instruction helpful.
Was this instruction helpful to you?
Thank you for voting!
turntable made a loud noise
First I unscrewed the screws that were holding the panel underneath. Then I removed the panel and removed the screws that held the turntable motor in place. Then replaced the old motor with the new and screwed everything back into place.
Parts Used:
-
Dianne from Westminster, CO
-
Difficulty Level:Really Easy
-
Total Repair Time:Less than 15 mins
-
Tools:Screw drivers
374 of 380 people
found this instruction helpful.
Was this instruction helpful to you?
Thank you for voting!